This blog will explain how to setup print list archiving.
Questions that will be answered are:
- What is use case of print list archiving?
- How to setup print list archiving?
- How to test print list archiving?
- How to troubleshoot issues with print list archiving?
Goal of print list archiving
The business sometimes needs to store report output for a longer period of time. They can print the information and put it in their archive. This leads to a big physical archive.
You can also give the business the option store their output electronically in the SAP content server.
Set up or check content repository
First check which content repository you want to use to store the print lists. The type of content repository must be “ARCHLINK”. Menu path in customizing is as follows:
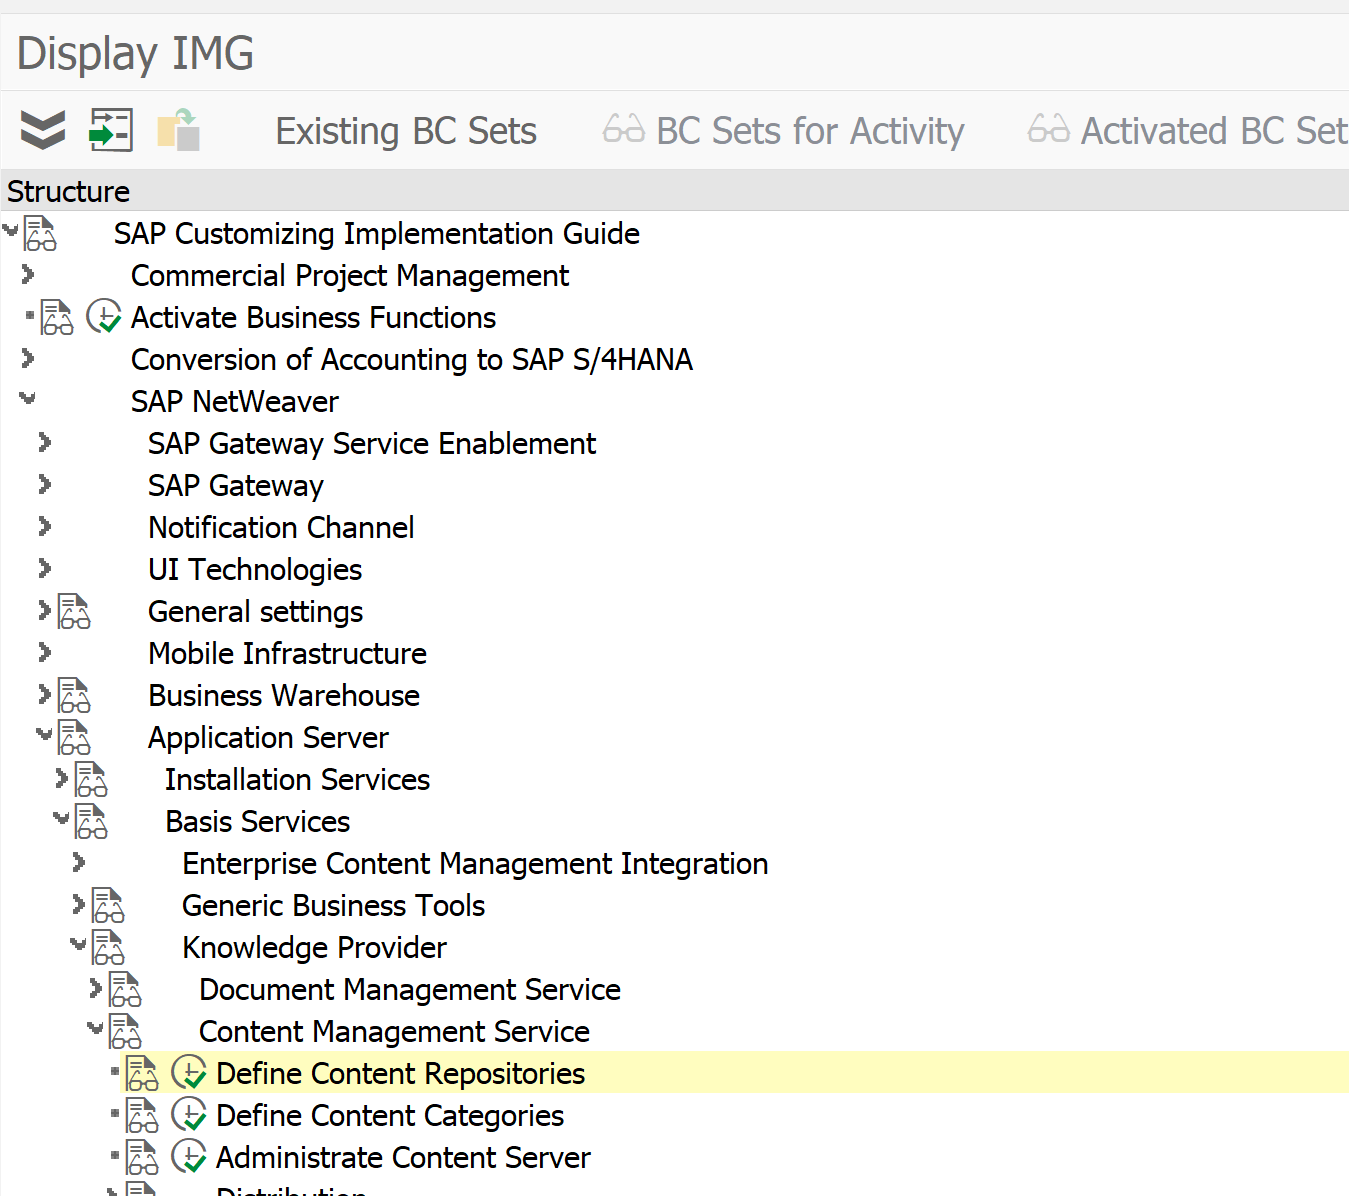
Or you can go there directly with transaction OAC0.
Content repository A2 is default present in the system and is used in the example below. A2 is pointing towards the SAP database for storage. For productive use a SAP content server in stead of SAP database.
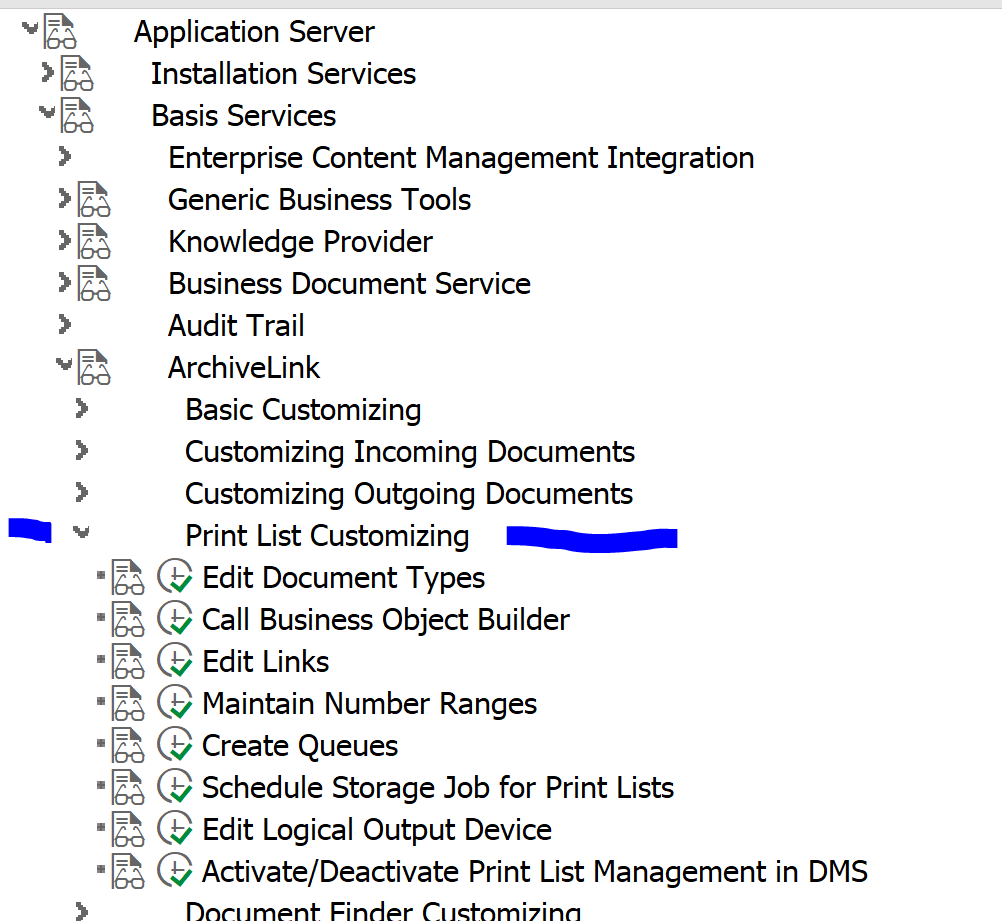
Customizing for print list archiving
In the following customizing path you find all the actions required for the print list archiving:
First check that print list document type D01 is present and is using ALF as document class:
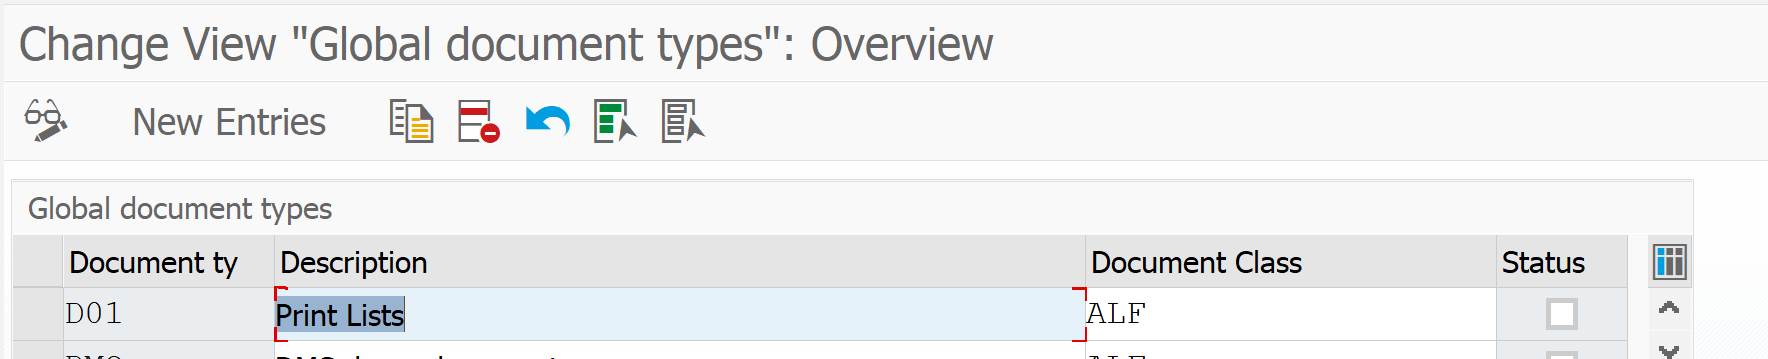
In the Edit links section, you can set for document type D01 which content repository is should use.

Then check if the number ranges for archivelink are properly maintained (if empty create new number range):

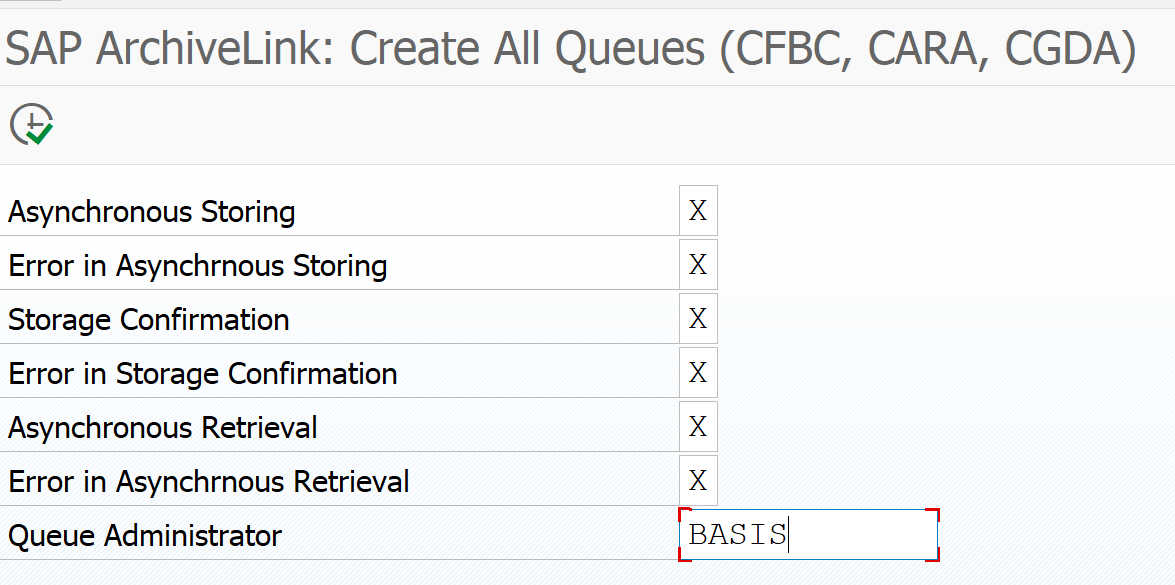
Then activate the print list queues:
Next step is to select the action to schedule the storage job. This job should not run faster than every 15 minutes.
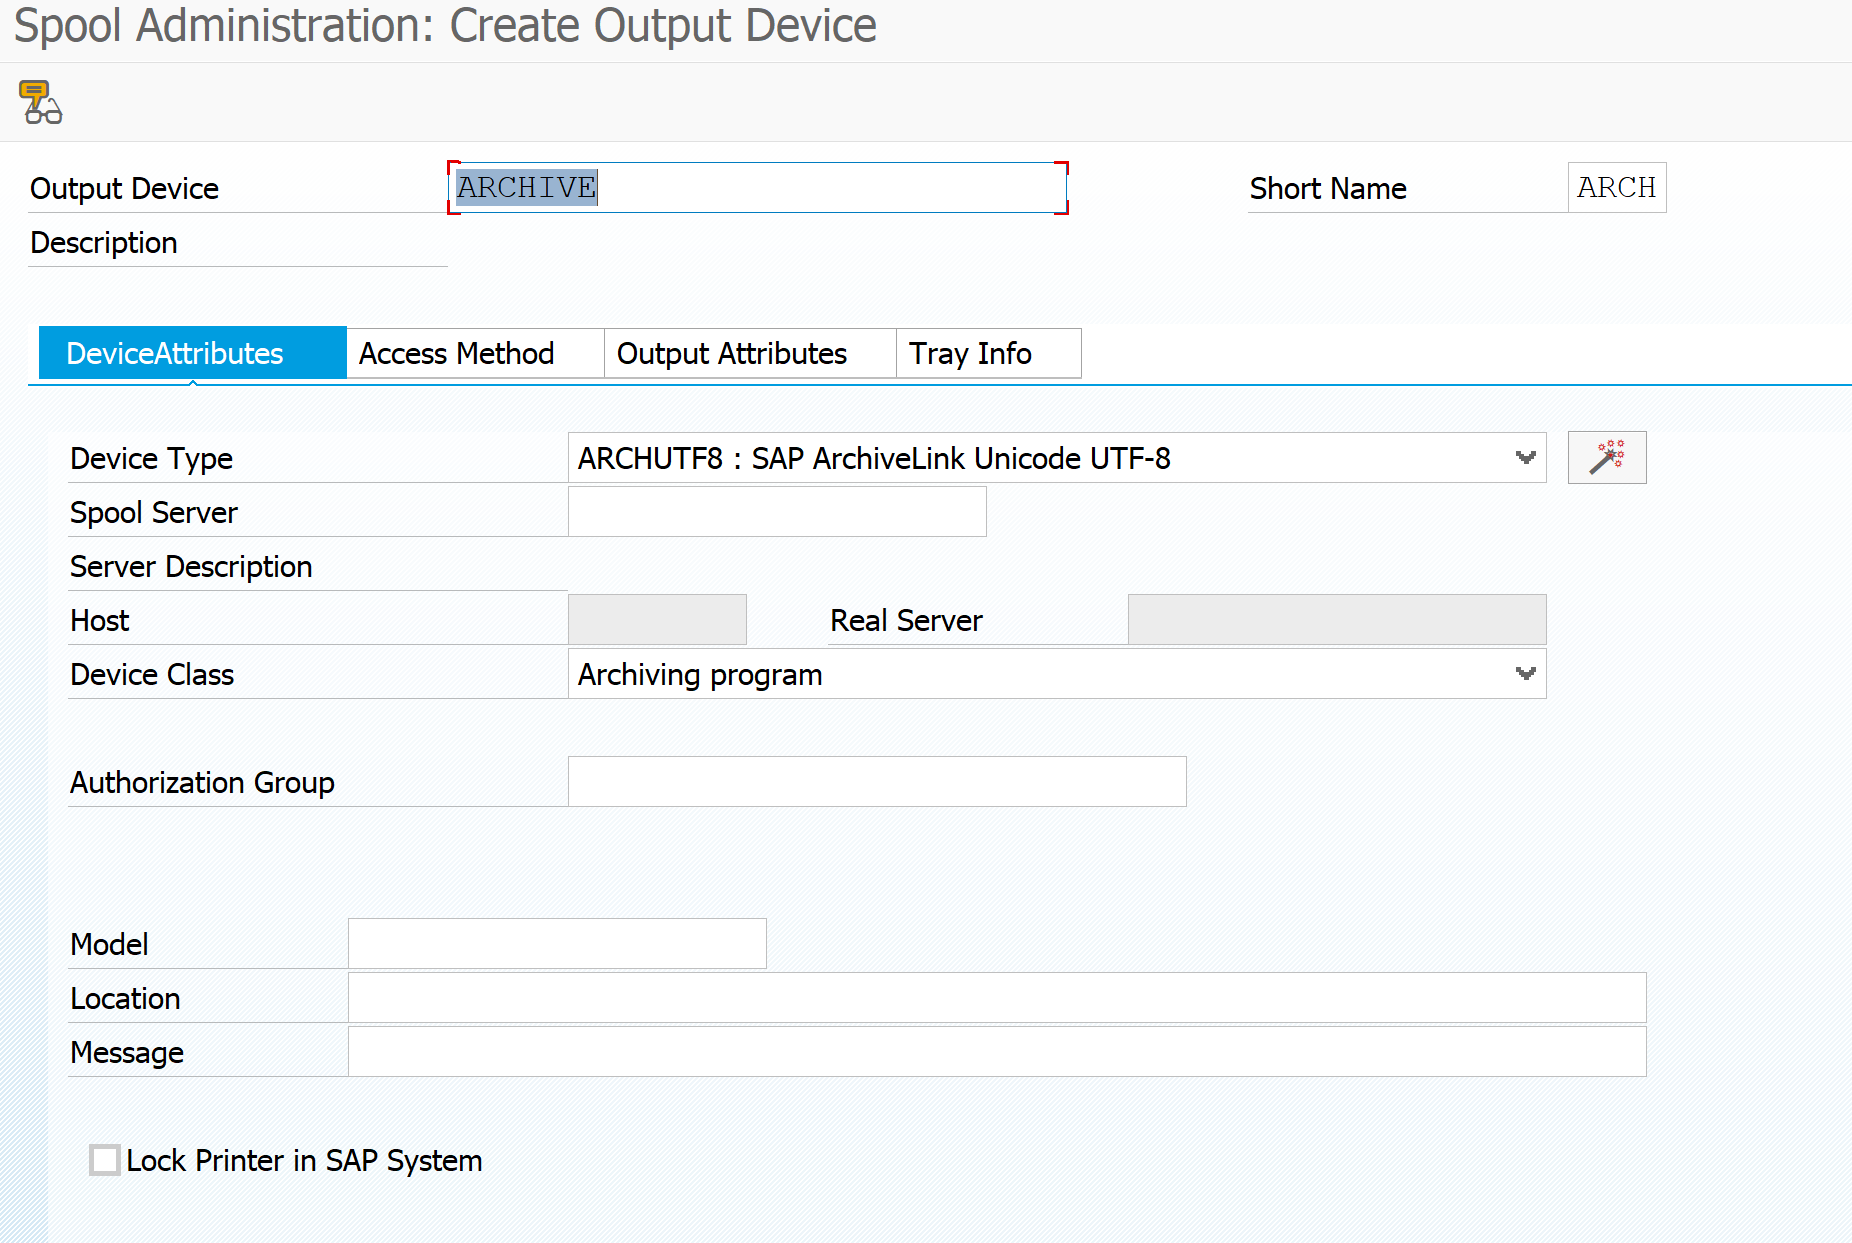
Final step is to setup the archive printer. You can later on see it with transaction SPAD as well.
Important here: short name must be ARCH. Device type and device class must be set to archiving.
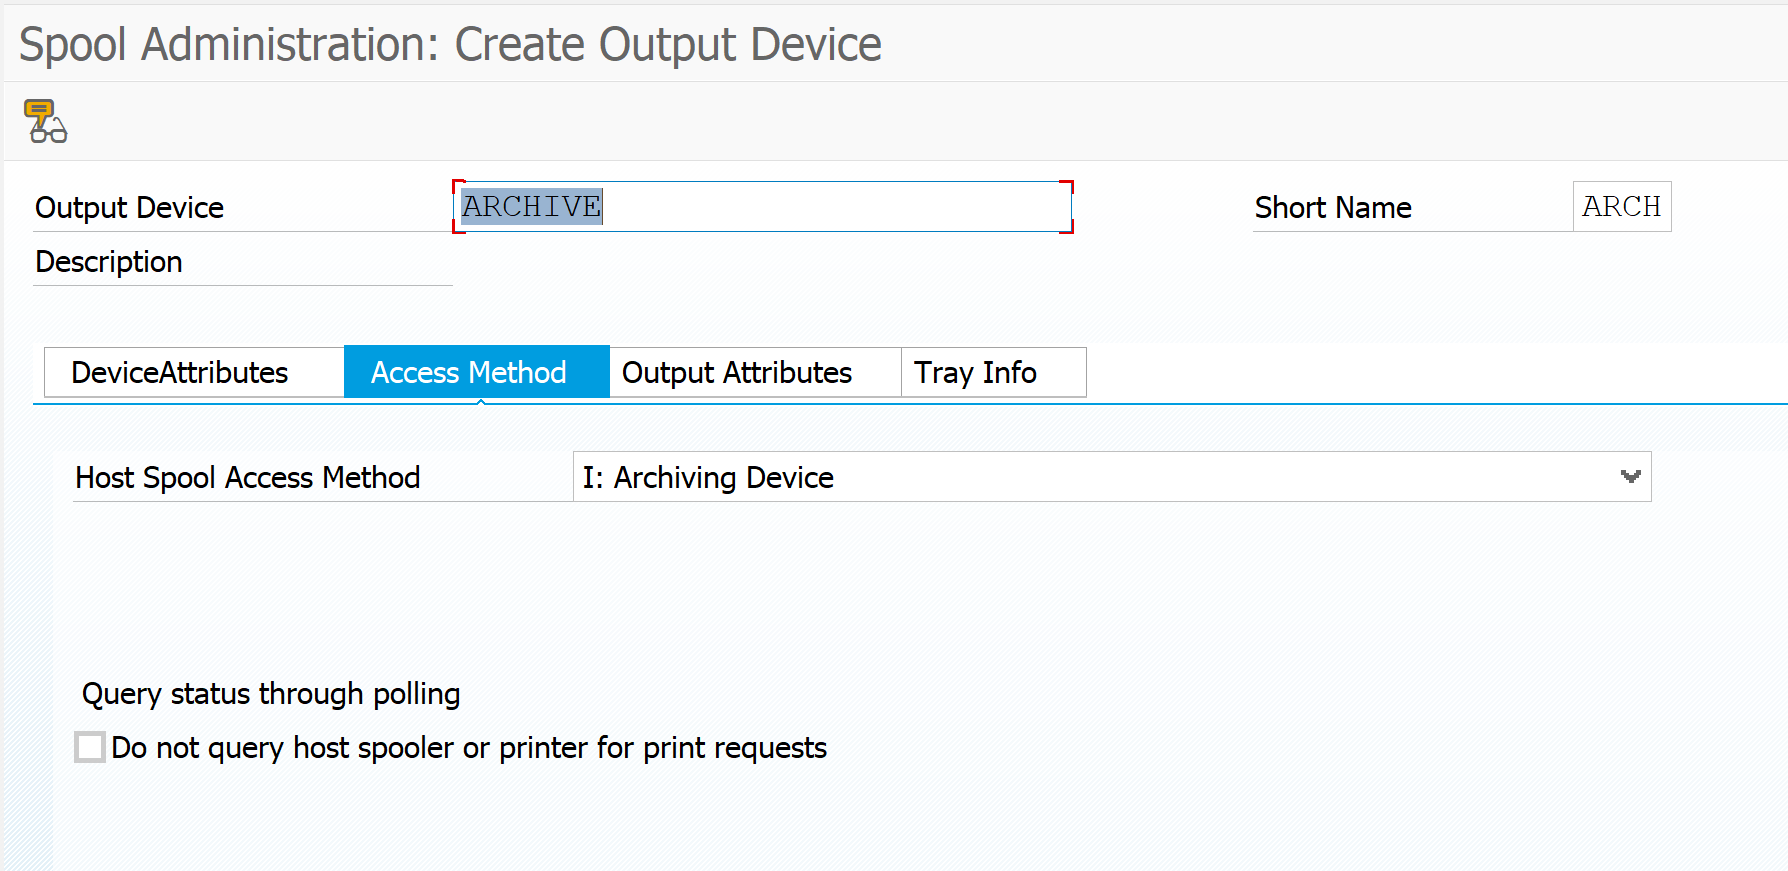
On the access method tab also set access method to archiving.
Now the setup is complete.
Testing print list archiving
The test procedure is described in OSS note 1792336 – Test if a Print List is being Archived.
If you follow this procedure you will initially run into this strange screen:
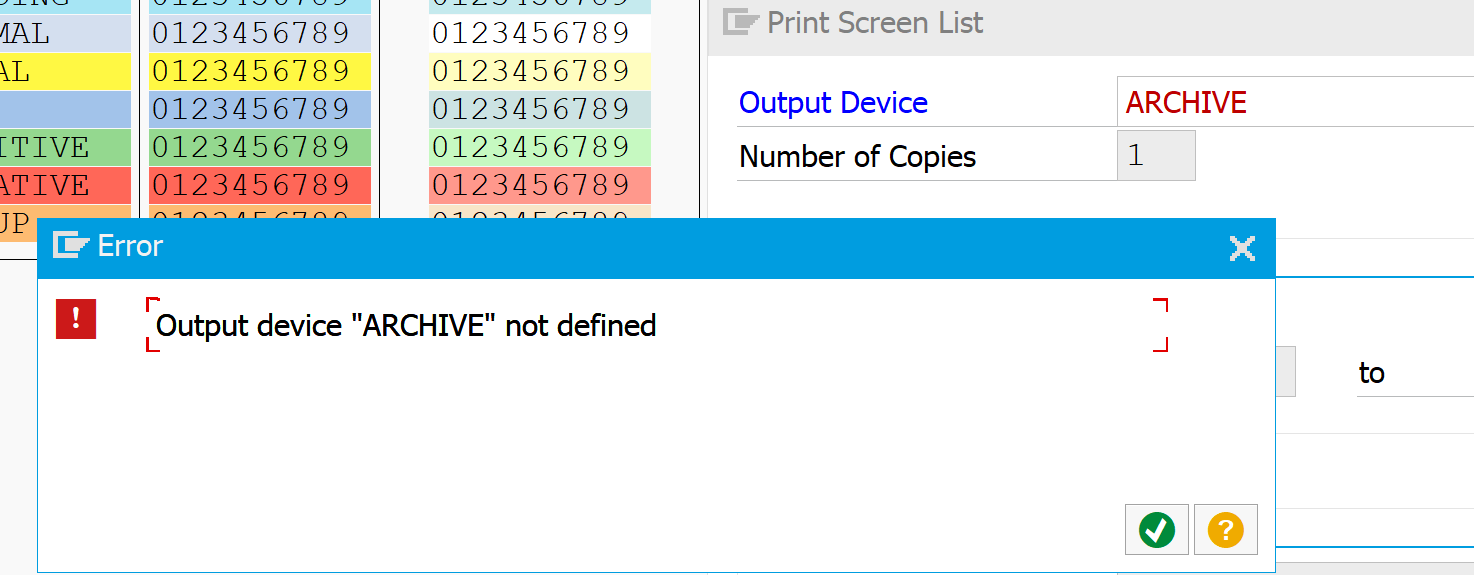
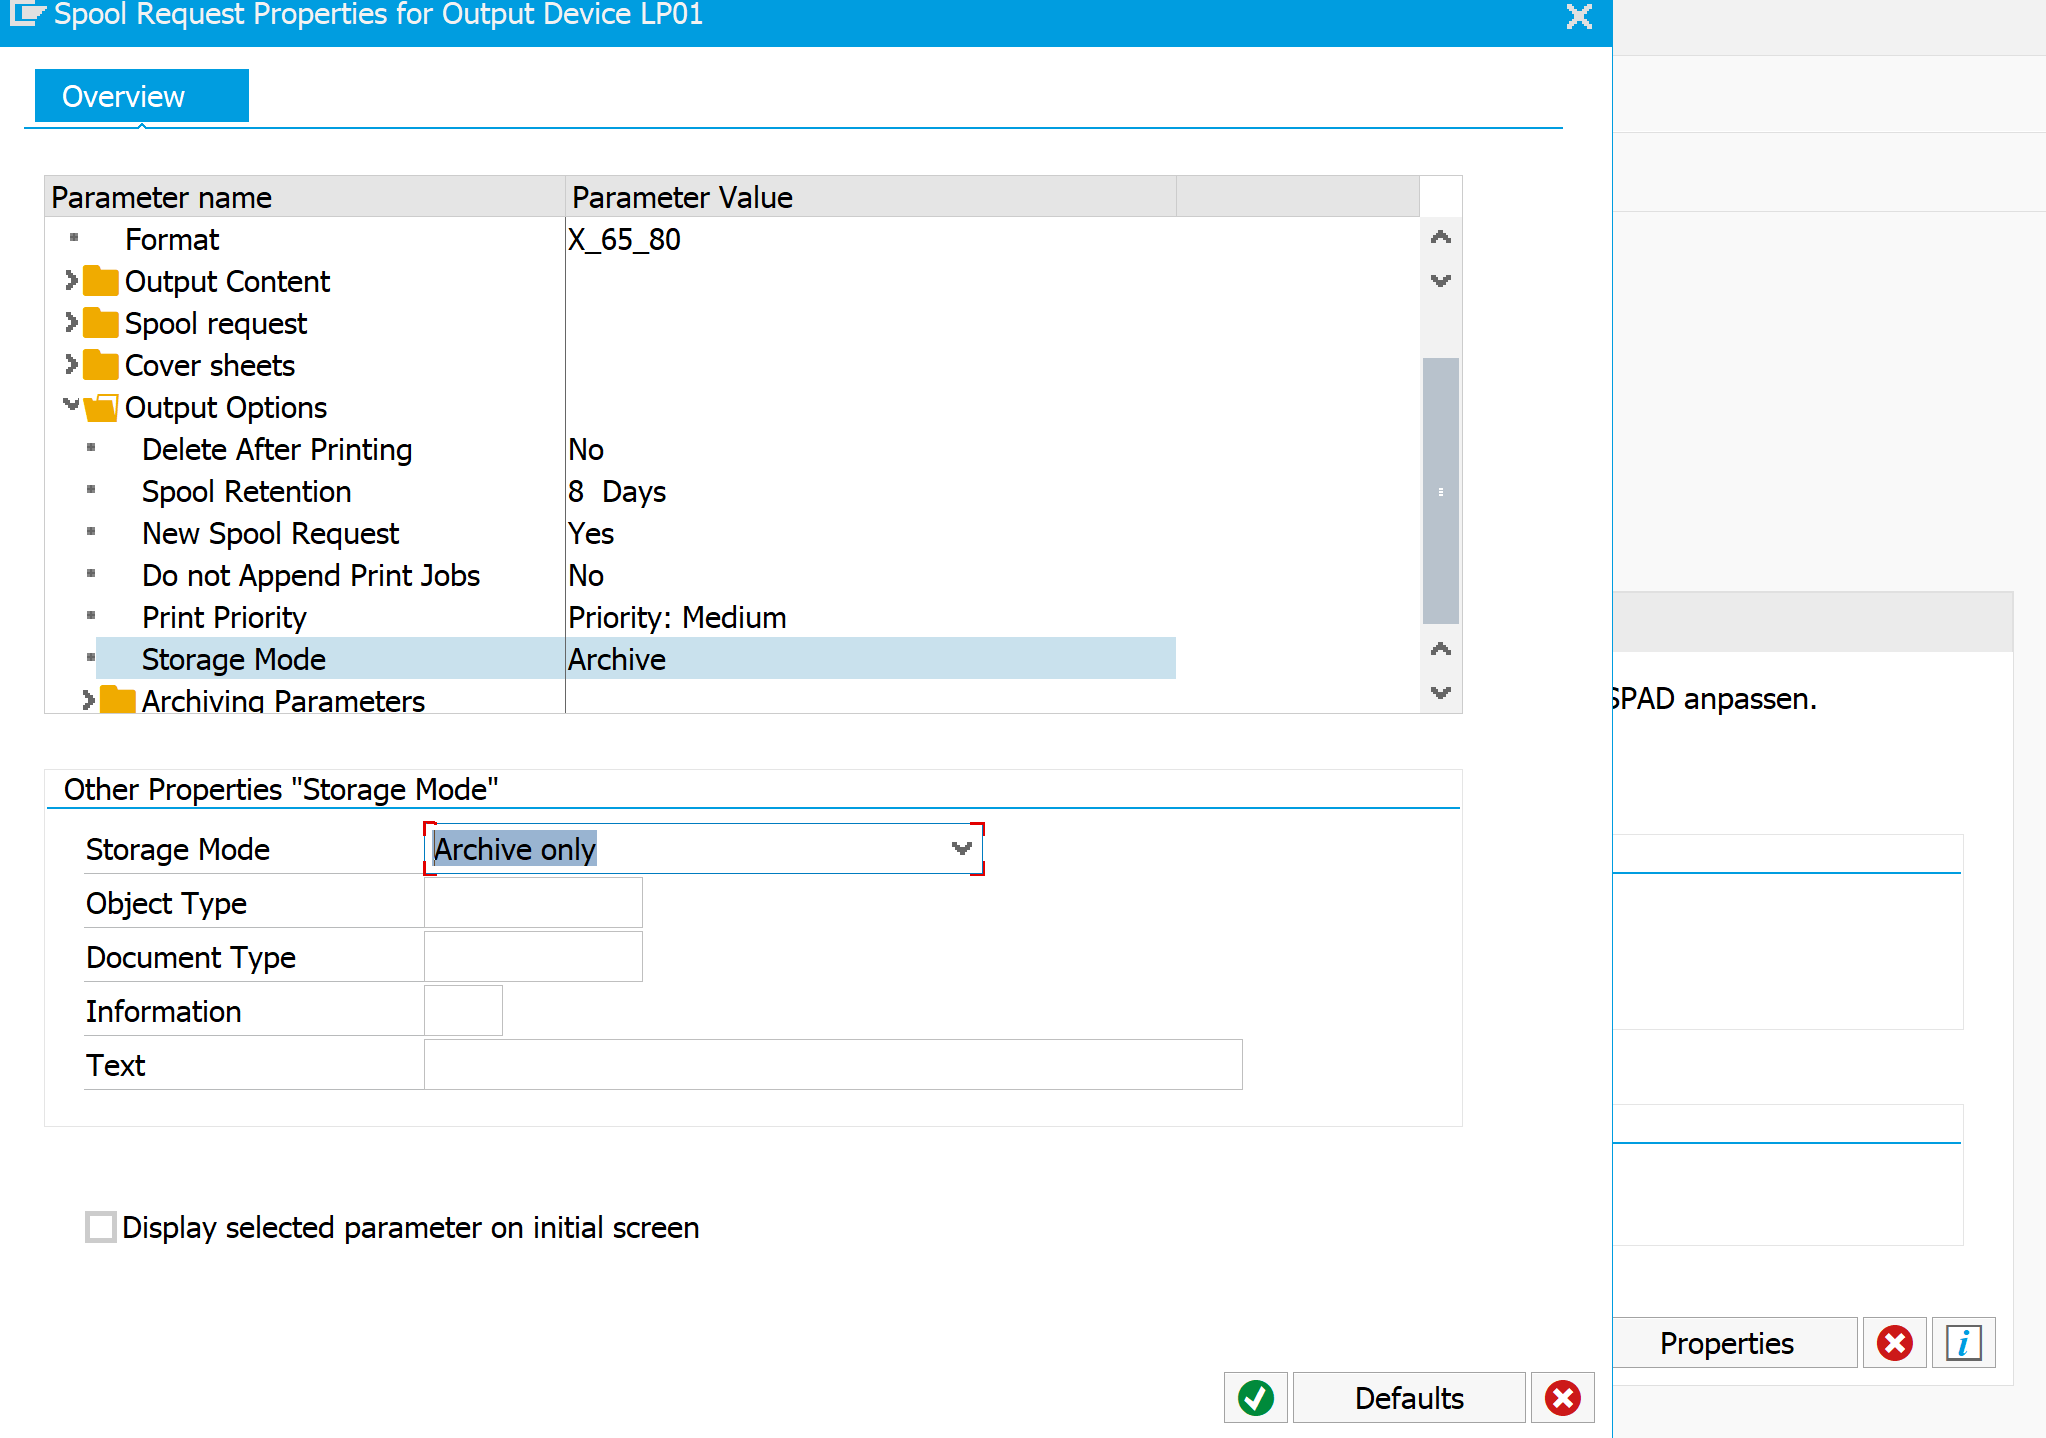
You didn’t do anything wrong yet. The problem is that the option for print to archive is not displayed by default. First go to the properties of a working printer to enable the archiving output option:
The rest of the note is self explaining:
- Start SE38 and run program SHOWCOLO
- Print the output list to printer ARCHIVE and archive mode selected
- Goto SP01 find the spool, select menu path Print with changed parameters
- Hit the Archive button
- Start transaction OAM1 and hit the execute button next to Archive queue
- Start transaction OADR to read from the archived print lists
- From the list take the document and select the button “Display from storage system”
Troubleshooting
If you have issues, please check the troubleshooting OSS note 1775577 – How To and Troubleshooting guide for storing print lists in ArchiveLink.
Other OSS notes: