In S4HANA you have a choice to activate the embedded livecache for SCM functionality. Or to keep your current SCM livecache in a separate system.
This blog will describe the steps to activate the SCM livecache embedded in S4HANA.
Questions that will be answered in this blog are:
- How to activate the embedded S4HANA livecache technically?
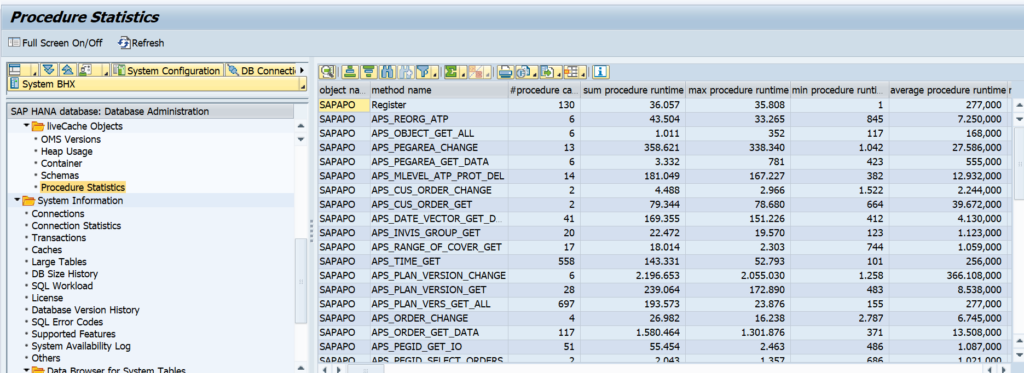
- How to monitor the embedded S4HANA livecache?
- How to activate the embedded S4HANA livecache functionally?
Installation
First read the embedded livecache OSS note: 2593571 – FAQ: SAP HANA Integrated liveCache.
Then determine via OSS note 2074843 – Version Matrix for HANA integrated liveCaches, which exact version to download and install.
Then follow all the manual installation steps described in OSS note 2407589 – Manual installation of liveCache for S/4HANA.
Installation will take few hours, up to a few days (depends on your experience).
Technical checks
When you start LC10 transaction, like you are used to on an SCM server, you will be re-directed to DB50 or DBACOCKPIT transaction:
In DBACOCKPIT you can see the 3 schemas for Livecache:
And you can see all livecache related technical parts:
Functional activation
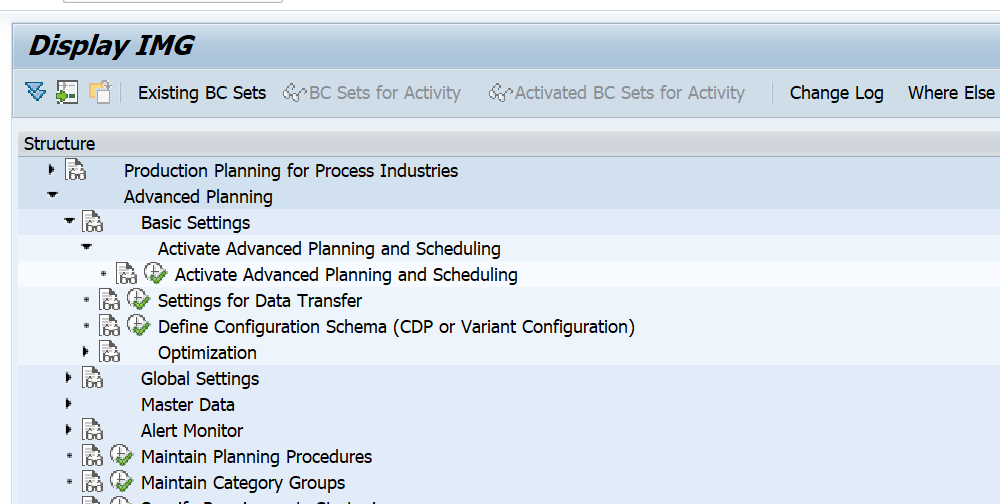
After the technical activation the functional activation has to be done in customizing for advanced planning and scheduling:
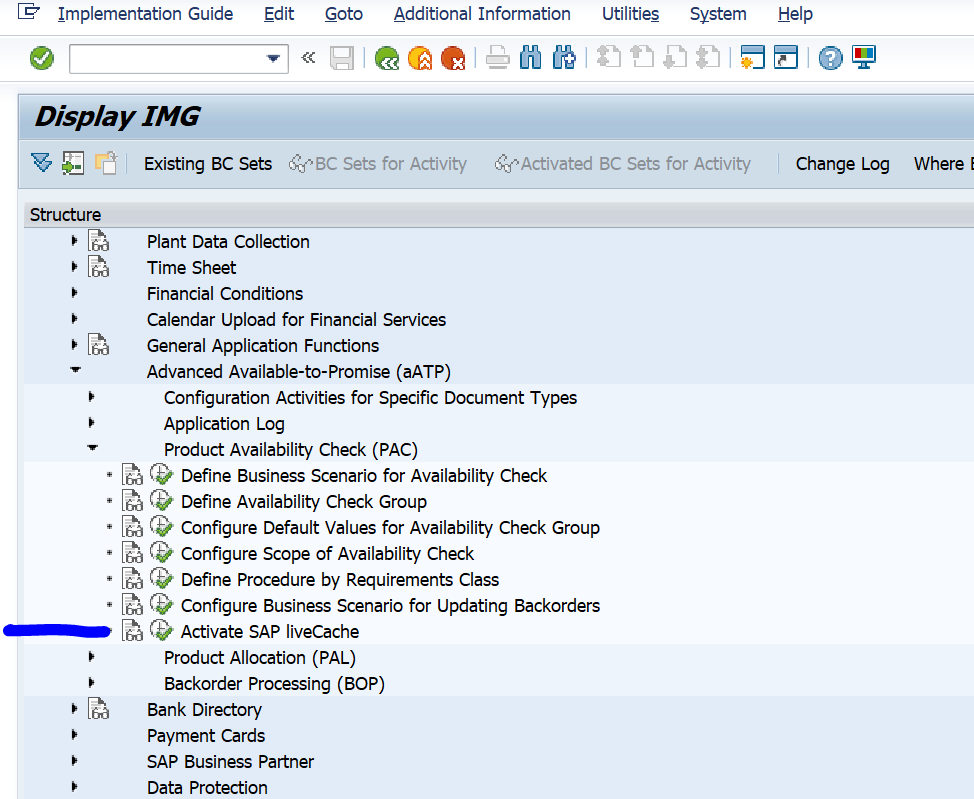
And separately for global ATP:
Functional testing
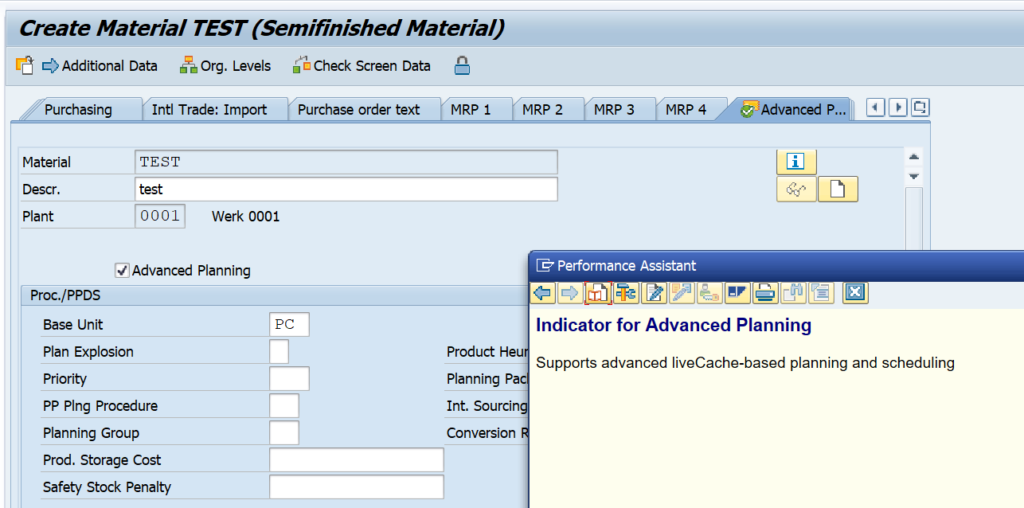
After the activation you can check to see all works by creation of new material in transaction MM01. The new tab Advanced Planning should be available now:
PP/DS optimizer
The PP/DS optimizer still needs separate server and installation.
See this blog and OSS note 1686826 – Installation help for installing SCM Optimizers.
Reference OSS notes
Migration options:


