Integrate SO10 text in webdynpro

This blog will explain how to integrate SO10 standard text in webdynpro. It will also show how to use this to integrate it into page on the right after logon (see also this blog).

Setup SO10 text

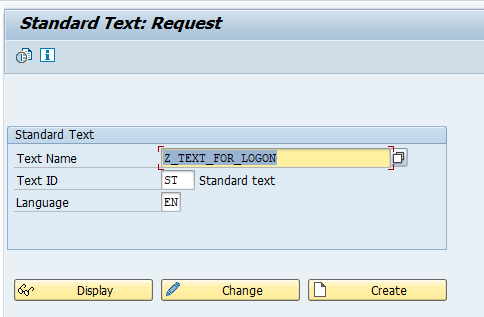
Start transaction SO10 and create text for logon:

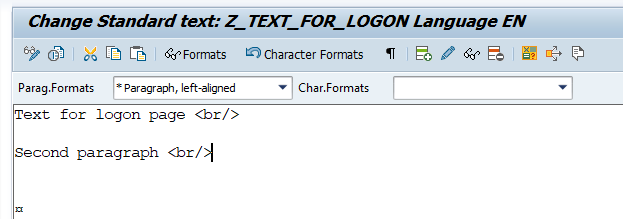
Now enter the text and save it:

We have entered text (as explained in SO10 blog). Important: add the <br/> tags to create the line break.

Setup webdynpro screen

We will now setup webdynpro screen into which we will integrate SO10 text above.

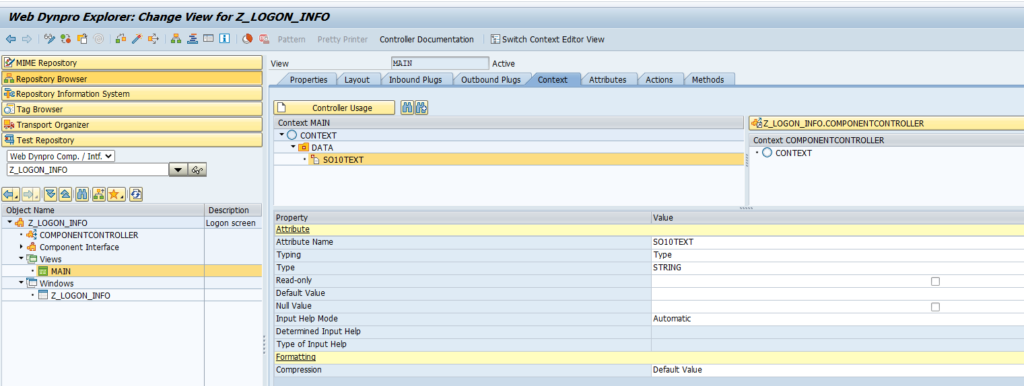
Go to SE80 and create webdynpro Z_LOGON_INFO and go to the main view context and create this structure:

This is the data container for the string to show on the screen.

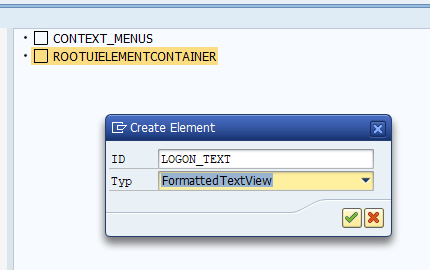
In the Layout View add element for logon text of type FormattedTextView:

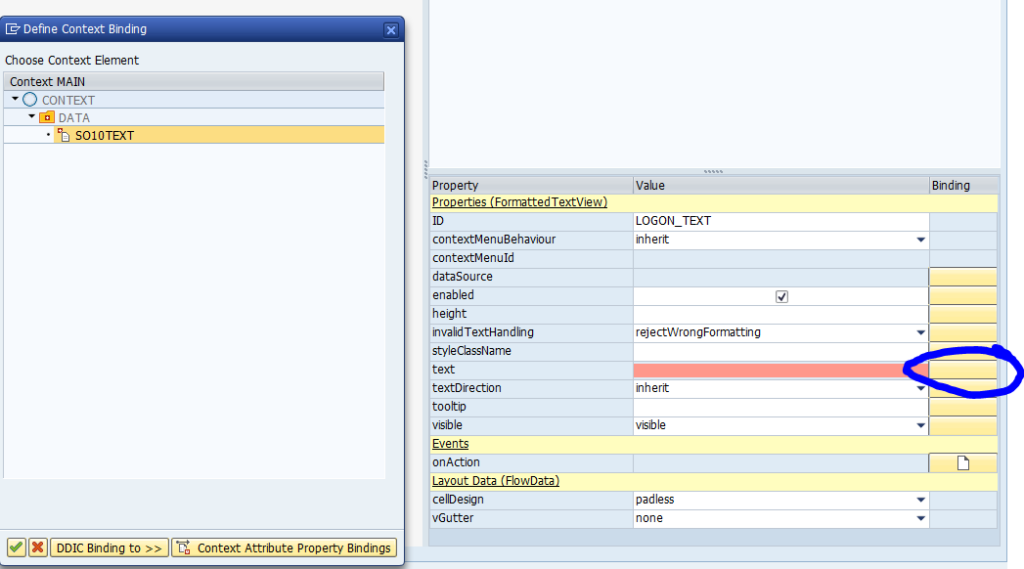
Bind the text from the data element:

And map the data source:

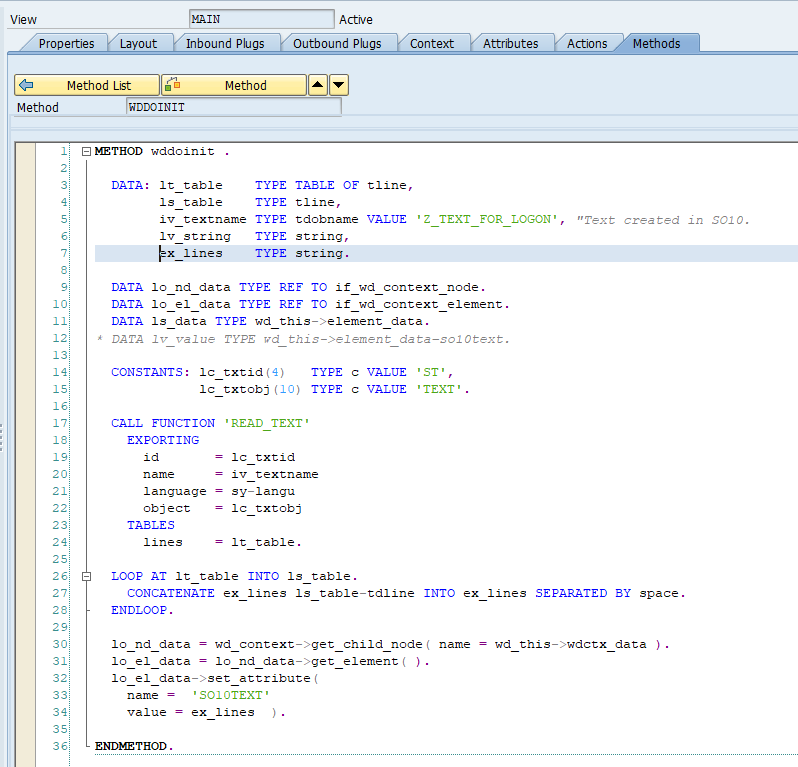
In the view go to the methods and fill the WDDOINIT method:

Full code:

METHOD wddoinit .

  DATA: lt_table    TYPE TABLE OF tline,
        ls_table    TYPE tline,
        iv_textname TYPE tdobname VALUE 'Z_TEXT_FOR_LOGON', "Text created in SO10.
        lv_string   TYPE string,
        ex_lines    TYPE string.

  DATA lo_nd_data TYPE REF TO if_wd_context_node.
  DATA lo_el_data TYPE REF TO if_wd_context_element.
  DATA ls_data TYPE wd_this->element_data.

  CONSTANTS: lc_txtid(4)   TYPE c VALUE 'ST',
             lc_txtobj(10) TYPE c VALUE 'TEXT'.

  CALL FUNCTION 'READ_TEXT'
    EXPORTING
      id       = lc_txtid
      name     = iv_textname
      language = sy-langu
      object   = lc_txtobj
    TABLES
      lines    = lt_table.

  LOOP AT lt_table INTO ls_table.
    CONCATENATE ex_lines ls_table-tdline INTO ex_lines SEPARATED BY space.
  ENDLOOP.

  lo_nd_data = wd_context->get_child_node( name = wd_this->wdctx_data ).
  lo_el_data = lo_nd_data->get_element( ).
  lo_el_data->set_attribute(
    name =  'SO10TEXT'
    value = ex_lines  ).

ENDMETHOD.

The code calls with function module READ_TEXT the text set into Z_TEXT_FOR_LOGON and binds it to the SO10TEXT element. Remark: the formatted text in webdynpro now processes the </BR> settings.

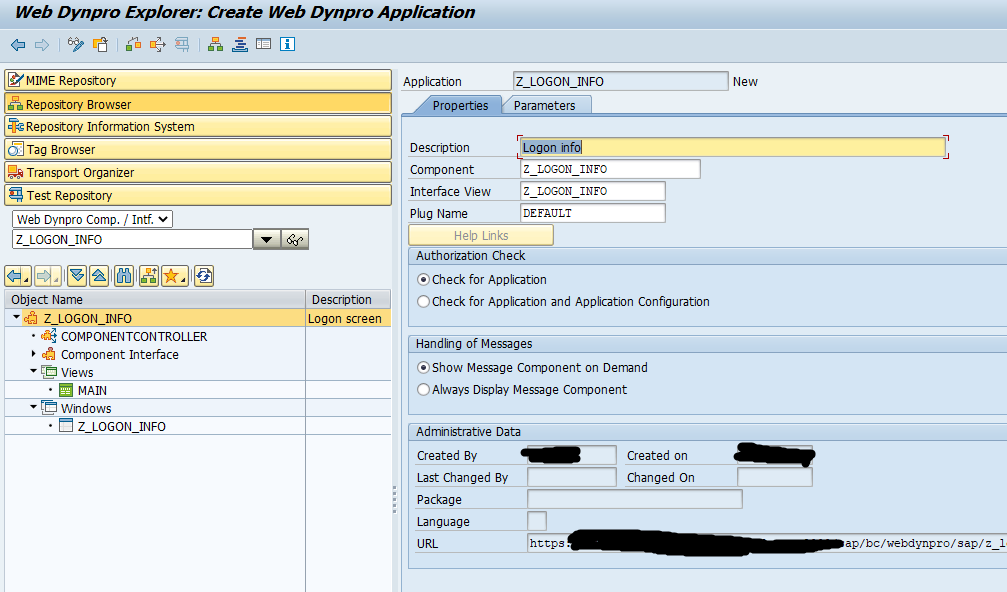
And create the webdynpro application:

And test it:

Restrictions

The formatted text is processed by class CL_WD_FORMATTED_TEXT. See help.sap.com on this. Restrictions are listed (like no use of commands), and list of allowed tags.

Adding URL

Adding a URL to the standard text and show it in webdypro is not possible (as far as known). To add a URL, add to LinkToUrl item in the webdynpro.

Insert as launch page

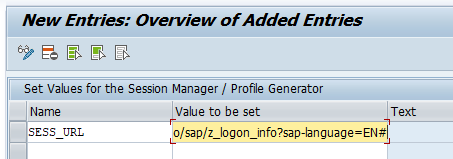
Now we follow the instructions from the blog on the logon text. Start transaction SM30_SSM_CUST and set the parameter SESS_URL:

Now log on again:

SO10 standard text

With transaction SO10 you can maintain standard texts. These texts can be used in SapScript, SmartForms and your own ABAP code.

Questions that will be answered in this blog are:

  • How to create a standard text in SO10?
  • How to set default editor for SO10?
  • How to transport SO10 standard texts?
  • How to call SO10 standard text in ABAP code?
  • How to insert hyperlink into SO10 text?

Create standard text

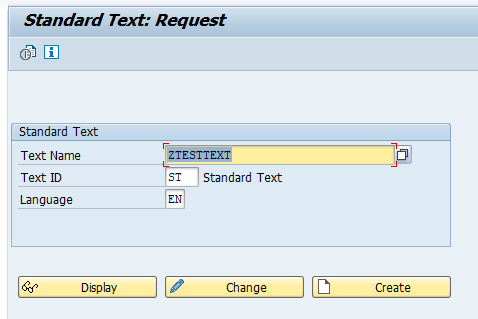
Start transaction SO10, enter the text name and press the create button:

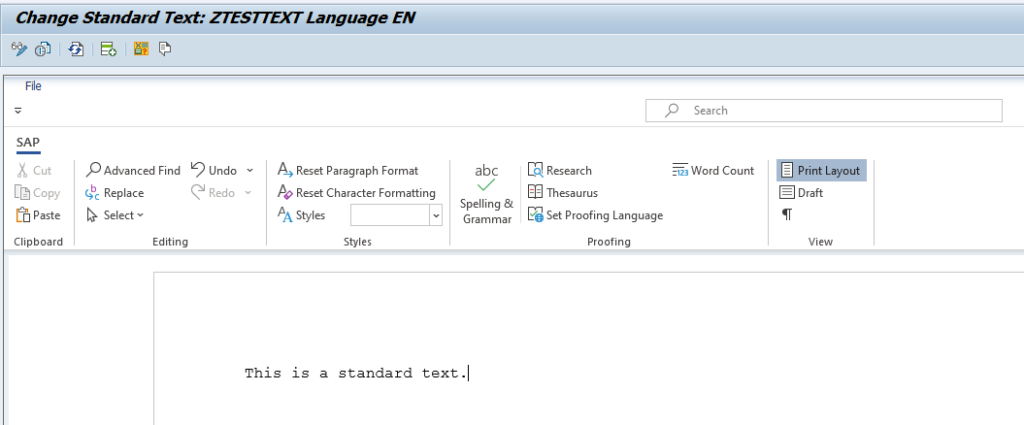
Now enter the text in the editor and save it:

Transporting standard texts

After saving the standard text the tool just saves the text without prompting for transport. This is as designed. The text can be maintained directly in production this way. Either by IT or even by business users.

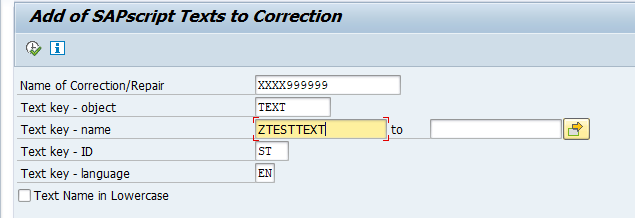
If you do want to transport the standard texts, use program RSTXTRAN to add the standard text to the transport:

Read standard text from ABAP code

You can read the standard text from your own ABAP code by calling function module READ_TEXT

Example code:

DATA: IT_TLINES type table of TLINE.

REFRESH IT_TLINES.

CALL FUNCTION 'READ_TEXT'
      EXPORTING
*       CLIENT                        = SY-MANDT
        ID                            = 'ST'
        LANGUAGE                      = 'E'
        NAME                          = 'Z_DEMO_TEXT'
        OBJECT                        = 'TEXT'
*       ARCHIVE_HANDLE                = 0
*       LOCAL_CAT                     = ' '
*     IMPORTING
*       HEADER                        =
      TABLES
        LINES                         =  IT_TLINES
*     EXCEPTIONS
*       ID                            = 1
*       LANGUAGE                      = 2
*       NAME                          = 3
*       NOT_FOUND                     = 4
*       OBJECT                        = 5
*       REFERENCE_CHECK               = 6
*       WRONG_ACCESS_TO_ARCHIVE       = 7
*       OTHERS                        = 8.

Inserting graphic in SO10

Follow the instructions in OSS note 2918753 – How to insert graphic in SO10.

Inserting hyperlink in SO10

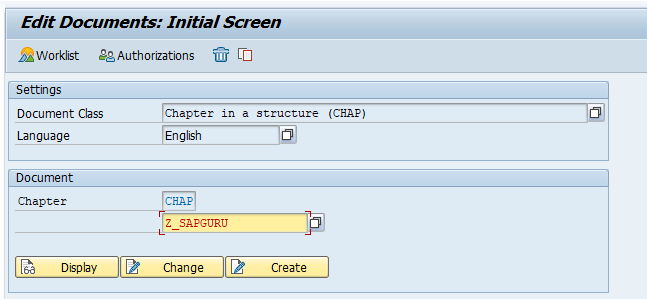
First create hypertext in transaction SO72. Select type CHAP:

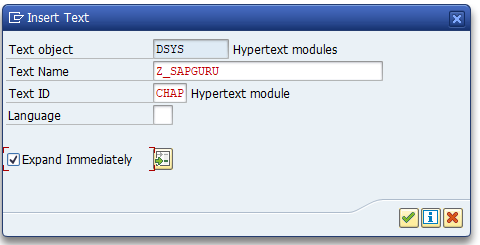
In SO10 now select the menu option Insert / Text / Hypertext:

Hyperlink is now inserted into SO10:

Changing the editor

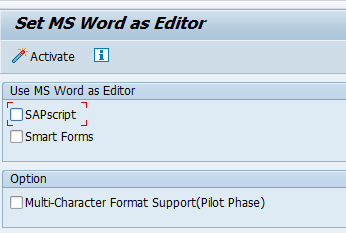
Many people don’t like the word tool as editor. It is not precise enough. You can run program RSCPSETEDITOR to change the setting for everybody:

Untick the MS word as editor and press the Activate button.

Relevant OSS notes: