SAP Eearly Watch Alerts (EWA) has always been a primary tool delivered by SAP for system administrators to get an automated report on their SAP system.
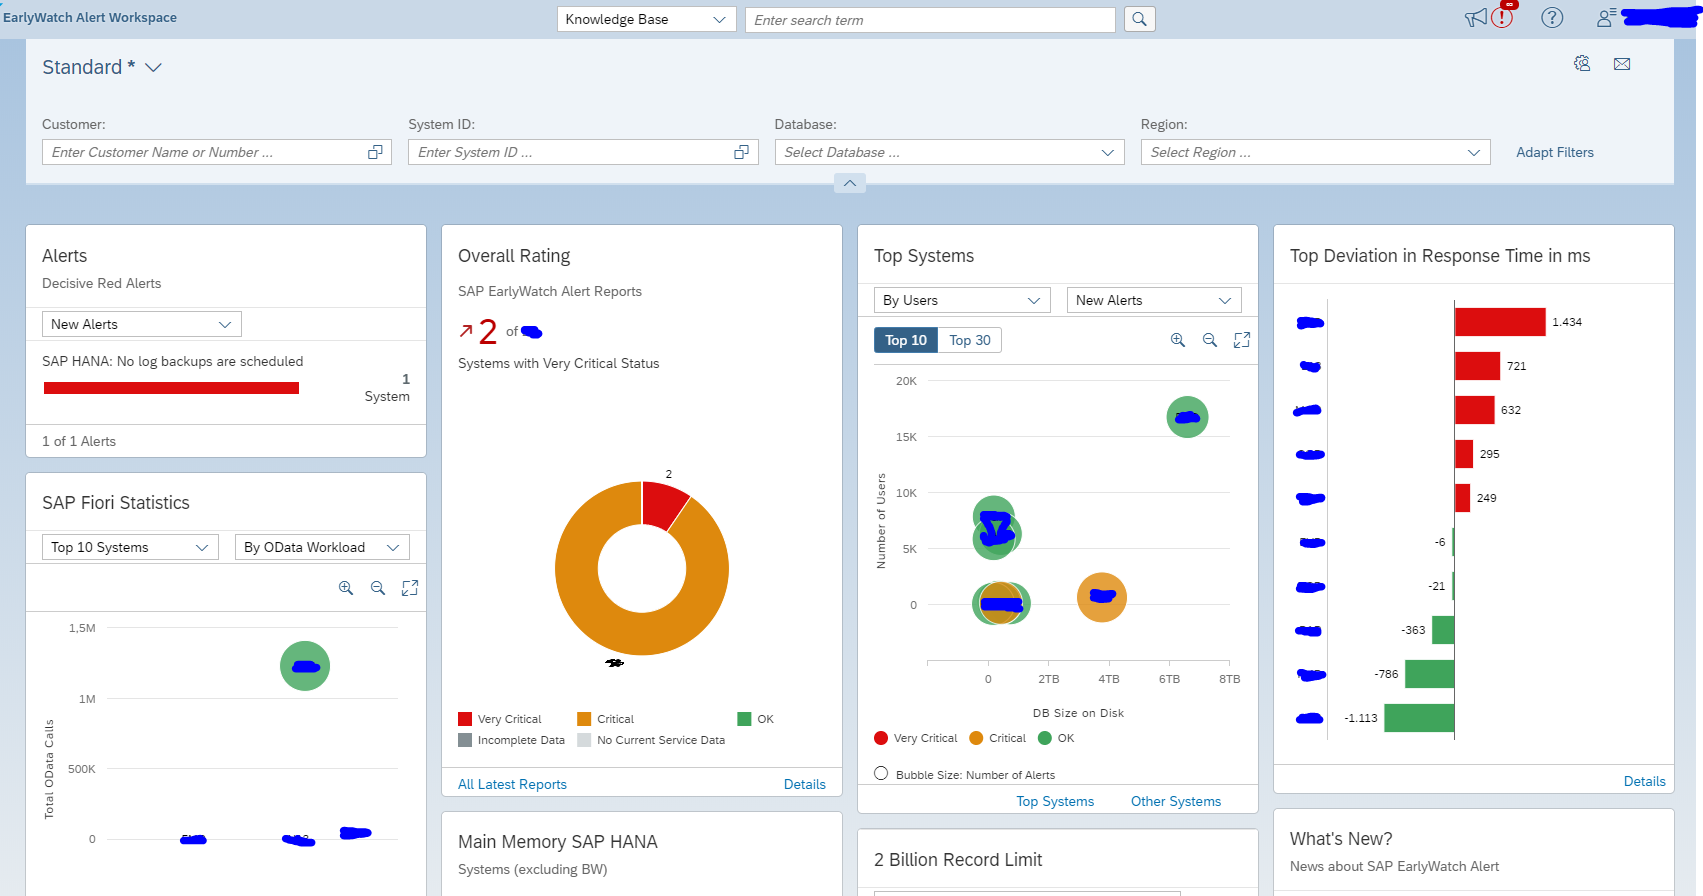
The last few years SAP has been working very hard to get the EWA online as part of the support.sap.com pages. This development is now so far and good, that you can consider to switch using the online EWA workspace in stead of the EWA’s generated by your local solution manager system.
Questions that will be answered in this blog are:
How to access the online EWA workspace?
Can I still get my EWA in PDF or word format?
What are extra functions the online EWA workspace offers versus the traditional EWA?
Can I set up e-mails for EWA workspace to receive early watches?
Can I get an overview of all the alerts across all EWA’s?
By clicking on the tiles you can zoom in on the diverse topics.
EWA for single system
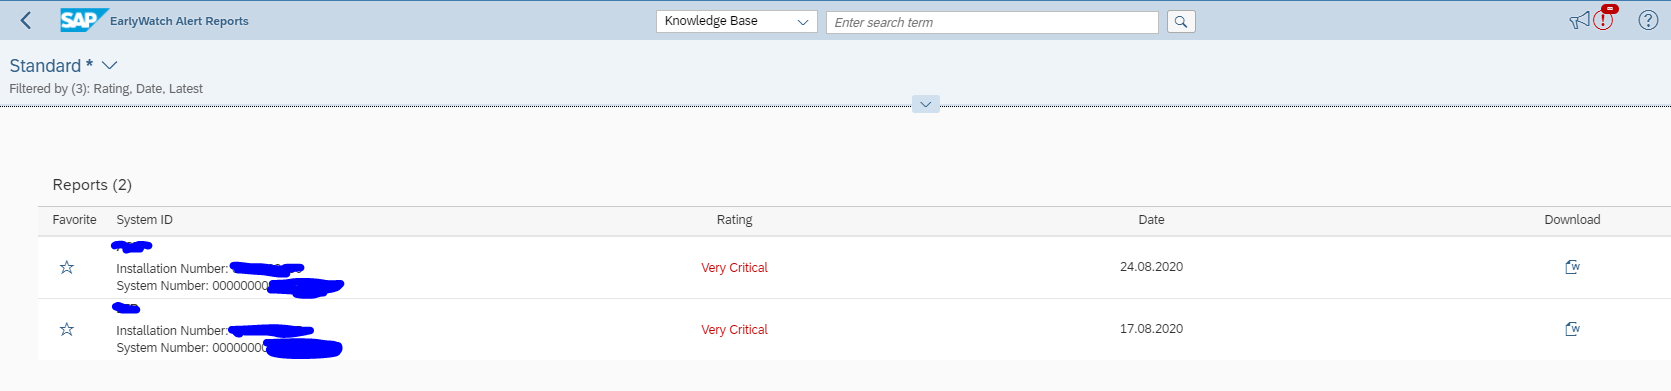
In the overall rating tile, you can click on the donut graph to goto the list of separate EWA’s:
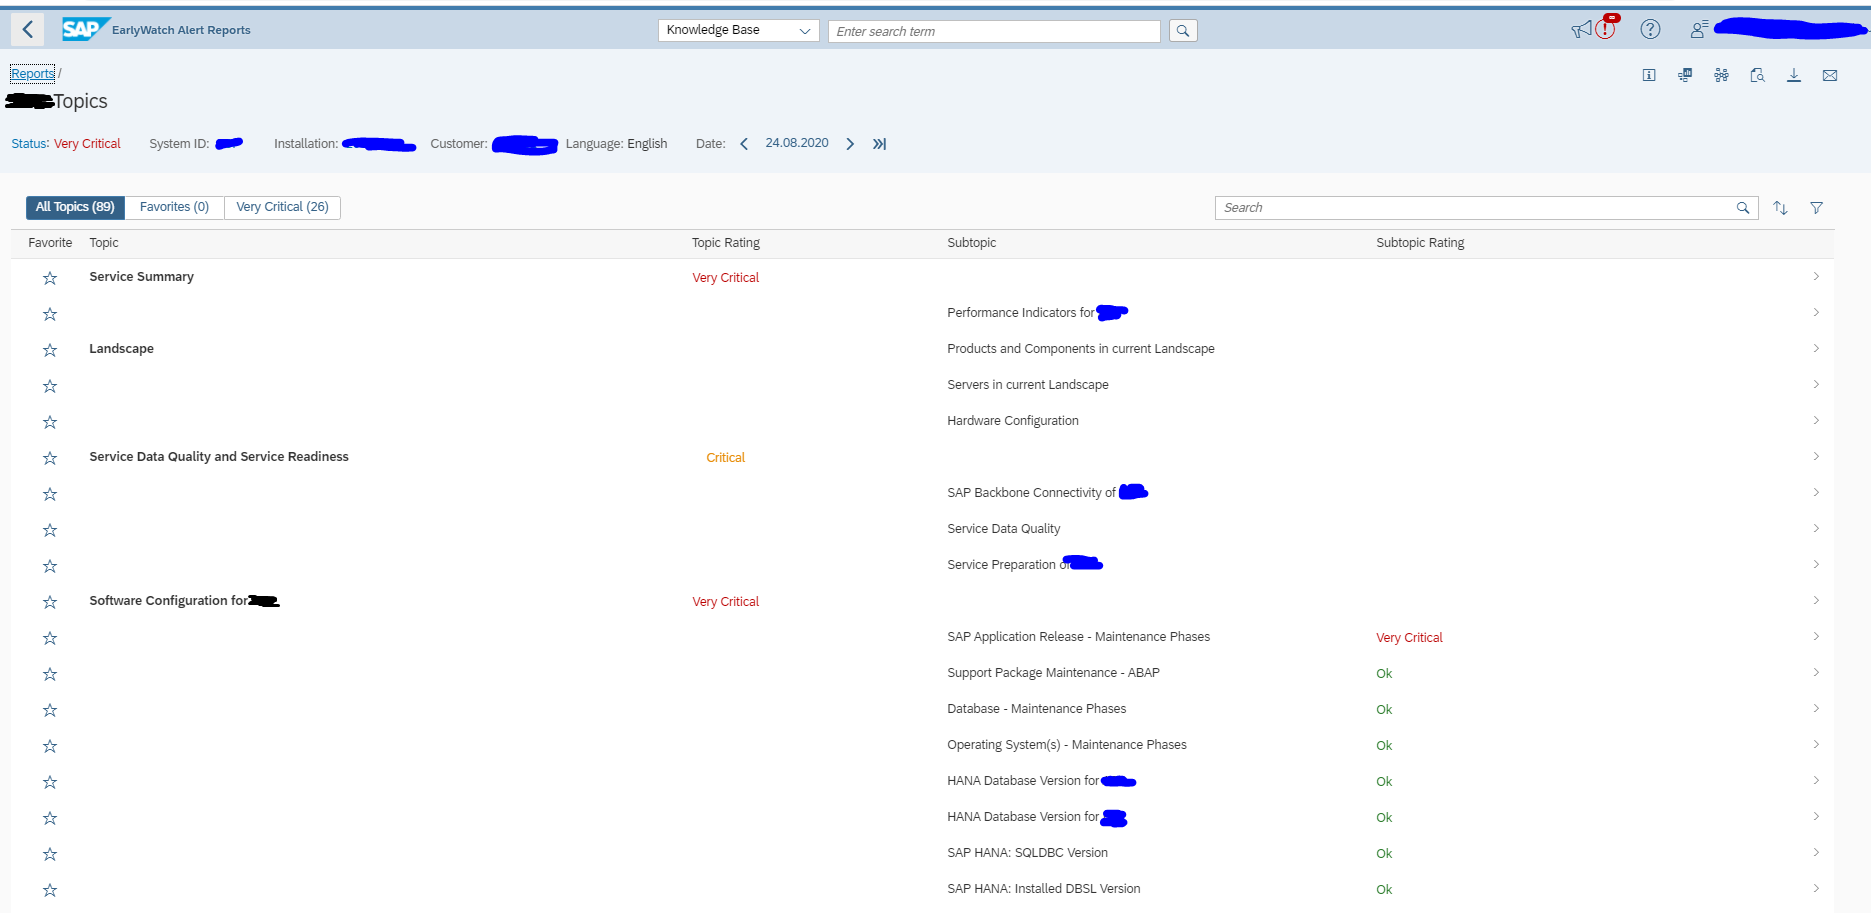
Here you can open the word or PDF doc, or by clicking on the line goto the online EWA for the single system:
On each topic you can zoom in by clicking on the line:
Sending EWA data to SAP
To get the information to SAP still the local SAP solution manager system (or Focused Run, see this blog) is used to collect the data, and submit it to the SAP market place. In the past the sending was once per month. With the switch to the new backbone infrastructure this is now once per week. If the EWA is not received on SAP EWA workspace page, please check the reference OSS notes in OSS note 1684537 – EarlyWatch Alert not sent to SAP: troubleshooting guide.
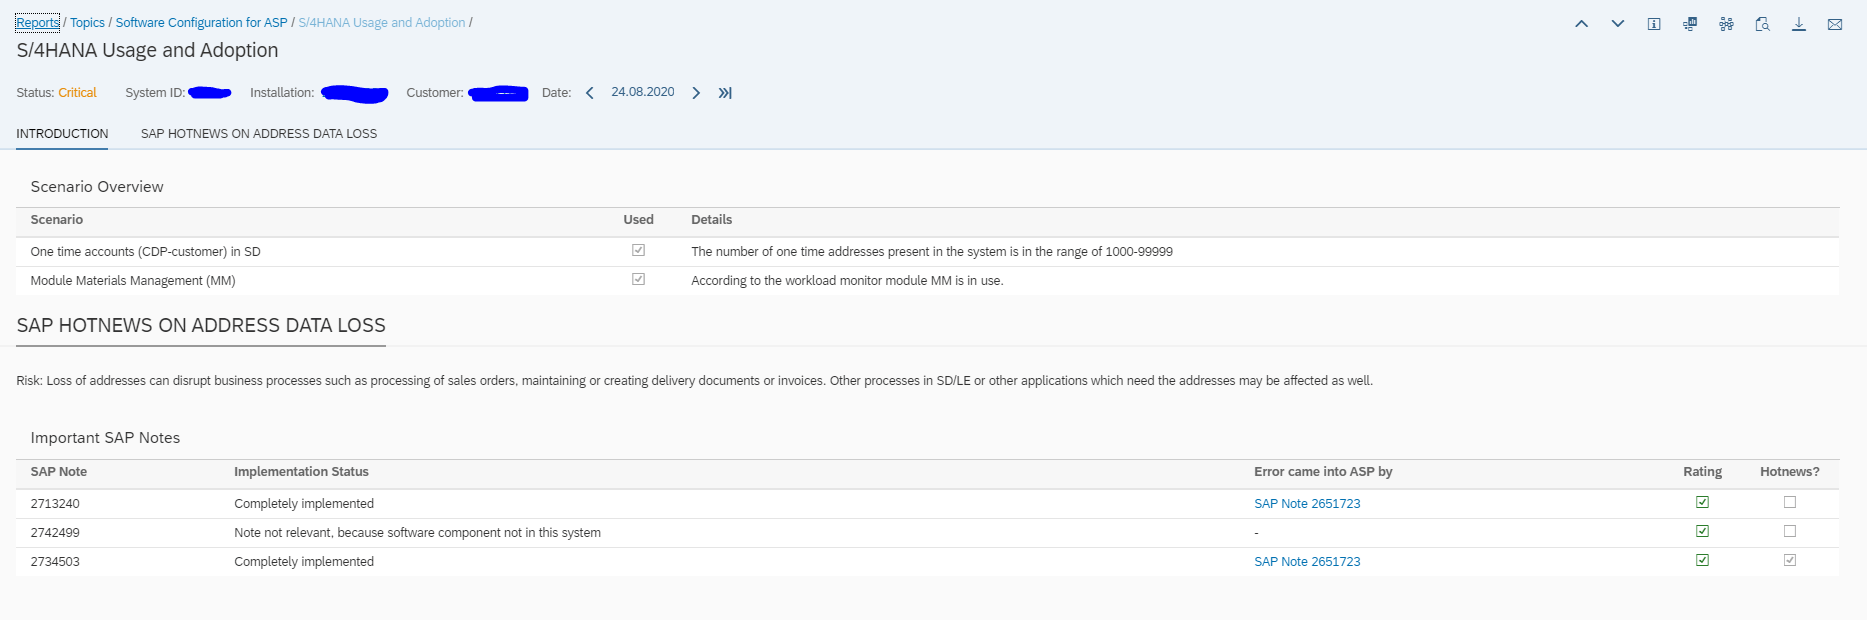
In me.sap.com there is a special tile which has an overview of all the alerts of all EWA’s: the EWA alert solution page. Read more on this useful tool in this blog.
Background on EWA workspace
The primary background site about the EWA workspace can be found here.
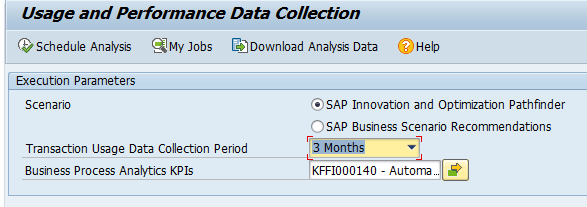
SAP pathfinder is part of the innovation and value support part of SAP. The full background can be read on the SAP pathfinder site. This site includes video’s that explain everything.
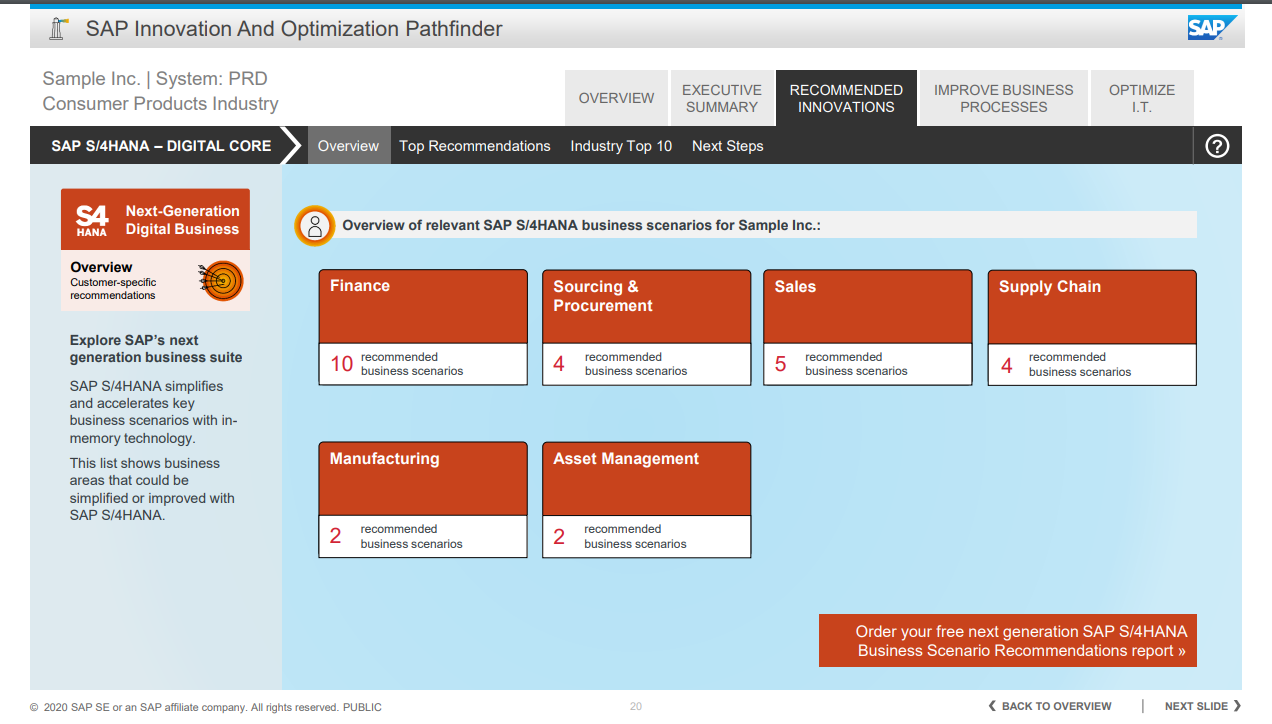
On this site you can also find an example output report.
If you have configured attachments of document info records to be stored in the content server, you still might have a lot of old document stored into the SAP database.
This blog will explain how to migrate these documents from the database to the content server.
Questions that will be answered are:
How to migrate documents from database to content server?
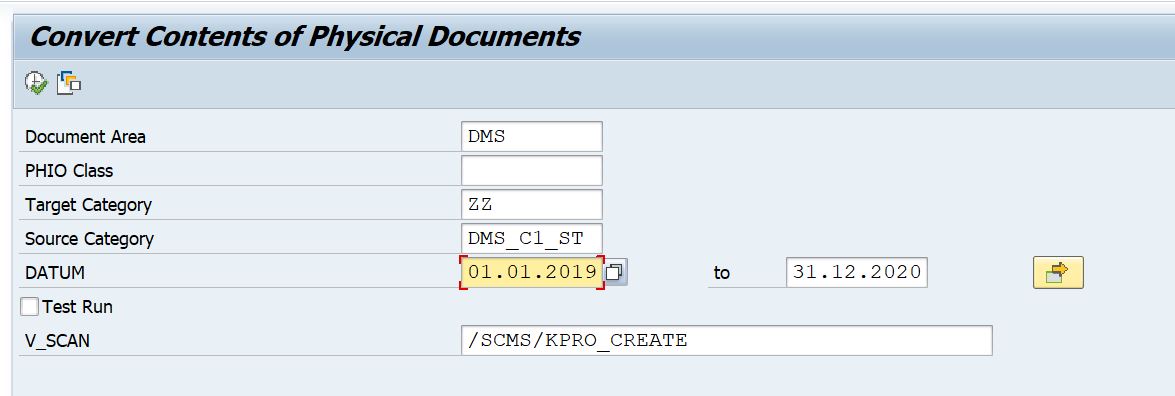
To run start transaction SE38 and start program RSIRPIRL and fill out the required data:
Select a time frame that has little documents in a test environment first. Check how long it takes and that it ends correctly. After the relocation is done you get a list of technical ID’s migrated. When confident in a test environment, run in production environment, and monitor the storage of the content server (so it does not fill up to 100%).
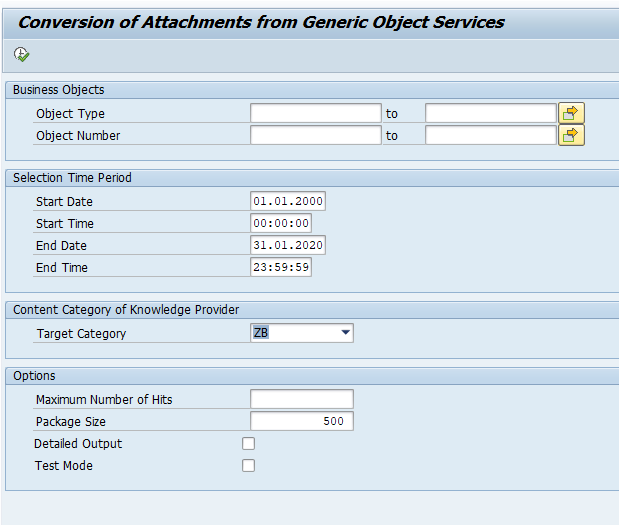
The program RSIRPIRL does not have many selection criteria. You might also find out that the time to migrate takes too long. If you need to migrate GOS document (global object services attachments), you can use program RSGOS_RELOCATE_ATTA:
This program migrates the GOS documents specified per type and page. GOS documents are normally the bulk of the documents. This way you can migrate most of the documents before running the full run with RSIRPIRL. Full background of program RSGOS_RELOCATE_ATTA can be found in OSS note 2293171 – RSGOS_RELOCATE_ATTA: Relocating attachments from generic object services.
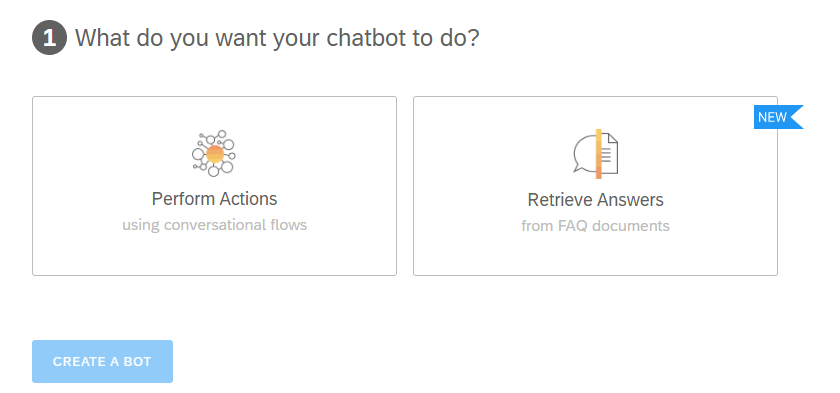
Here we choose Perform Actions and press the CREATE A BOT button:
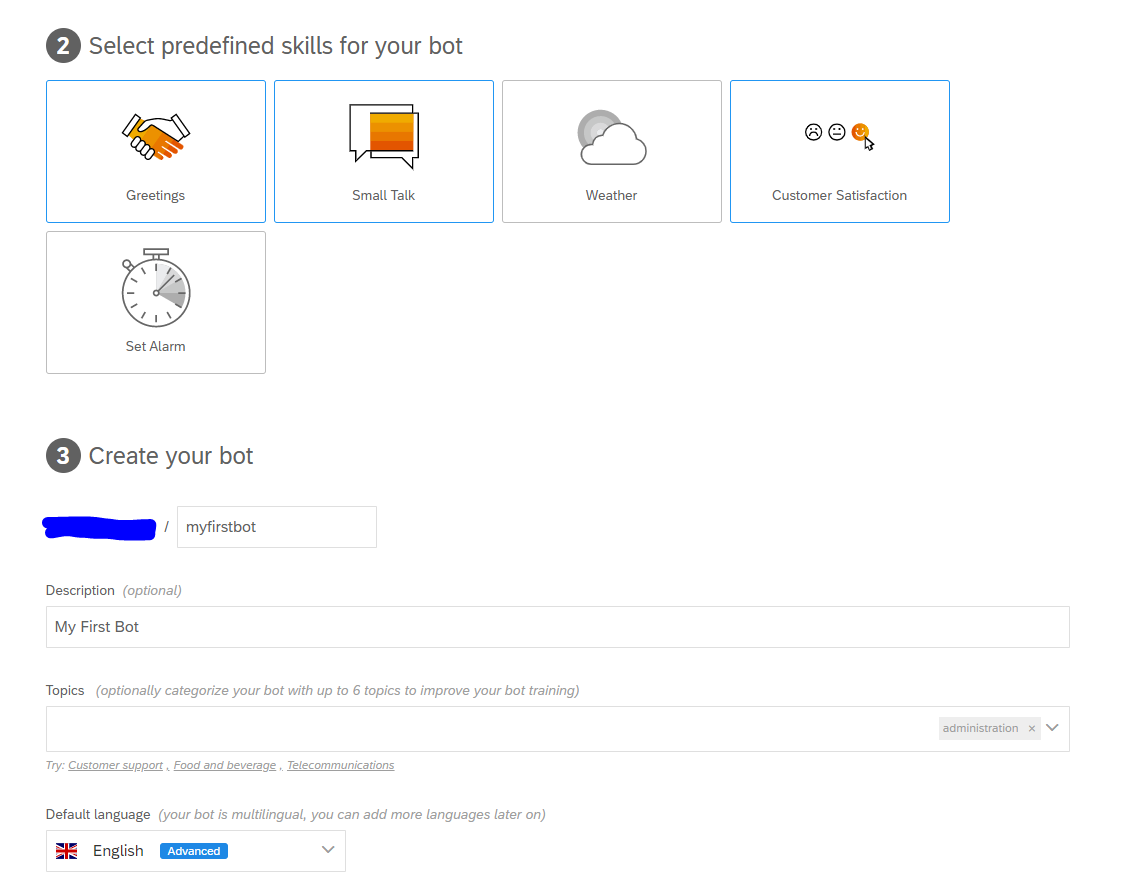
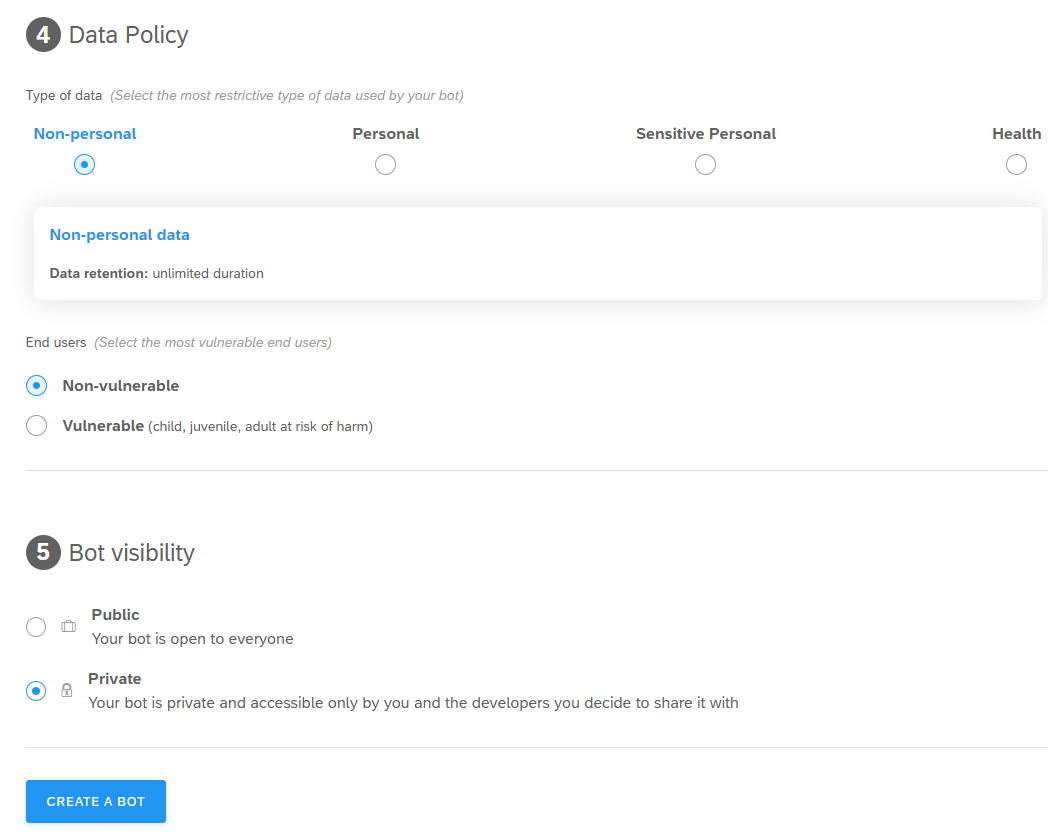
Continue with the wizard:
Now create the bot.
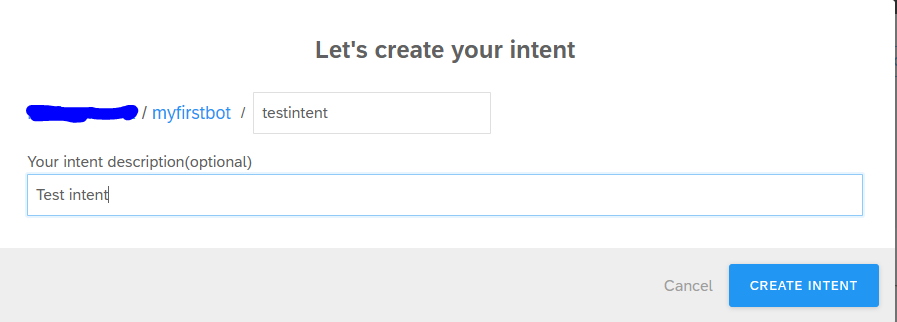
First thing to add is an intent:
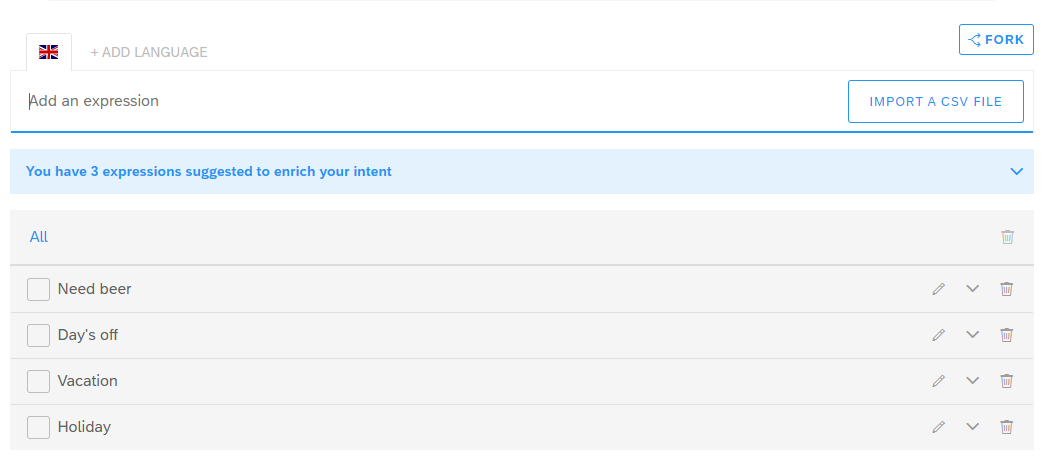
And enter the detailed words (expressions) for the intent:
When the user keys in one of these words, it will trigger the bot.
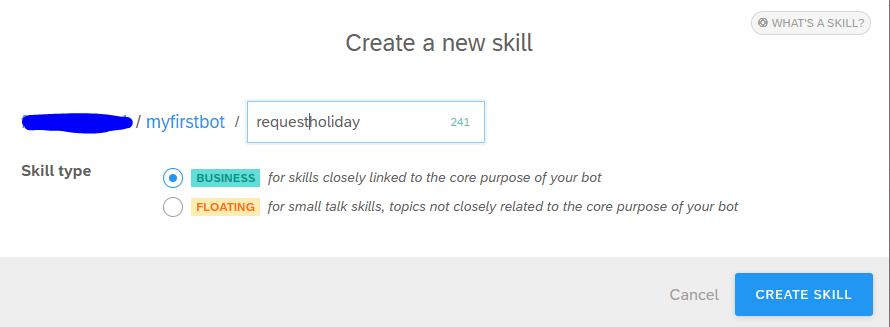
But this is only the trigger. There is no action yet. Goto the build tab and create a skill first:
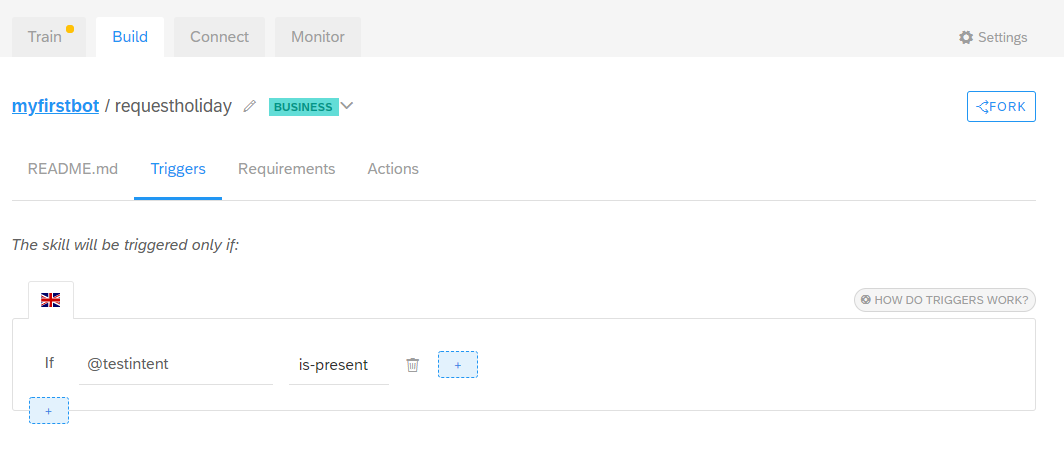
Now open the skill. In the skill you can goto the details to add a trigger:
Here we use our test intent we created before as trigger.
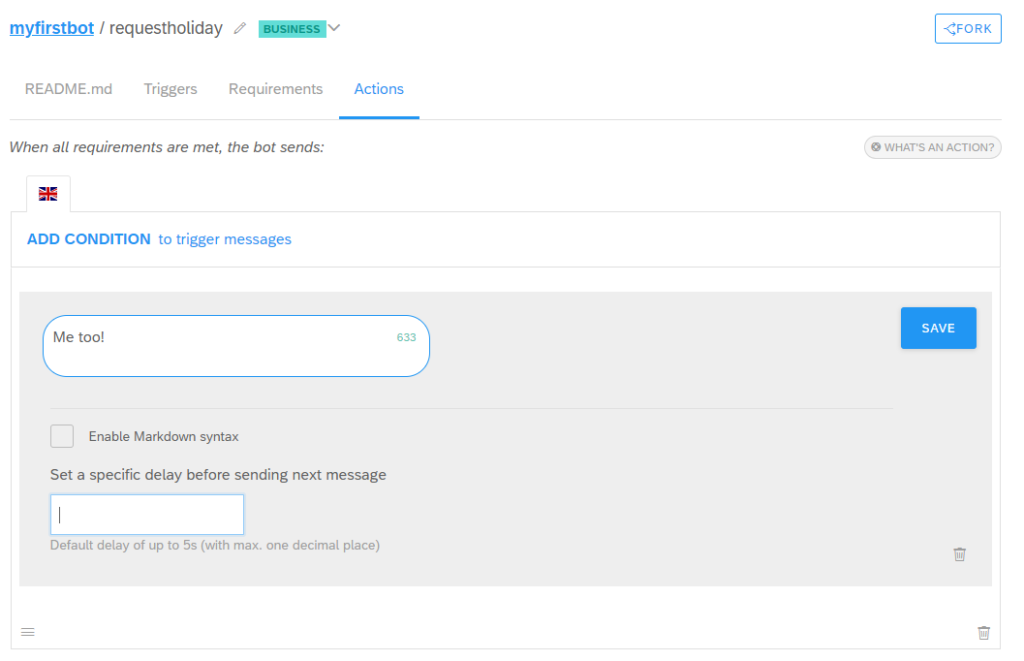
Now goto the Actions tab and create the wanted action:
In our simple case, we respond back with a text saying “Me too!”.
Testing the chat bot
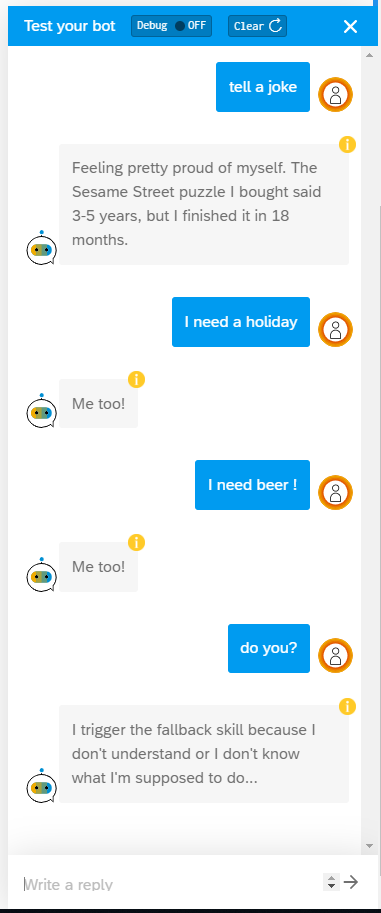
Now we will test our chat bot. Test result:
First thing we say is “tell a joke”. Then the bot will tell a joke.
Then we ask: I need a holiday. Since we have set the word “holiday” as an intent, the bot responds with the action and says “Me too!”. The same for I need beer. Any response question that is not in the chat bot script it goes to fallback.
OpenSAP course
SAP has a nice OpenSAP training on chatbot building. Follow this link.
When executing data archiving you have to be acting careful. The data archiving write and delete processes can be consuming a lot of CPU power from the database. Also, if you are not careful you might, by accident, claim all background processes. This blog will explain how to limit the amount of batch jobs used for data archiving. The data archiving run process itself is described in this blog.
Questions that will be answered in this blog are:
How can I limit the amount of deletion jobs?
How can I restrict the archiving jobs to run on a specific application server only?
Limit amount of deletion jobs
When the write run of data archiving is finished, this can have delivered many files. If you are not careful with the deletion, you select all files and each file will start a deletion run. This will consume a lot of CPU power on database level, since the deletion run will fire many DELETE statements to the database in rapid sequence. Also you might consume all batch jobs, leaving no room for any business batch job.
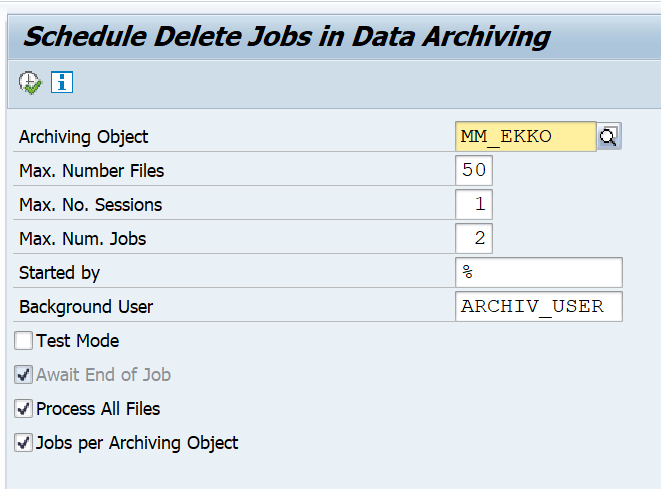
In stead of running the deletion from SARA, you can also run the deletion via program RSARCHD:
With this example, MM_EKKO files will be deleted. Maximum of 50 files from 1 archiving run will be processed, with a maximum of 2 deletion batch jobs running at the same time.
General application server restrictions via batch job server group
In SM61 you can setup a special batch job server group. Here can assign a single application server for you data archiving batch job processing. We assume here you created a group called DATA_ARCH.
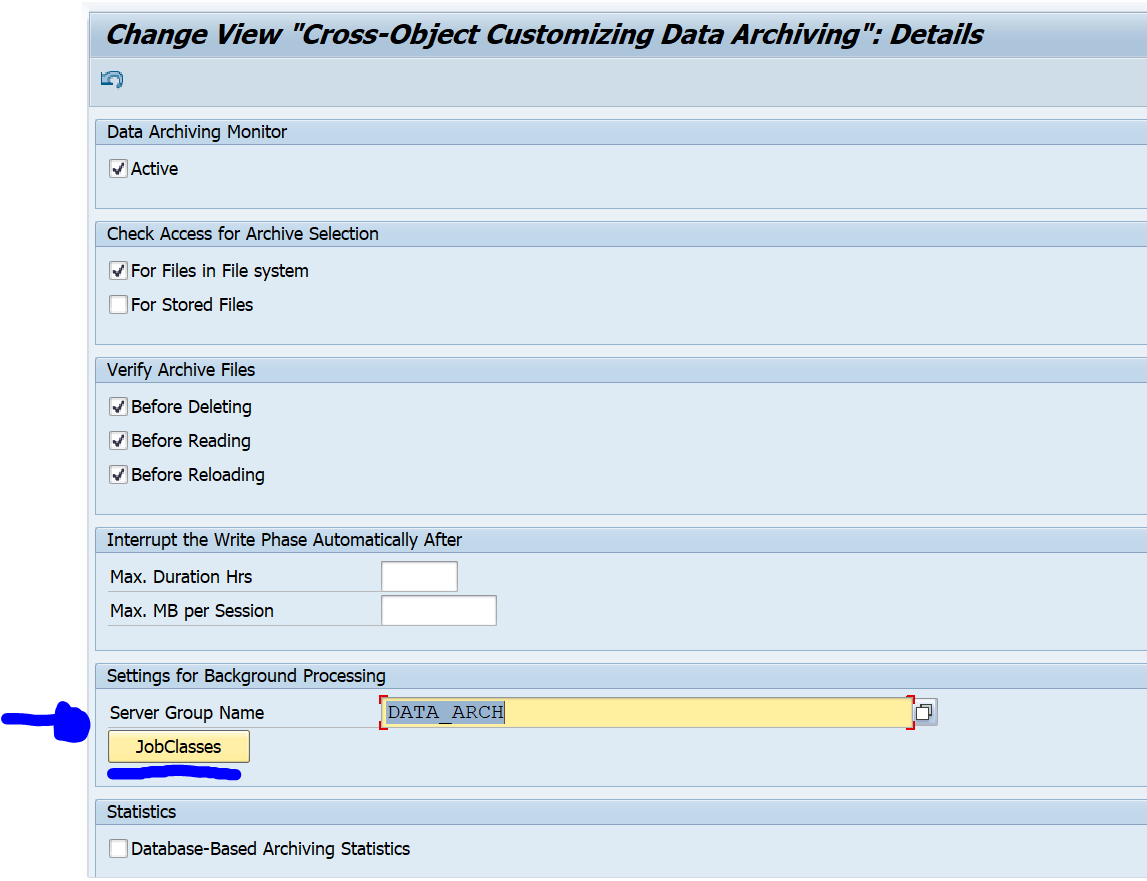
In SARA you can now goto the general data archiving settings:
Now you can link the batch job server group:
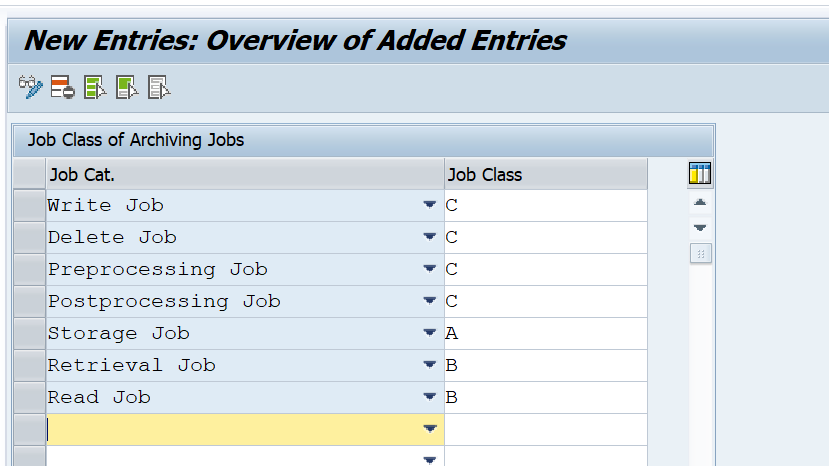
With the button JobClasses you can specify the job priorities per data archiving function:
A = high priority, C = low priority. The above screen shot is an example.
In the previous blog we have exposed a web service. Now we will show how to consume a web service in ABAP. As example we will consume the web service we exposed in the previous blog. This blog assumes you have configured the basic web service SOAP runtime (if not, read this blog).
Questions that will be answered in the blog are:
How to generate a web service consumption proxy?
How to setup SOAMANAGER for web service consumption?
How to test the web service consumption setup in SE80?
How to use the generated web service consumption proxy in ABAP code?
What are the authorisation and security aspects for web service consumption?
Generating web service consumption proxy
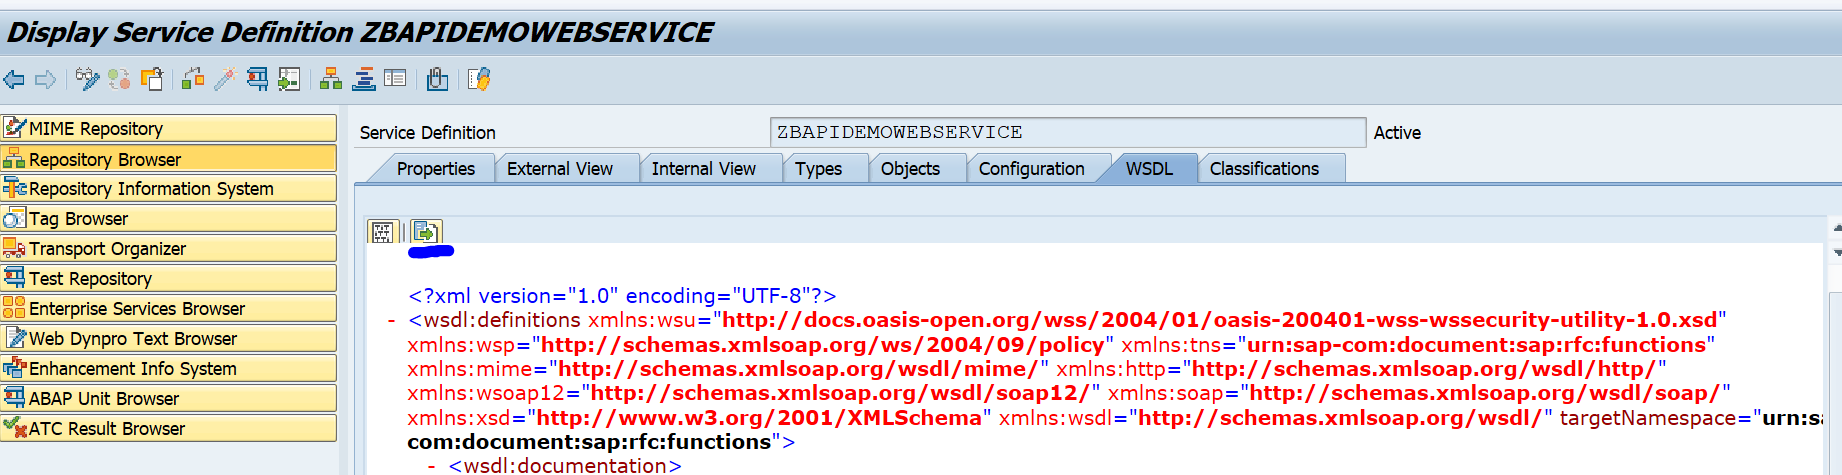
Start in SE80 by exporting the WSDL file from your previously generated webservice. Goto the WSDL tab and press export to save the WSDL file locally:
In SE80 in your package select Enterprise Services and right click on it to create a new service:
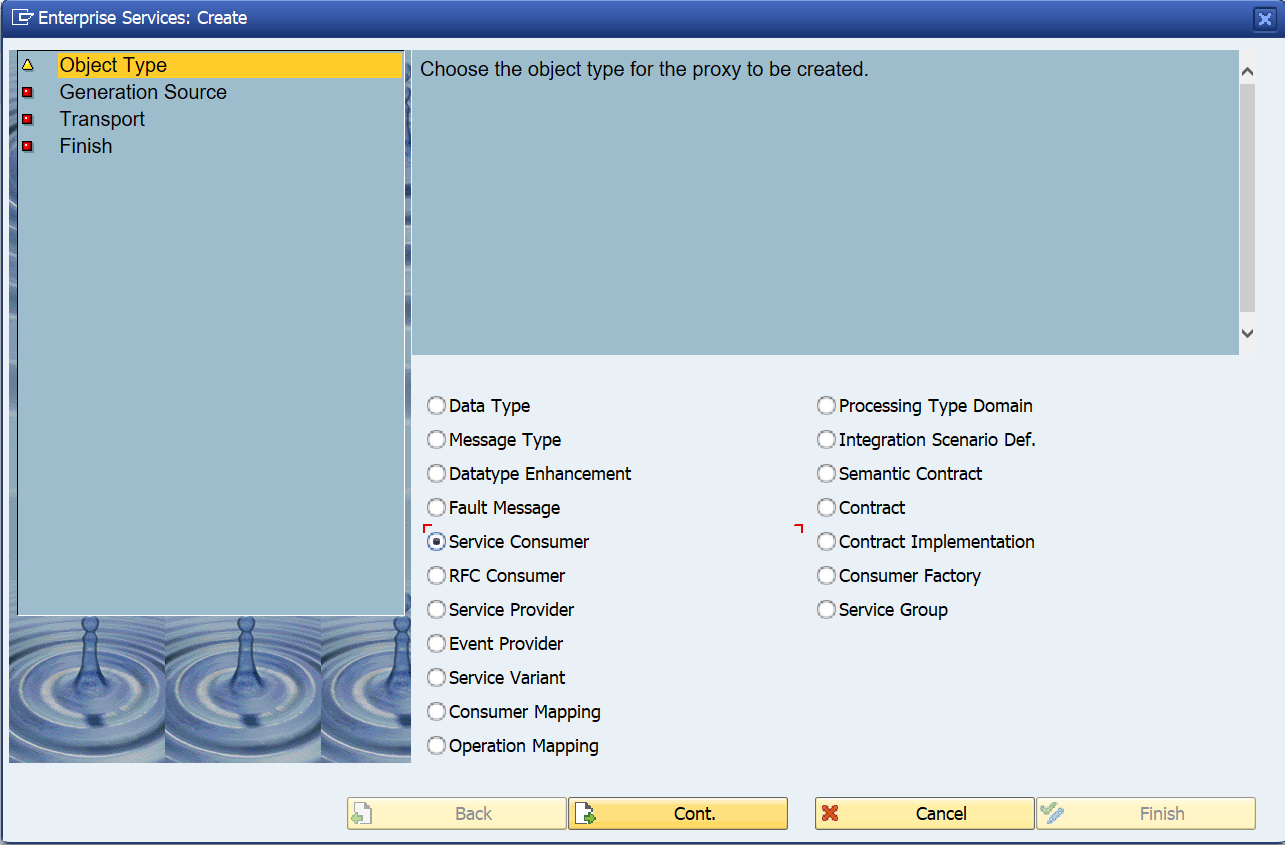
In the object type screen select Service Consumer:
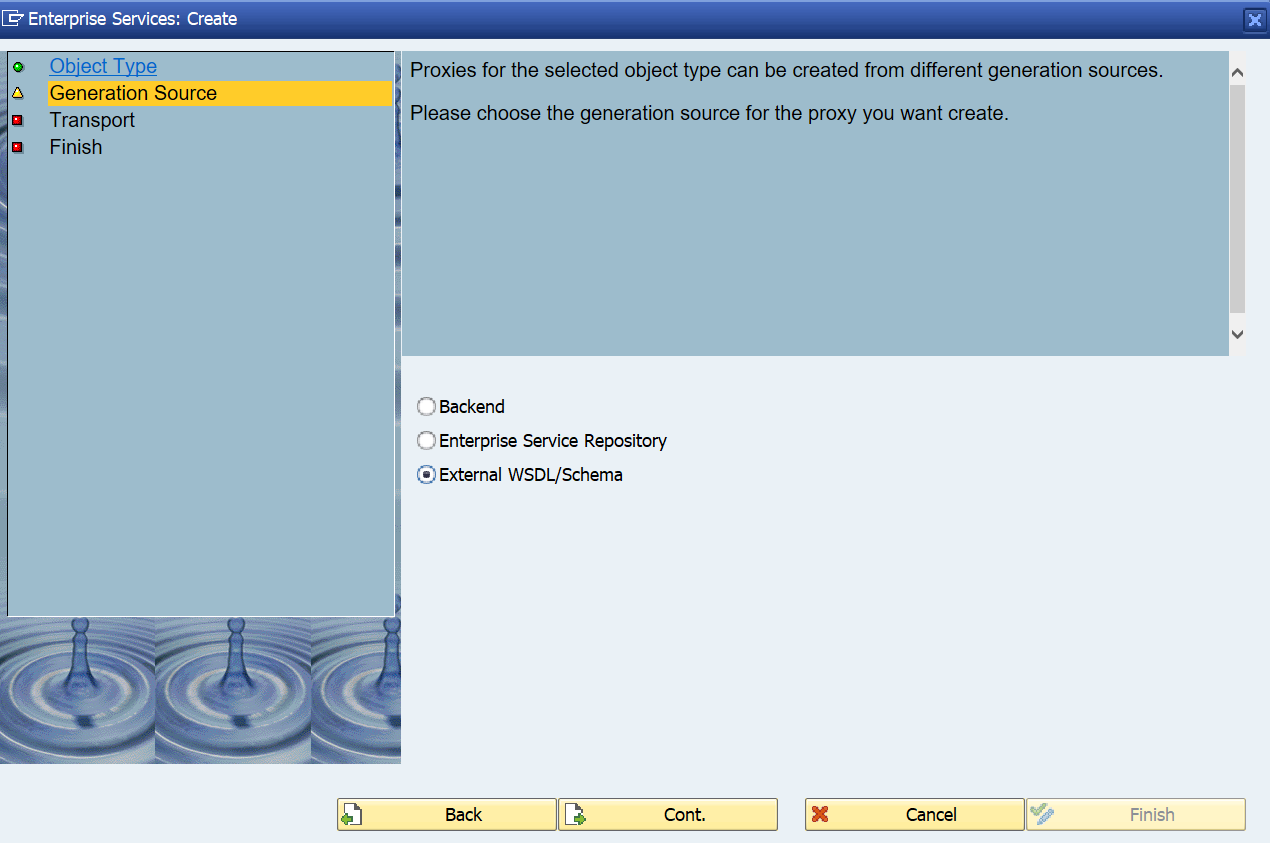
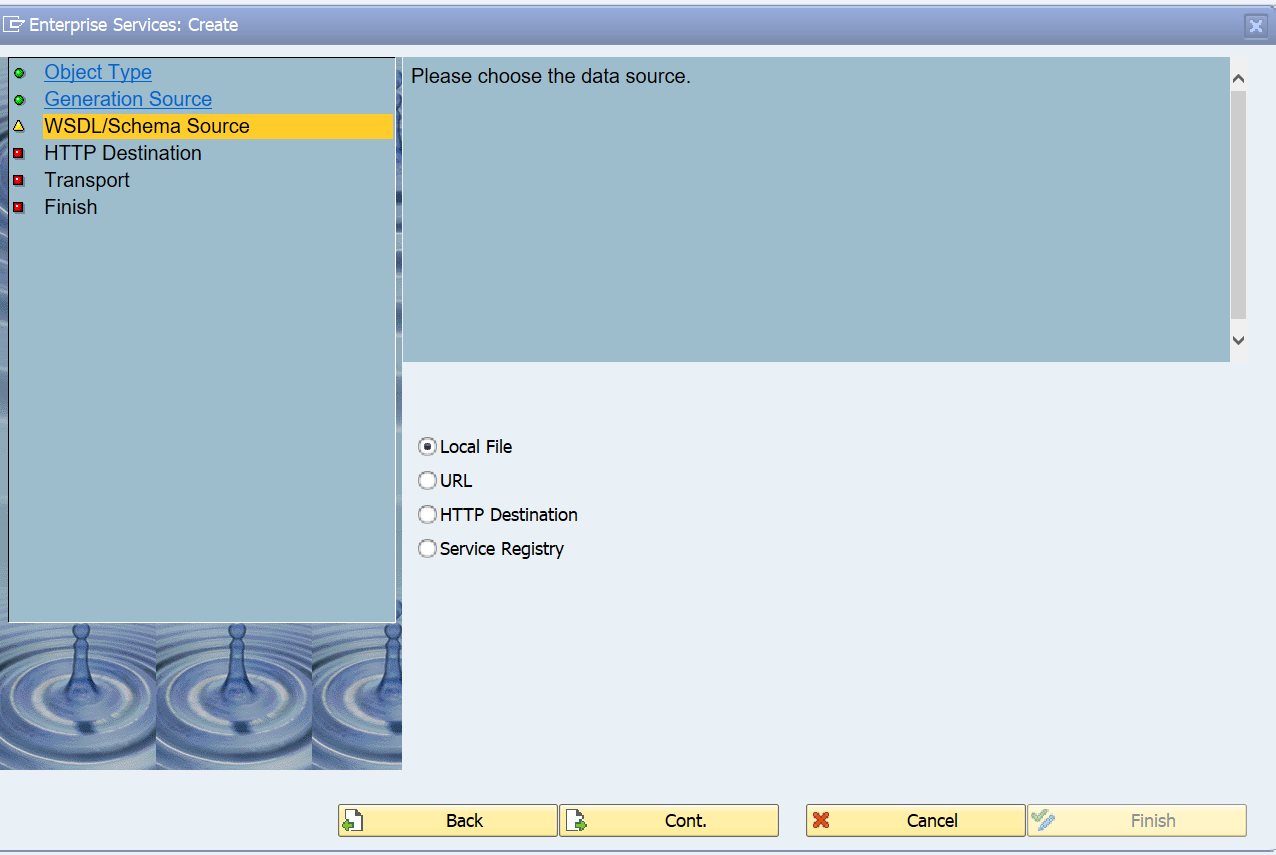
Now select External WSDL/schema:
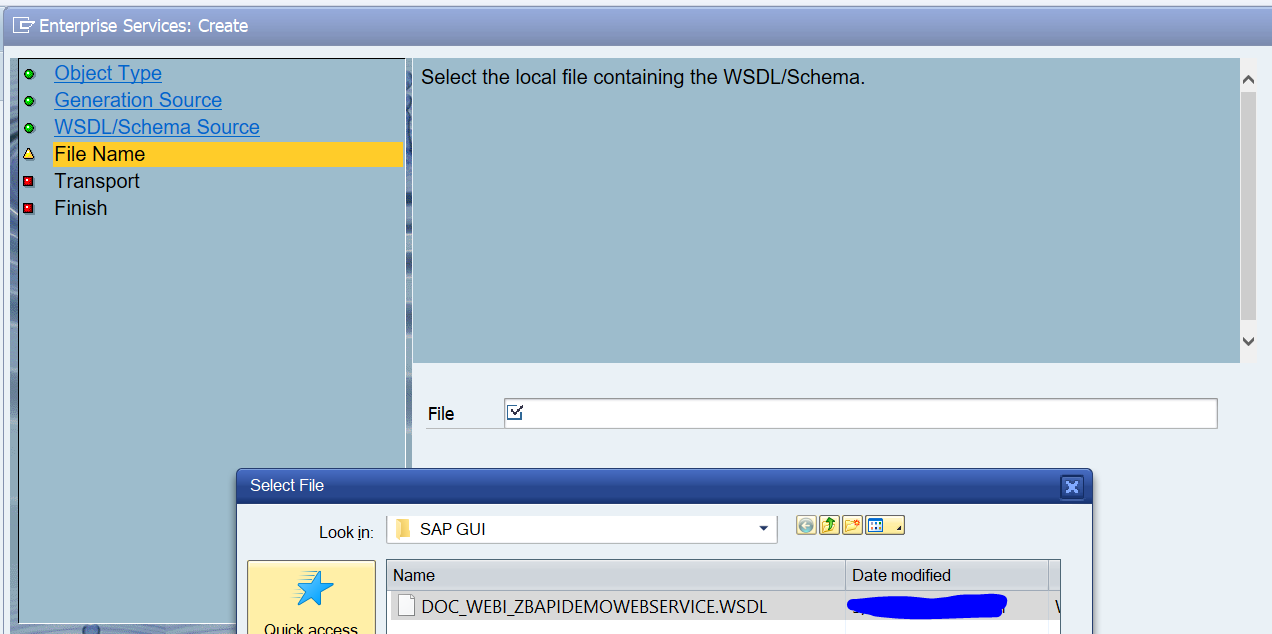
Select local file:
Select the local file:
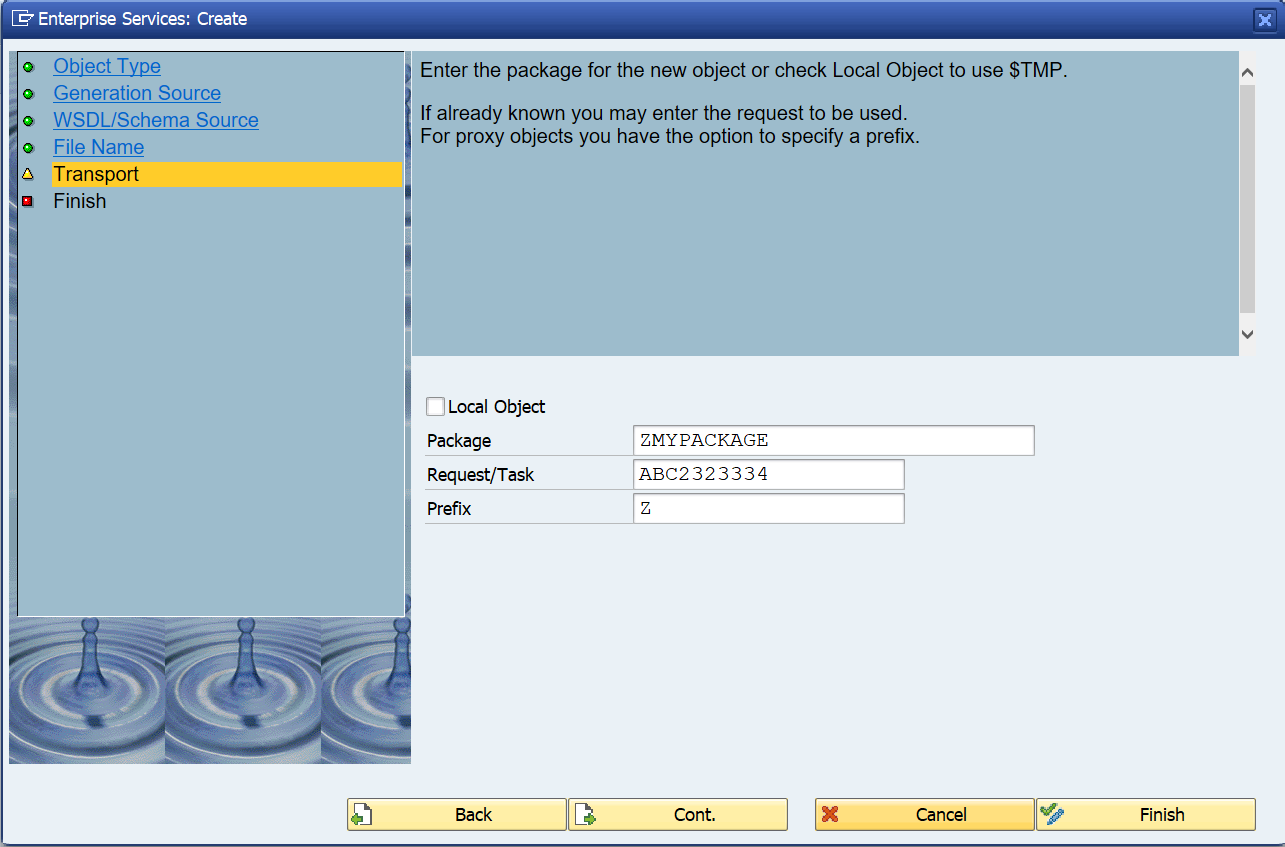
Select the package, transport and use Z as prefix:
Then select Finish to complete the roadmap.
Wait for the system to compile the software:
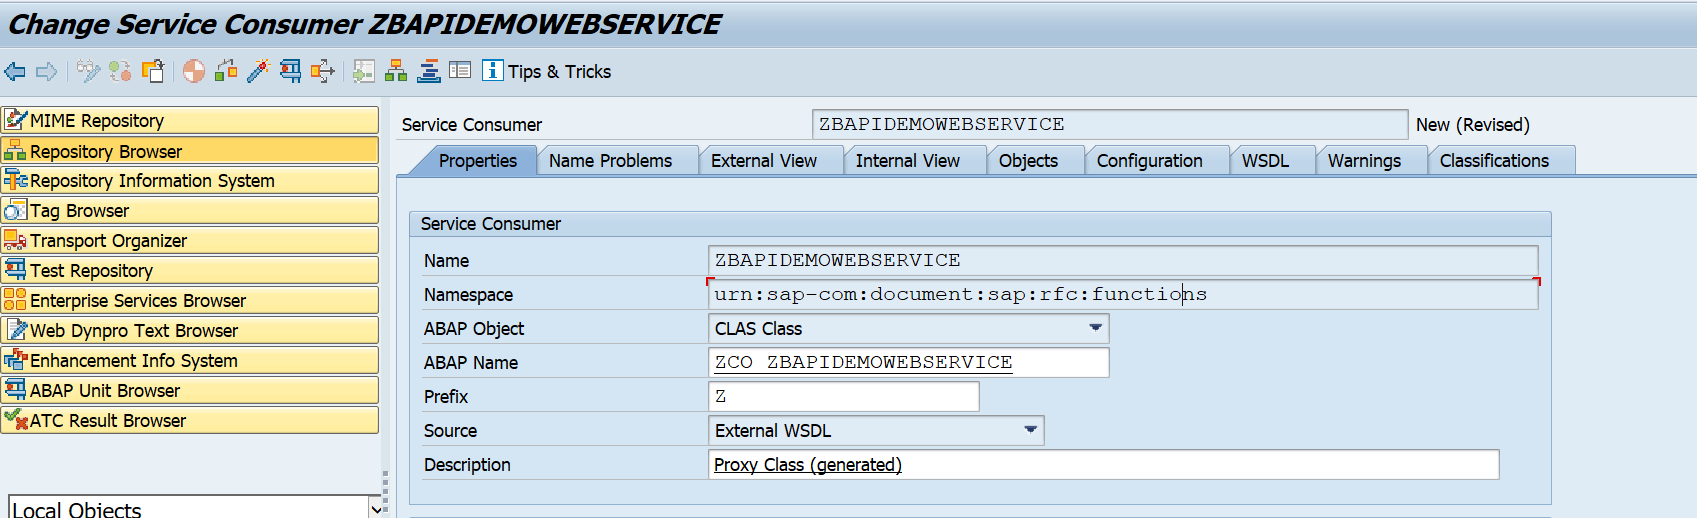
Save and Activate. Now the design time proxy is ready.
SOAMANAGER settings
In the previous steps we have setup the design time proxy. Now we add the runtime artefacts as well.
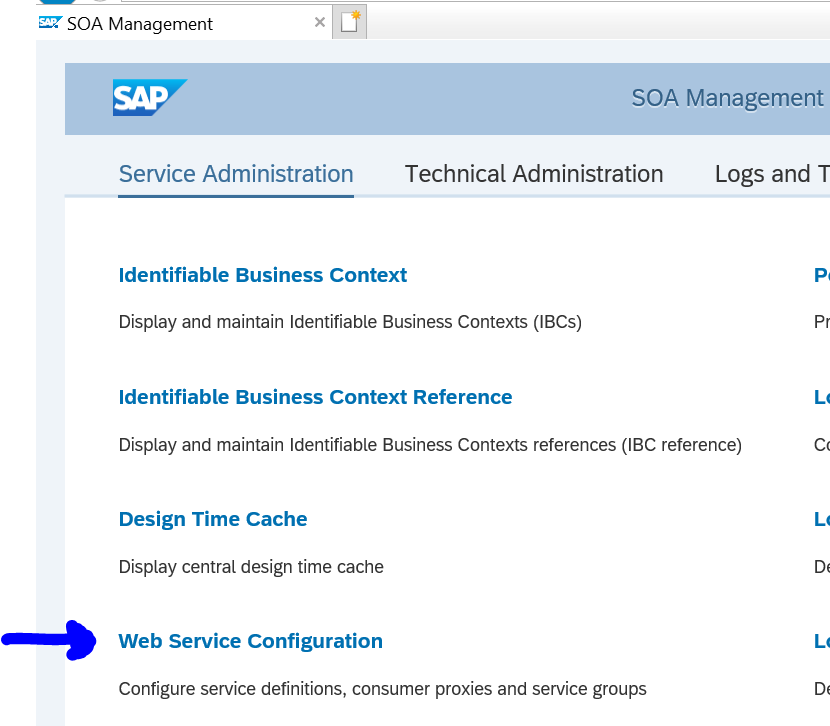
Now goto transaction SOAMANAGER:
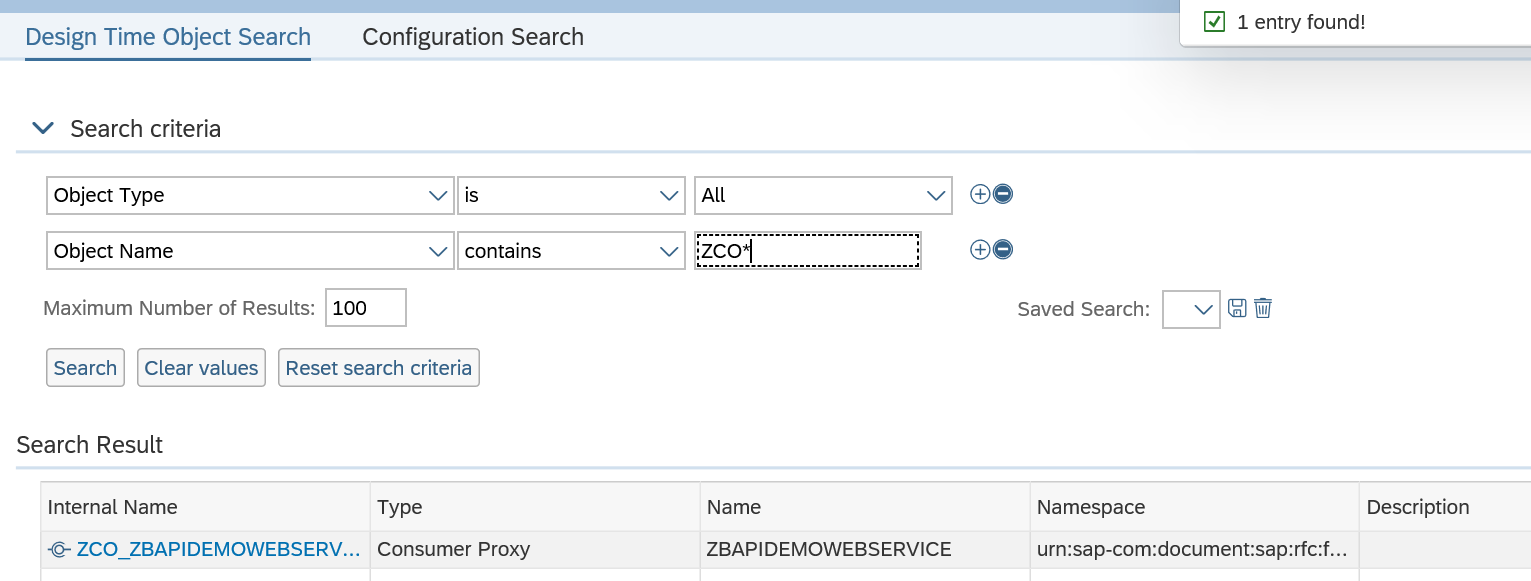
Select Web Service Configuration, and search for the newly created design time object:
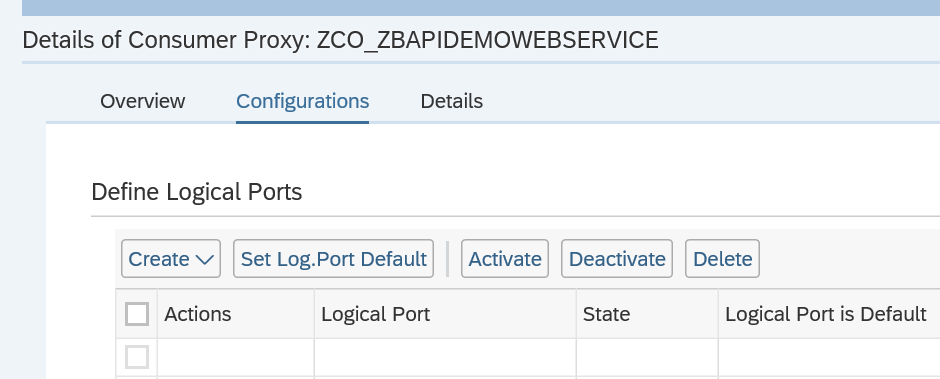
Click on the blue internal name to reach the configuration screen:
On the screen press Create and then manual configuration:
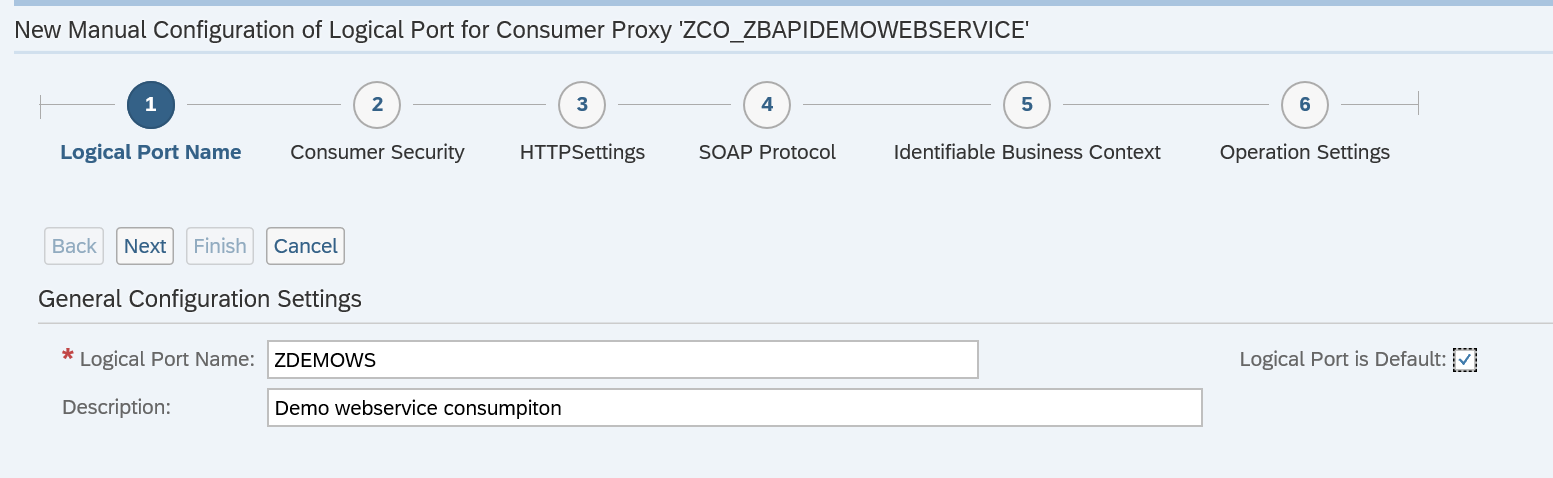
Give the logical port a name and description and mark the logical port is Default tickbox to true. Then continue with the roadmap.
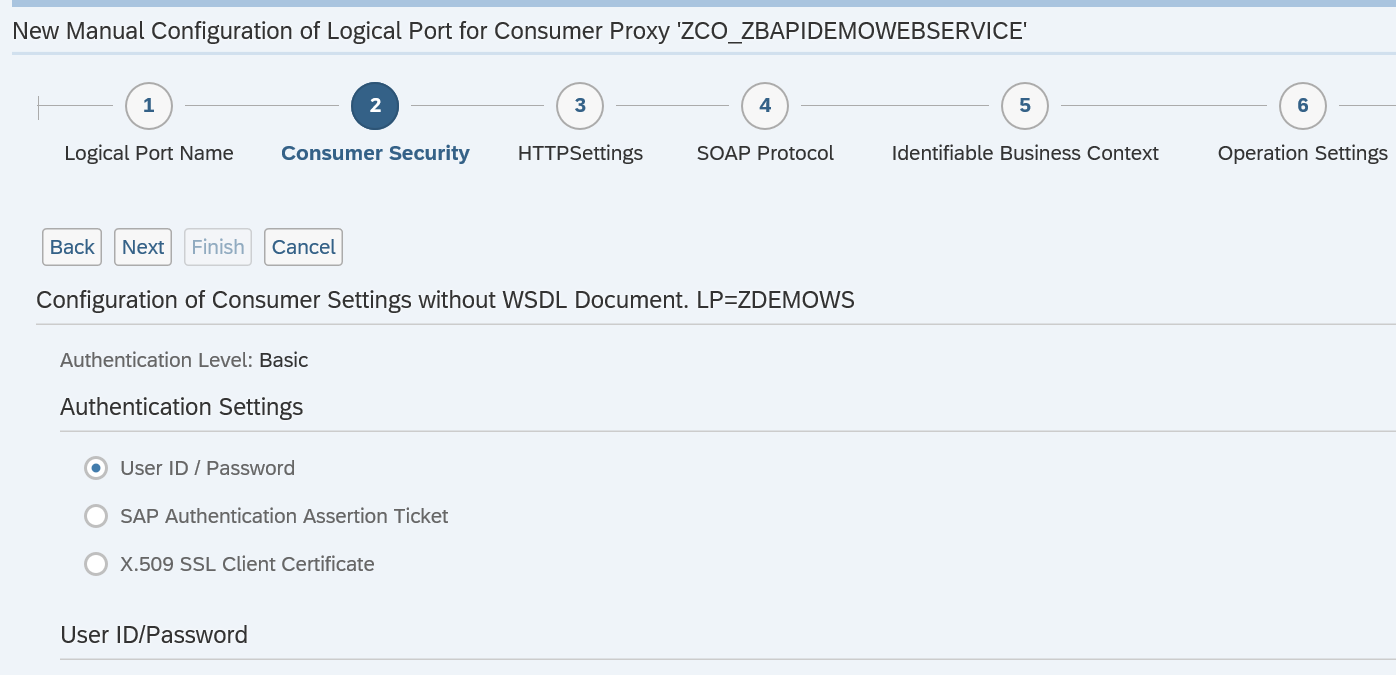
Now fill out user ID and password. Continue and fill out user ID and password:
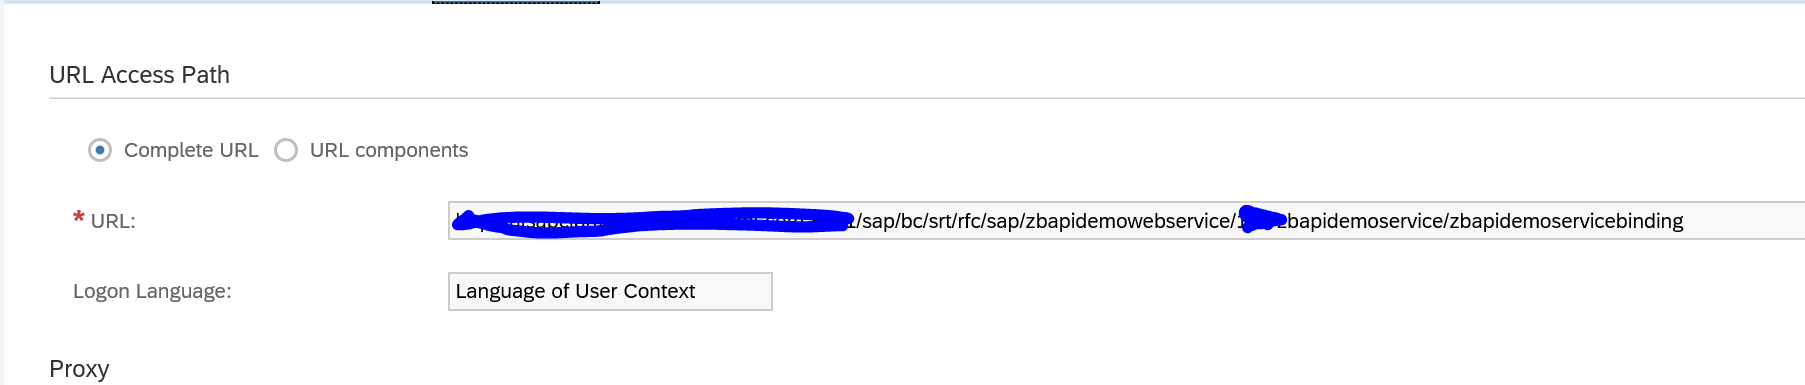
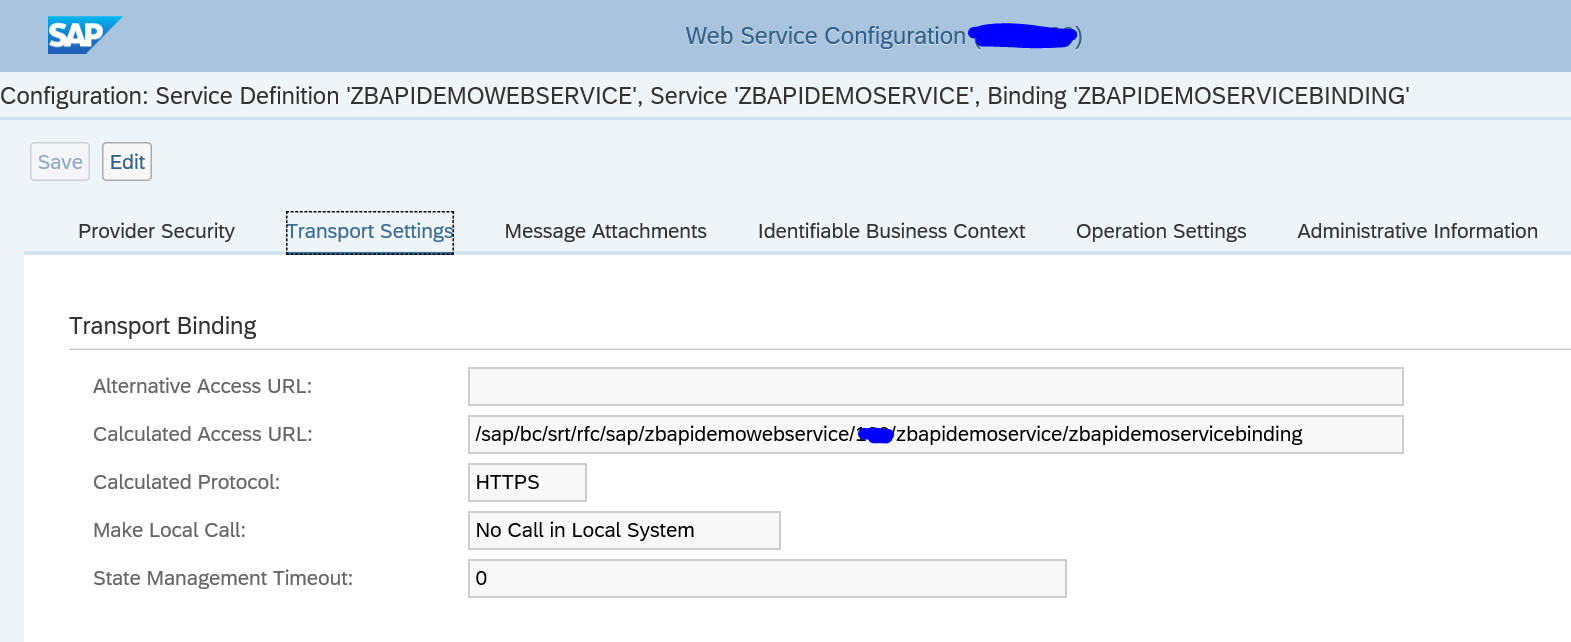
You can lookup the access URL from the service defined in the previous blog and check on the transport settings tab:
Do not use the WSDL URL address, but the binding URL!
Now fill out the URL details in the next screen.
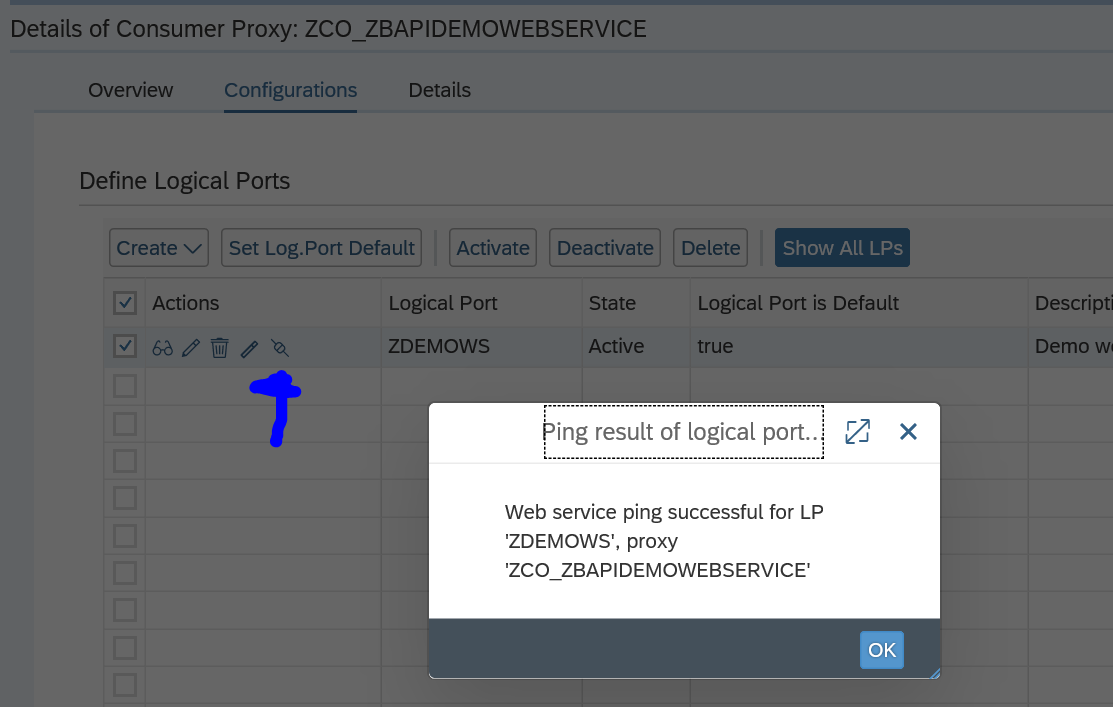
Now finish the roadmap. And on this screen hit the ping web service test button to check if all is ok:
The design time artefacts can be transported. The SOAMANAGER settings need to be repeated in each system. This is wanted as well, since on a test system you might want to call a test web service URL and on production the same web service from the production URL.
Testing the web service consumption setup
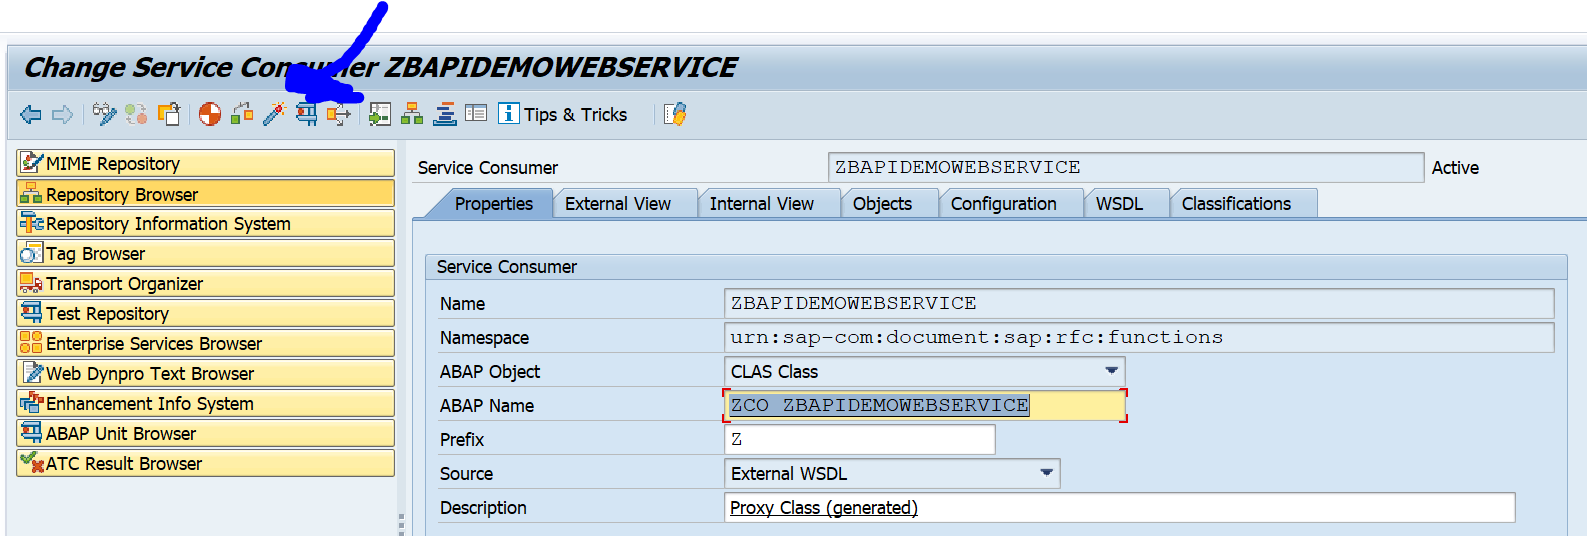
Now go back to SE80 and test the web service consumption:
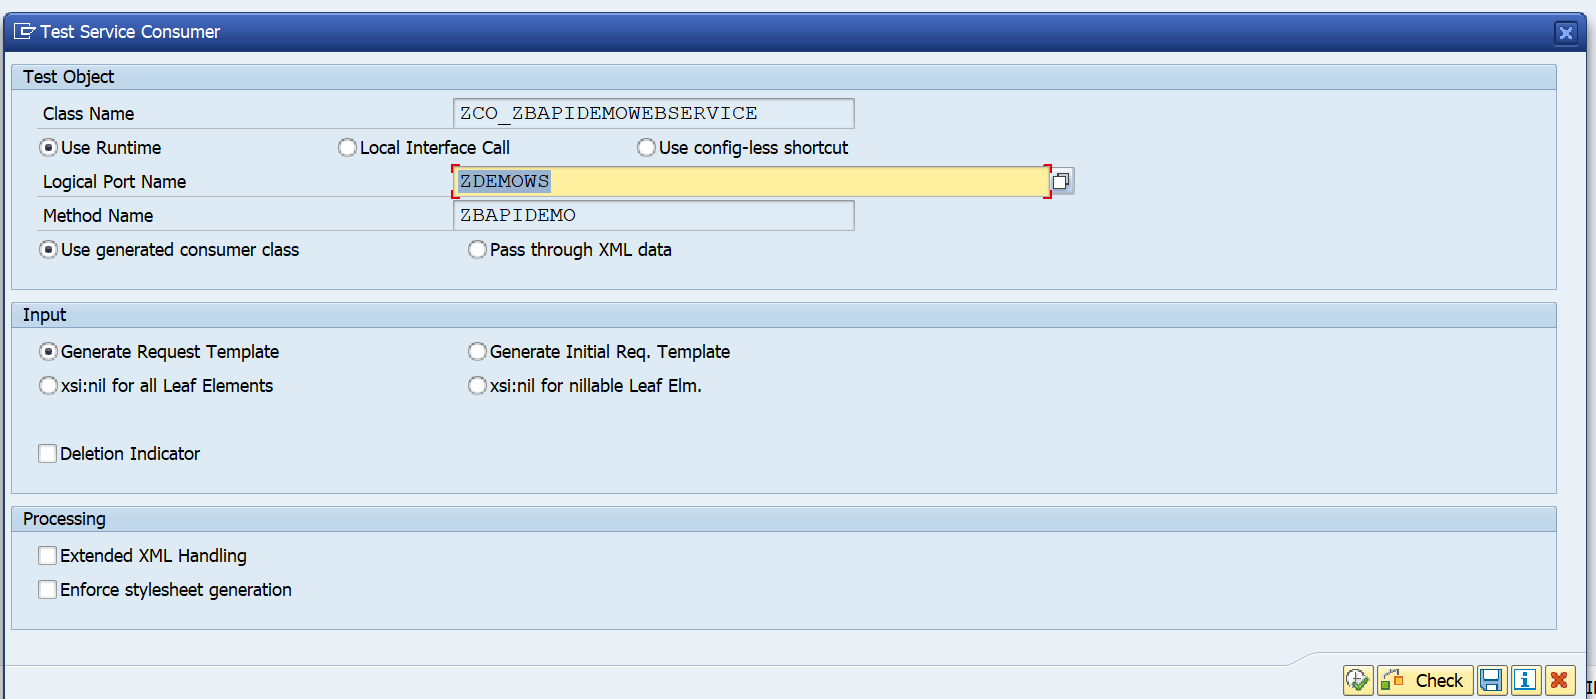
Select the port you created above in SOAMANAGER:
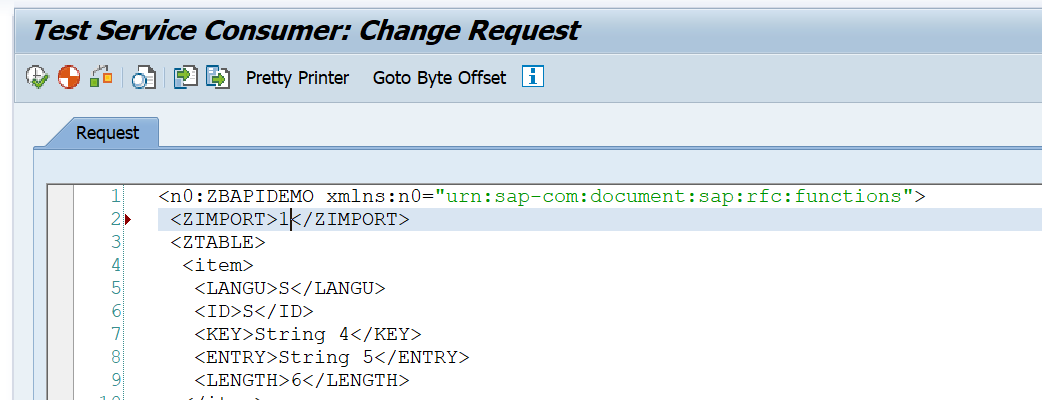
Edit the data:
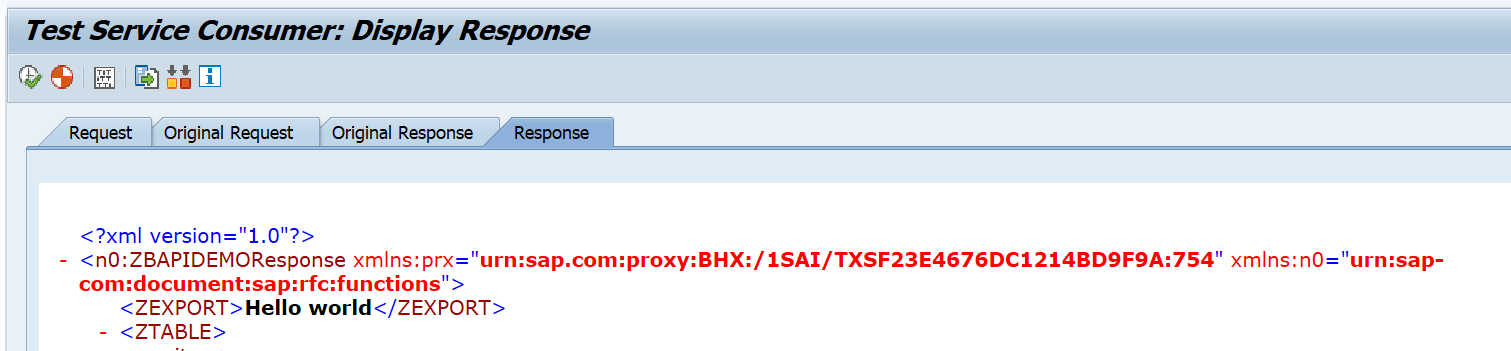
And press test to get the results:
Using the web service consumption proxy in ABAP code
Now we are ready to use the web service consumption proxy in our ABAP code. ABAP code example:
* Data Declarations DATA: zcl_proxy TYPE REF TO zco_zbapidemowebservice, " Proxy Class zdata_in TYPE zzbapidemo, " Proxy Input zdata_out TYPE zzbapidemoresponse, " Proxy Output zfault TYPE REF TO cx_root. " Generic Fault
* Instantiate the proxy class providing the Logical port name CREATE OBJECT zcl_proxy EXPORTING logical_port_name = 'ZDEMOWS'.
* Set Fixed Values zdata_in-zimport = '1'.
TRY . zcl_proxy->zbapidemo( EXPORTING input = zdata_in IMPORTING output = zdata_out ). WRITE: / zdata_out-zexport. CATCH cx_root INTO zfault. * here is the place for error handling
ENDTRY.
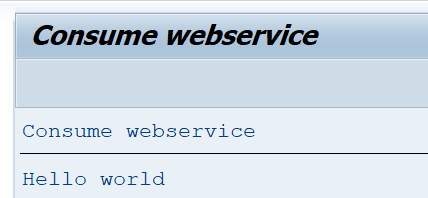
Run the ABAP and see the result:
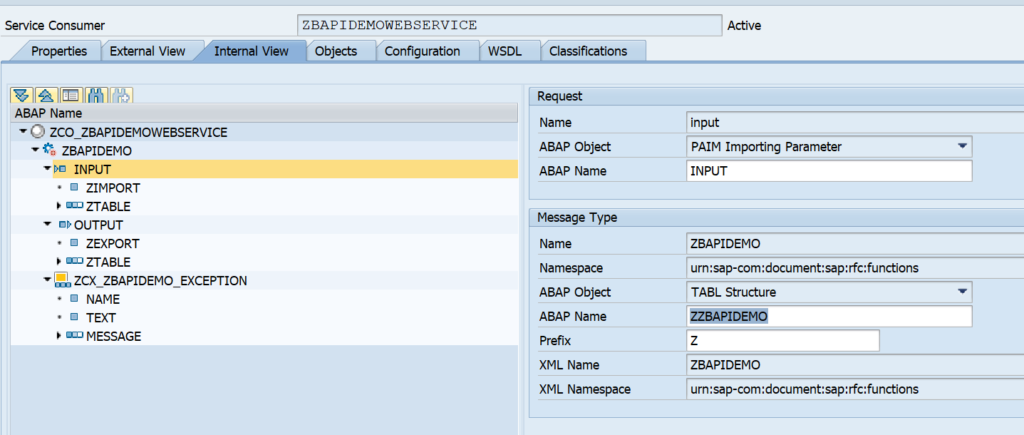
How to get the right parameters? All the required structures can be found on the SE80 ABAP web service consumption proxy internal view:
Authorizations
The end users using the ABAP that is consuming the web service must be given the rights for the correct S_SERVICE object. Otherwise they will get an error that they are not authorized to call the proxy service object.
Monitoring the availability of the web service
It was explained you can test the connection. Unfortunately there is no out of the box way to test this connection in a batch job on a frequent basis. If you want to frequently test and be alerted on issues with connection to the web service, you can read this blog to deploy a simple custom program that executes this function and can be planned in the background.
Background notes and blogs
More information and details can be found in these 2 SAP wiki’s: wiki1 and wiki2.
Larger productive systems have multiple application servers to spread the workload. But if the system is not configured properly one application server can be overloaded while others are almost idle. This blog will explain the load balancing settings.
Questions that will be answered are:
How can I check my current load balancing situation?
How can I load balance SAP GUI users?
How can I load balance SAP to SAP RFC traffic?
How can I load balance external system to SAP RFC traffic?
How can I load balance qRFC traffic?
How can I load balance batch jobs?
How can I load balance web traffic?
How can I load balance workflows?
How can I configure MRP parallel processing settings?
How can I configure load balancing for TMS transport system (STMS)?
How can I validate if load is properly balanced?
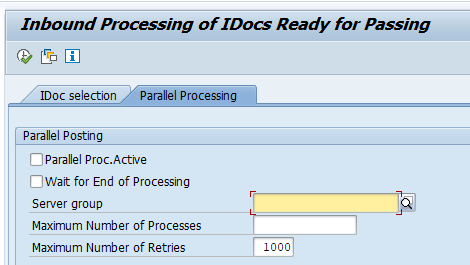
How to make parallel processing settings
Parallel processing settings are explained in this blog.
How to check current situation of load balancing
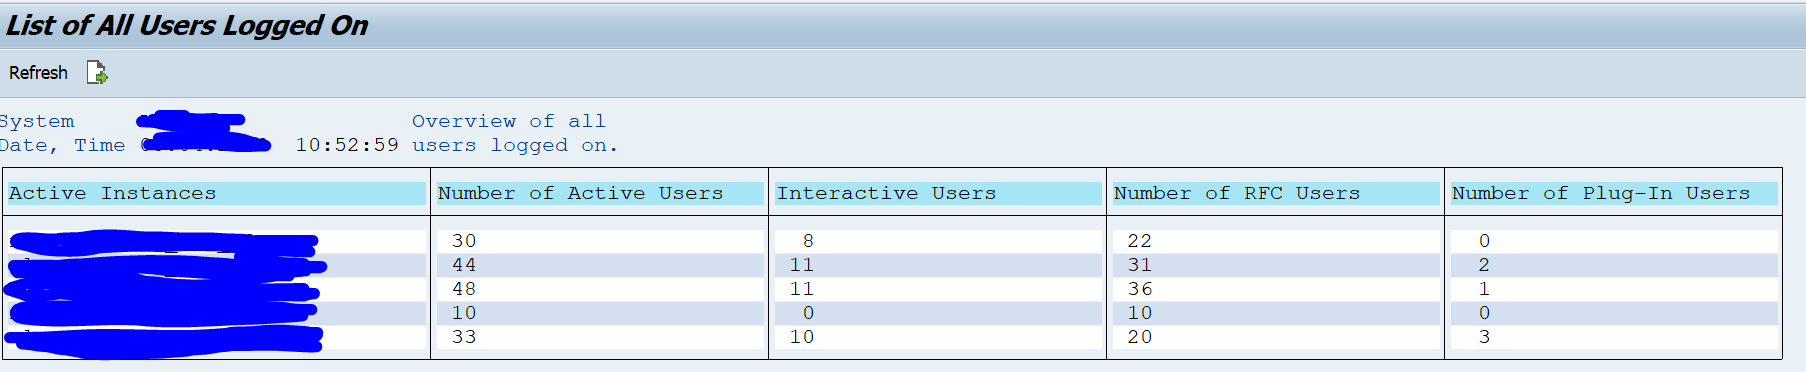
You can start transaction AL08_OLD (in older systems AL08) to get an overview of the distribution of your logged on users and how they are spread over the application servers:
Or use the new load balancing tool: read this blog for the new tool installation and usage.
Load balancing for GUI logon
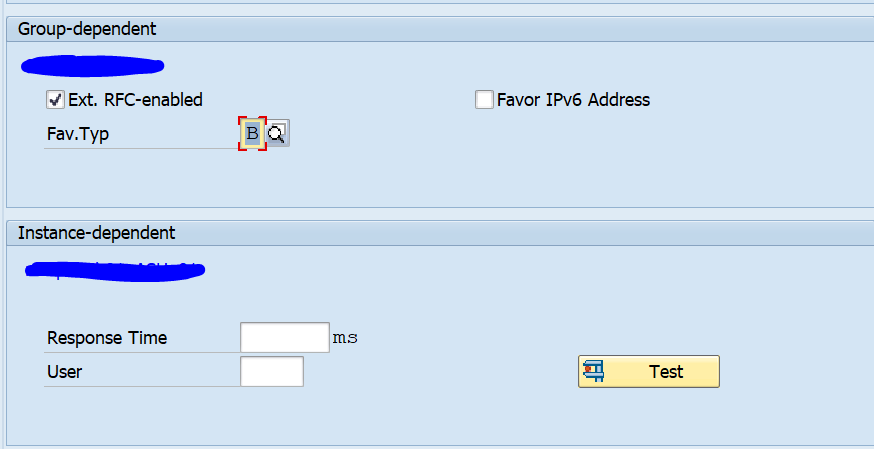
With transaction SMLG you can setup logon groups that can be used for SAP GUI logon and RFC logon. In the details of each logon group you can make dedicated settings:
The Fav.Typ setting indicates the load balancing mechanism (round robing, best performance, weighted round robin). Set Ext RFC-enabled to also do load balancing in this group for external RFC calls.
You can set limits per application server on response time and amount of users. This limit is not a hard limit, but a soft limit to influence the quality calculation. The setting is per application server and it is across the logon groups (you cannot make settings per logon group). The background of these limits is explained in OSS note 118093 – Concepts of defining ‘limits’ in logon load balancing and on the SAP wiki page.
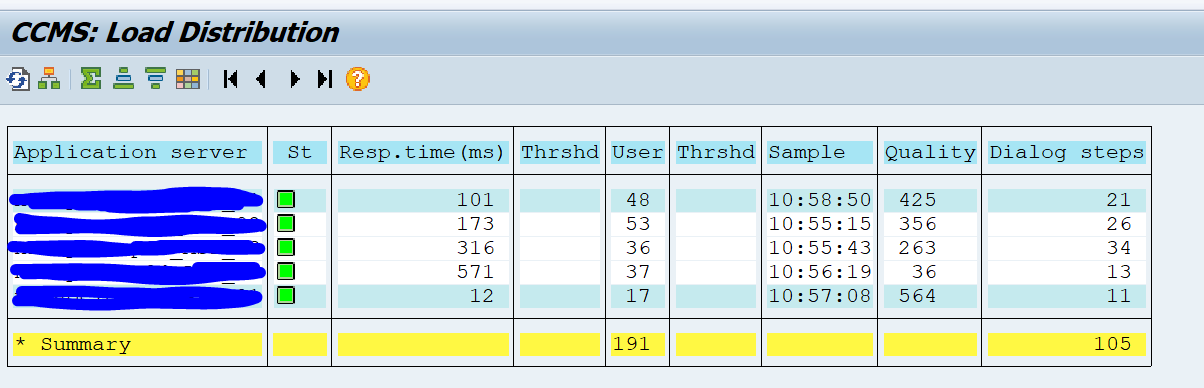
In SMLG you can choose menu option Goto / Load distribution to get an overview of the current load distribution and quality:
A higher quality number means it has the best quality. New users that logon will be routed to this server if you have set the SMLG settings to Best Quality.
RFC traffic load balancing for external system to SAP connections
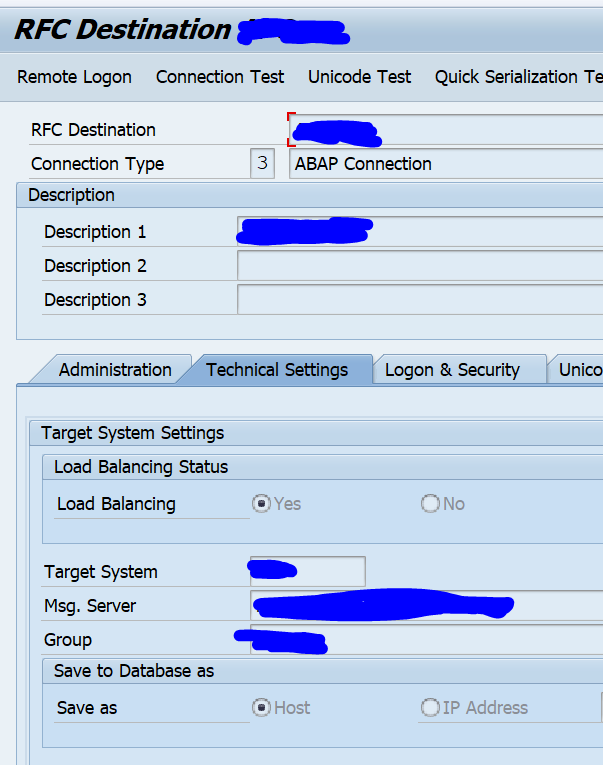
Many external systems connect to SAP via the SAP JCO connector. The JCO connector can do load balancing, if configured properly. The problem here is that the developers form the other application using JCO have no idea on the settings to be made. The other problem is that on a development system the settings are typically pointing to one server only and the basis team did not configure load balancing. Now suddenly in production (or in a quality environment) they have to switch to load balanced settings using different parameters.
The parameters settings to be made are explained in:
Also setup the logon group in development system and assist the external team with the needed settings. The best way is that the external team uses load balancing settings from the start in development as well
Setup extra application server in quality landscape to test load balancing
RFC server group
With transaction RZ12 you can setup RFC server groups that also can be used for load balancing purposes.
RFC load balancing for qRFC
If you use qRFC (this is used for example in the CIF interface to SCM and EWM), then you need to configure the RFC group (settings made in RZ12) in transactions SMQS and SMQR. See blog on qRFC.
Web traffic load balancing
For web traffic load balancing, you have to set up the SAP web dispatcher. In the SAP web dispatcher you can configure to which back-end application servers to use.
Batch job load balancing
Batch job load balancing can be done by setting up batch job server groups in transaction SM61. See this blog.
Server size capacity balancing
The ABAPMETER tool (see blog) can be used to check if all your application servers are processing at the same speed. Some might be having lower CPU capacity or strength. Or having slower network connection.
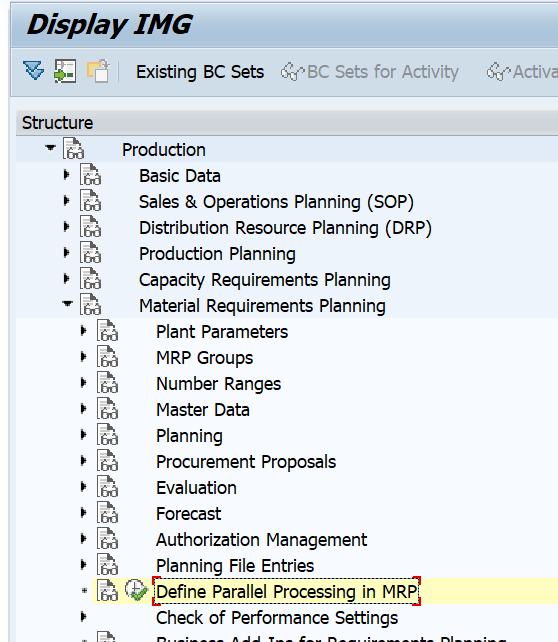
The MRP run (material requirements planning) is a very intensive process from the system perspective and very important from business perspective. It is important that the MRP run finishes in time, but is also should not overflow the system by occupying all work processes and CPU. In this customizing action you can defined the MRP run parallel processing settings:
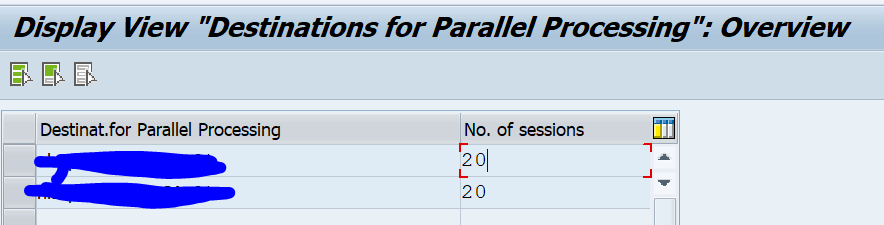
Now you can assign the specific application servers that the MRP run is allowed to use in parallel and the maximum amount of work process it can use:
There is also specific MRP tool now available. Not related to parallel processing, but is can help you in technical optimization of the MRP run. See blog.
Load balancing for GRC access control SOD risk analysis
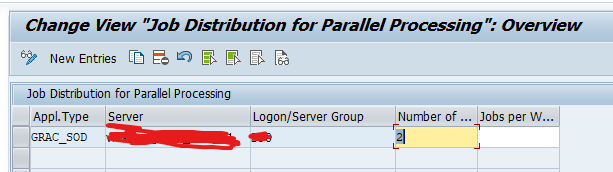
View V_TBANK_PP_DISTR (via tcode S_GF1_13000059) determines the load balancing for GRC access control SOD risk analysis:
Load balancing for SCM-APO-CIF transfer initial loads
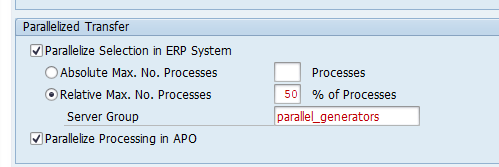
Initial load transactions towards SCM-APO via the CIF interface (CFM2, CFM9, etc) have a section to set parallel processing:
OSS note 943334 – TMS setup in high-availability systems describe the enabling of load balancing via logon group SPACE for TMS via program TMS_MGR_LOADBALANCING. A different logon group is not possible via this program.
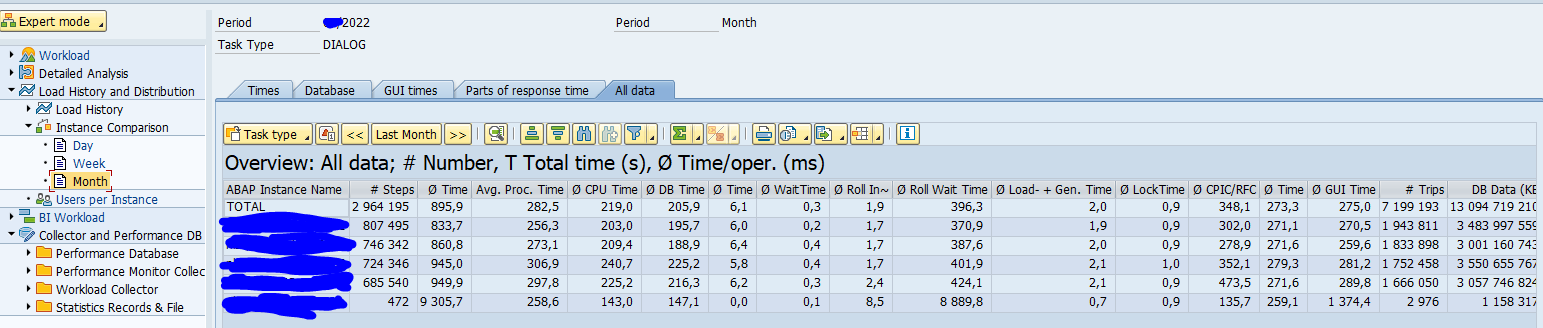
To check if load balancing has done its job, go to transaction ST03, and open the section Load History and Distribution, Instance comparison, then the time frame:
Check that the load is evenly distributed among the application servers. The central instance will off course have a different load profile.
Troubleshooting OSS notes and blogs
The following OSS notes can be useful for troubleshooting:
To change the message subject of a mail, create a new message in SE91. Example is class Z_CUSTOM message 010 with text: “Gentle reminder of workflow”. Now put in field message class for subject field the name of your class (Z_CUSTOM) and the message number in message number for Subject:
Changing the body of the message of the reminder mail
Goto transaction SE61 and select text type Text in Dialog. First the default text SWU_NOTIF_INBOX:
Now use the copy button to copy the text to a Z text. For example Z_SWU_NOTIF_INBOX. Change the text as per you requirement and activate the text.
Now you can use this new text in the workflow reminder mail program:
SAP workflow inbox
Using transaction SOY5 or via program RSSOINBO you can get an overview of the amount of workflow items per user:
Via program RSSOINBD you can delete the inbox of a user:
In the second screen select all the items you want to terminate and use menu option Edit / Work Item / Logically Delete. The workitem will now to status CANCELLED. Then they can be archived (see blog).
Workflow development objects can give some issues in transports, since not all objects are immediately put into a transport upon development.
If you have set a workflow task to general and want to transport it, use program RHMOVE30 to put it into a transport. For more background read this SAP blog.
Substitution and forwarding
Using transaction SBCS_EXTCOM you can setup forwarding for a user ID towards different user ID as admin. This might be needed in case of illness of a user:
In the third tab of this transaction you can see if a user has setup a substitution himself.
With transaction SWEQADM you can manage the workflow event queue. Transaction SWEQBROWSER can be used to view the content of the queue. Program RSWEQDELETE can be used to clean up the workflow event queue.
With data archiving you reduce the database size of SAP and increase the performance by reducing the amount of records in the SAP tables. The data archiving process write files with the archived data. These files must still be stored securely, since on file level any admin can delete the files and you might loose valuable business data.
This blog explains the setup of storage of data archiving files by using SAP content server as storage medium.
Questions that will be answered are:
How do I setup the link from SAP netweaver ABAP stack to the SAP content server?
Which settings do I need to make in the archiving objects to store the archiving file to SAP content server?
How do I store the files in the SARA transaction?
General tips and tricks for SAP content server can be found in this blog.
Setup of SAP content server 7.5 information can be found in this blog.
How to setup archiving technically can be found in this blog.
Linking the SAP Netweaver ABAP stack to SAP content server
First we need to maintain a special protocol in customizing using this path:
Create a new protocol:
This protocol can now be assigned to the SAP content server you want to use for storing the data archiving files. Go to transaction OAC0 to link the protocol to your content server:
If the field protocol is not visible immediately there, click the button Full administration first.
Data archiving object specific linking
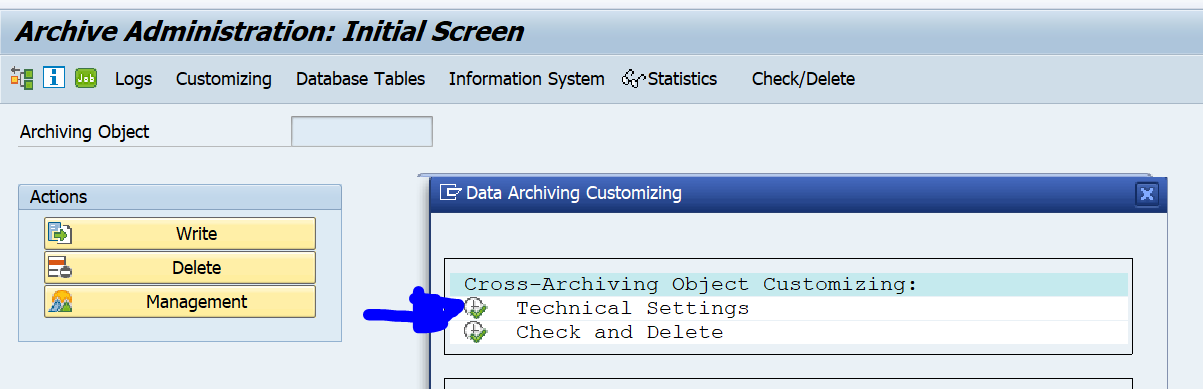
After the steps above to make the general connection to content server available, the content server needs to be explicitly mentioned in each data archiving object. For any data archiving object (start transaction SARA first and select the object), click on the customizing button:
In the popup screen now select Technical Settings in Archiving Object-Specific Customizing:
At the bottom fill out the content server repository and decide if you want to start automatically or immediately:
Remark 1: the F4 search help does not work here! Key in the value directly and check using the check button. Then save the data.
Remark 2: always tick the option Delete Program Reads from Storage System. This forces that the archive file is securely stored first, before the deletion run is allowed to start.
Use of archive routing
If you have a lot of archiving data and a lot of years of archiving done, it can be needed to set up a second or third content server.
With the use of Archive Routing you can determine in which content server to store which archive files.
On the SARA screen push the customizing button and select Archive Routing:
Now set up a rule:
And the conditions of the rule:
This setting does NOT work for the CHANGEDOCU object. To achieve the same for CHANGEDOCU, you must switch to the licensed SAP ILM product.
Storing archive files in SARA
After the configuration is done the new button Storage system appears on the screen in the SARA transaction for this specific object:
If the button does not appear: check the technical settings above, and remember: this is to be repeated for each object.
Storing files that have been written by the Write phase of the data archiving process can now be stored by pressing the Archive Files button:
Select the file(s) to store:
Now a batch job starts (per file!) to store the archive file into the SAP content server.
After correct storage of the file, the file can be selected in the delete phase.
SAP has released content server 7.5. Content server can be used to store attachments, documents and archiving files outside of the SAP database.
Questions that will be answered in this blog are:
Where can I find more information on SAP content server 7.5?
How to upgrade to SAP content server 7.5?
What is the support on my SAP content server 6.5 installations?
SAP content server 7.5
The main OSS note for SAP content server 7.5 is 2786364 – SAP Content Server and Cache Server 7.5 (and higher). This is a major different technology setup: there is no Apache or Microsoft webserver needed any more. The content repository setup itself does not change.
As mentioned before the technology has changed on how data is put into content server and how it is retrieved, but the data structure itself is the same. Note 2786364 – SAP Content Server and Cache Server 7.5 (and higher) is also describing the migration process. Your database (most of the times MaxDB) remains as is. But you have to install new 7.5 content server. Then you migrate the configuration. You stop the old 6.5 server and start up the new 7.5 server. You test that all works via the content server check programs from this blog (you might need to perform changes in transaction OAC0). SAP recommends after successful migration to clean up the old 6.5 as soon as possible to avoid issues (like an overzealous admin starting it up again…).
Support of SAP content server 6.5
In the main OSS note on SAP content server 6.5 (1983930 – Availability of SAP Content Server 6.50) there is no direct indication of end of support date. SAP content server 6.50 is part of the Netweaver 7.40 stack. The support of this stack ends by 31st of December 2020.
The content server test programs (for example RSCMST) can respond differently with the new content server. SAP is updating these. For more information see the blog on content server tips & tricks.